Augmentation: Relaxation Transportation (ART)
This project is a revision of my AR sculpture project, and it's a lot closer to my original idea. I wanted to make the city bus experience more like a long car trip through the country. I focused on the best seat of the bus: the right side of the very back row. I changed that seat to a leather chair to be more inviting. I added a robin gliding up and down, which can be used as a guide for a breathing exercise.
Unfortunately, I had to demonstrate this project in a lab environment, under strictly controlled circumstances. In the real world, the AR window gets left behind when the bus starts moving. 🙁
This is the ad:
Technicals
The two main tech-techs (technical techniques) that I used were image targets and stencils. For the image target, I just used Connie's examples, which are great. I replaced the "Reference Image" and "Prefab To Generate" in the GenerateImageAnchor object.
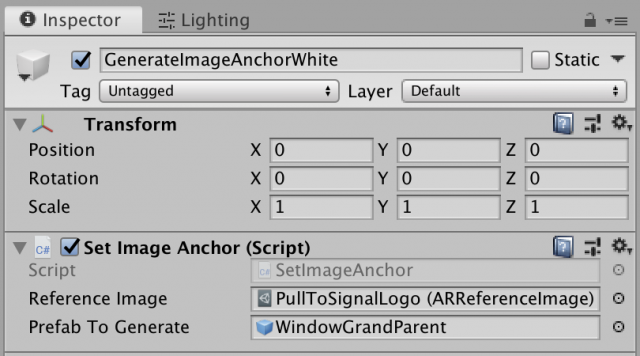
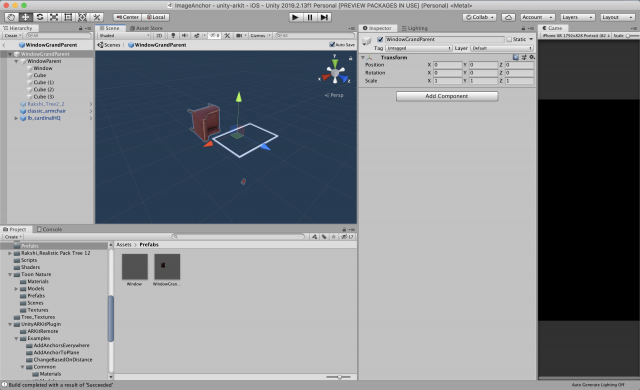
I learned that the Transform of the prefab doesn't matter, because the image anchor script adjusts all of it on its own, so I made a wrapper in the prefab to be able to move & rotate the whole thing relative to the image. I also learned that you can imagine the image's center at 0,0,0 in the prefab world and laying flat, facing up. I went through a lot of builds getting the orientation of the prefab right.
I got the window to work using stencils, which I learned from this wonderful man, PiratesJustAR, in his "How to Unity AR Portal" series: https://www.youtube.com/channel/UCuqVdyk3I8wUtqOAzCoQJIA
I didn't use all of his stuff, because I didn't need to be able to go through the portal. I basically just used two code snippets:
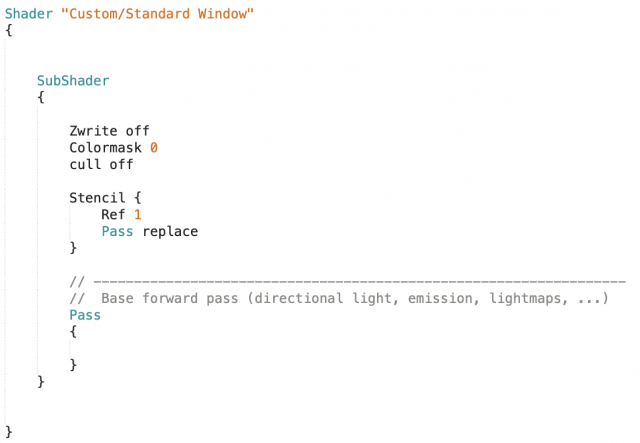
This is the shader that I put on the window itself, which is a quad in the middle of that white frame. I just put the shader on a new material, and then put that material on the window.
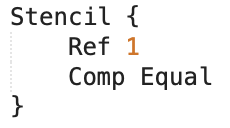
This bit of code goes on every shader that is being used by objects that you want to be outside the window (in my project, that's everything but the chair). Then, you will only be able to see that material through the window, and otherwise it will not be rendered. You have to go through all the materials being used, which is kind of a pain, and then find the shader file that they're using by downloading the standard shaders (https://unity3d.com/get-unity/download/archive) and searching through them for the shader that your object is using (for me, all the shaders on the trees and ground and mountain and bird).

Then, you make a copy of that file, add the Stencil { Ref 1 Comp Equal } inside the Subshader {} brackets.
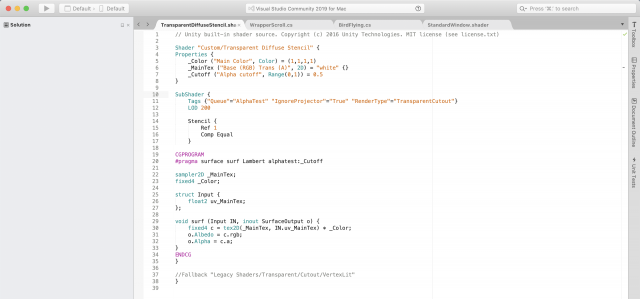
Another thing is that you should rename the shader at the top, which I change to "Custom/[Whatever The Name Of The Shader Is] Stencil".
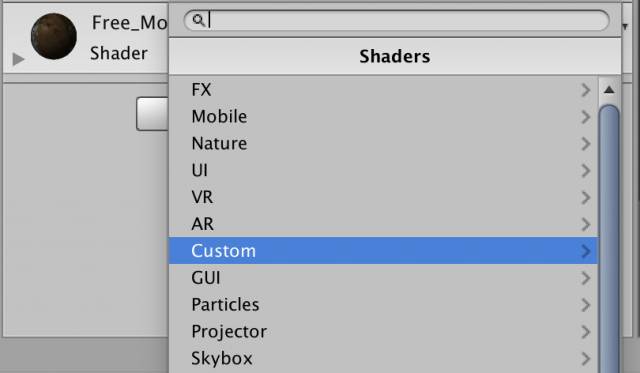
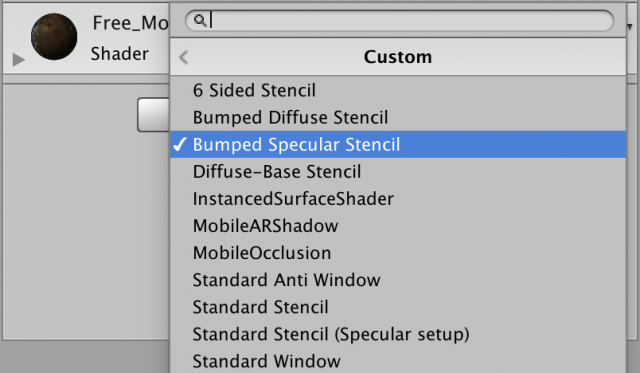
Then add the shader to the materials your project is using. The whole process is kind of a hassle, but it works. The video by PiratesJustAR explains it all really in depth and really well.