Preparation
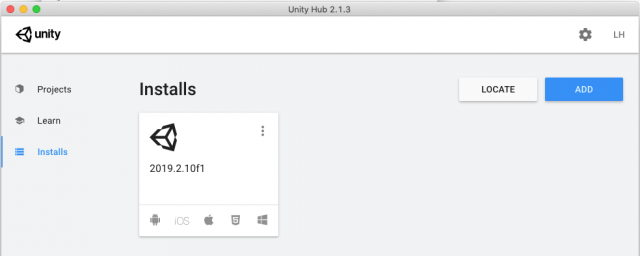
Unity Version:
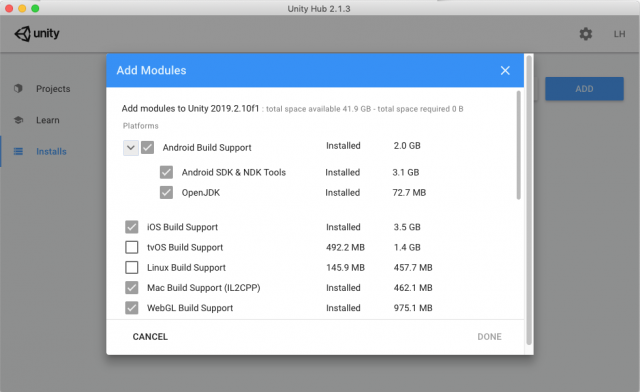
The one I am using is 2019.2.10f1. With a or b version, that might not work smoothly. Pick the latest final version. you can then check if you have the right modules by clicking the 3 dots menu from the version you are using and select Add Modules.
Make sure you have installed the modules for Android Build Support. Expand the tree and get both Android SDK & NDK Tools and OpenJDK as well.
Oculus Account, Oculus App, and Developer Mode
Oculus Account:
In this step, we are creating a new account if you do not have one. And then we are going to get the App ID which we need later for the Quest to work with Unity
- Create an account at Oculus
- Then go to the Developer page
- select Manage on the side menu
- If you see both Create New App and Create New Organization, select Create New App. If you only see Create New Organization, select that and follow the steps, the Create New App will appear once you have created the new organization.

- You can use any App Name you like. For Platform, select Oculus Go & Gear VR
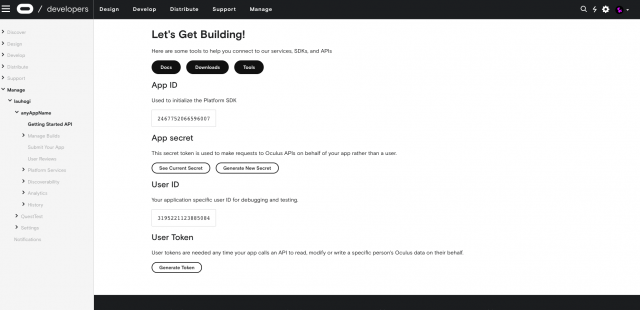
- You should be able to see the following page with the App ID. we will come back for it later when Unity asks us for the App ID.
Oculus App and Developer Mode::
We are going to switch the Quest to developer mode in the Oculus App on your phone
- Get the Oculus app from the app store
- Log into the same Oculus account that you just create the App ID from
- In the Settings tab, select Pair New Headset and follow the steps
- IMPORTANT: connect your Quest to CMU-DEVICE wireless network
- Once the headset is paired, you should be able to see the device listed right under your name in the Settings tab. Select the device -> More Settings -> Developer Mode
===========================================
Create and Configure the project
- Create a new 3D project
- Import Oculus Integration from the asset store
- When it's done, there might be a dialog box to ask you for a plugin update. Press yes/upgrade and you will be asked permission to restart Unity, let it restart.
- At this point, you should see Oculus listed in the top menu bar
![]()
Project settings
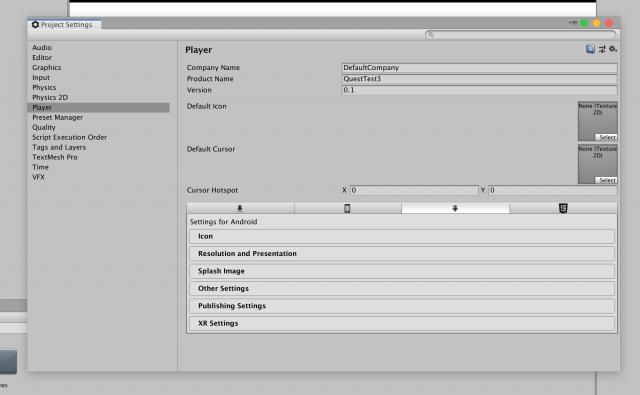
Now we have to configure Unity to build our project for Oculus VR on Android. We have three setting changes here.
- Go to the Edit Menu -> Project Settings -> Player tab
- Select the Android tab in the Player tab
- In XR Settings, add Oculus for the Virtual Reality SDKs list with the "+" button
- In Other Settings, remove Vulkan from the Graphics APIs
- Scroll down in Other Settings, change Minimum API Level to "Android 4.4 KitKat (API Level 19)"
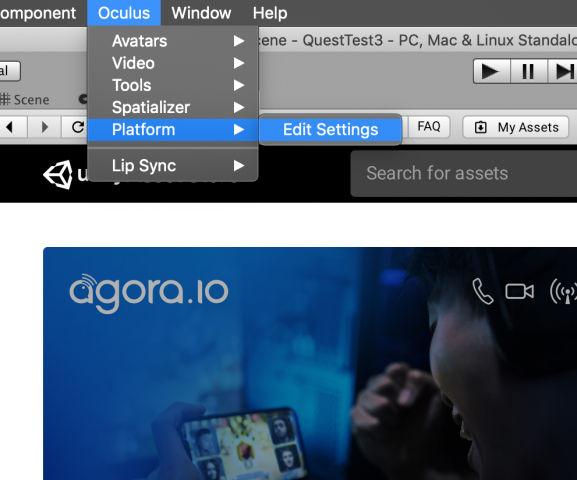
Oculus Platform Settings
Here we need to type in your oculus account info and the App ID from the oculus website
- Find the Edit Settings menu
- you should see two red exclamation marks on the right panel
- Copy App ID from website to both Oculus Rift and Oculus Go/Quest or Gear Vr
- Then log in to your Oculus account in Unity
Build Settings
This is almost the final step.
- Go to File -> Build Settings -> go to the Android tab
- Set Texture Compression to ASTC
- Press Switch Platform, this will take some time
- Connect the Quest to the computer with the USB C cable
- Set Run Device to Oculus Quest, you might have to click the refresh button to see the Quest
If you press Build And Run, you should be able to view the scene in the headset.