Category: 11-Final
szh-Final
For the final project I wanted to revamp my Face Super Mario controller to make it more user-friendly. (Not sure if it's there yet... but hopefully.)
Since my original inspiration was from a Youtuber who creates videos of beating classic Mario games in inane ways, I really wanted to be able to package my code as an actual program and sent it to him.
But before that, I needed to improve the user interface, so that it can be used by someone who isn't just the programmer who knows all the bugs and work arounds.
I gave the option to users to "reset" the initial position:
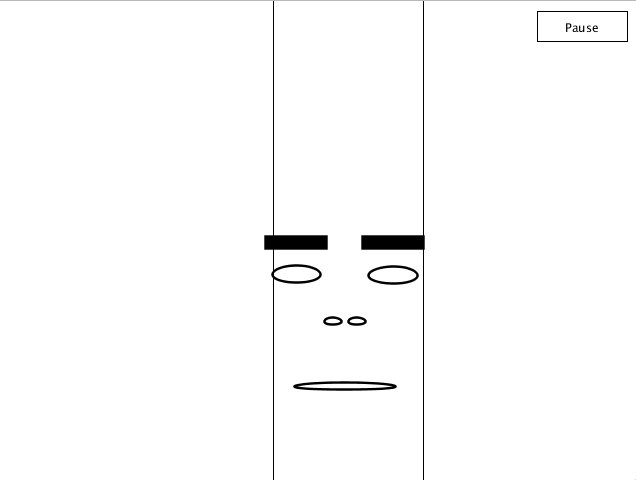
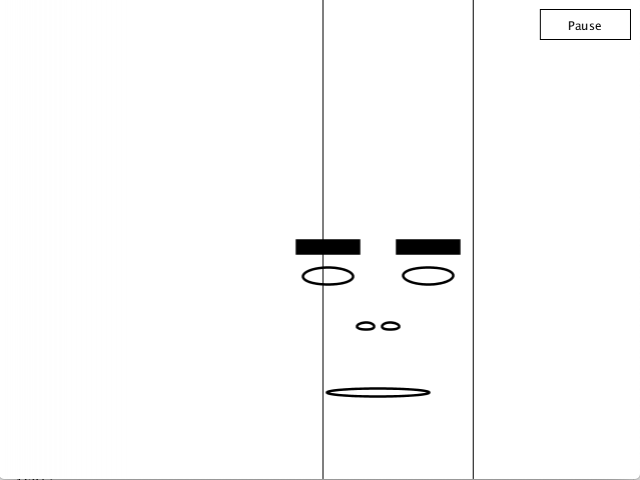
(The center lines indicating where the face moved.)
This allows for further recalibration in case the model didn't start of correctly, or if you want to reposition yourself. This also gives a "hard reset" to all the control incase anything is acting finicky.
I also added in options so you can choose how to move your controls! 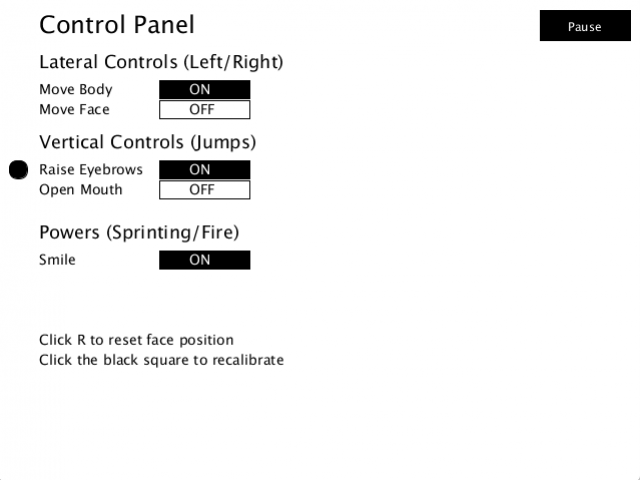
There is now moving the body back and forth, moving the face side to side, raising the eyebrows, and opening the mouth. And smiling to sprint and or use your power up!
In addition, the user can click on the black circle on the left to recalibrate the settings (so if the maximum and minimum for something is too far off, it can be adjusted to each user's own needs).
(It was kind of difficult to manually make and place all these buttons? Processing maybe isn't the best place to do all the UI!)
In the future, I want to implement a feature where the user can manually input what they want each action to map to what keys (unlike turning something on or off) so there's even more freedom.
sansal-final
Collaborated with vingu.
Check out post here:
/vingu/12/04/final/
final
Collaboration with Sanjay.
This is a revision of our AR project. The AR package that we used (Fritz AI) was unreliable with pose estimation, so we scrapped AR. Within the timescope that we had to revise it, we change to web brower instead (not enough time to try webAR).
We got Mixamo to work with the 3D model by fixing/reducing the geometry/mesh. The 3D model does a punching animation. We rendered the animation to images, then played the images onto p5js like a sprite.
The 3D model appears when the person strikes a pose. In addition, the piano soundtrack plays. These are references to the show: "Jojo's Bizzare Adventure"  (pose that was referenced)
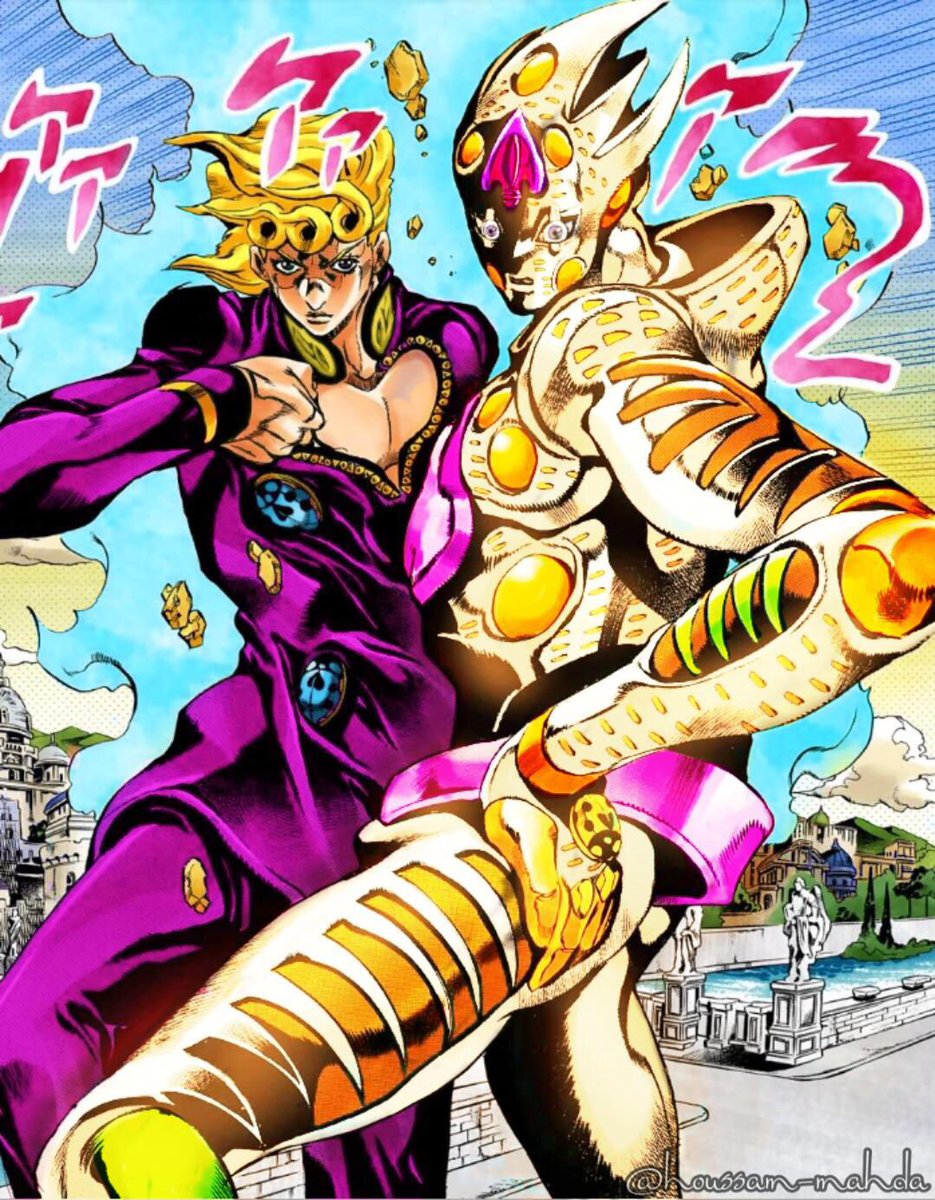 (pose and the stand referenced)
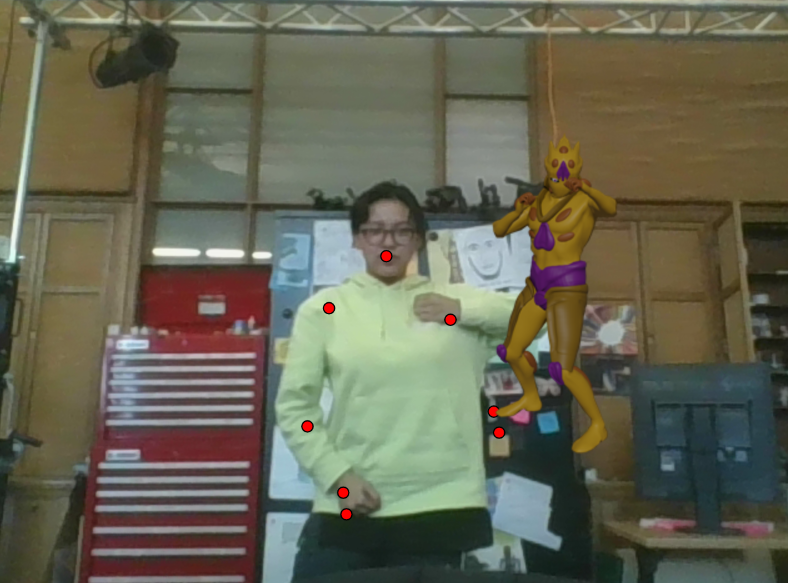 (3D model image appears and starts punching when person poses)
 (punching animation done in mixamo)
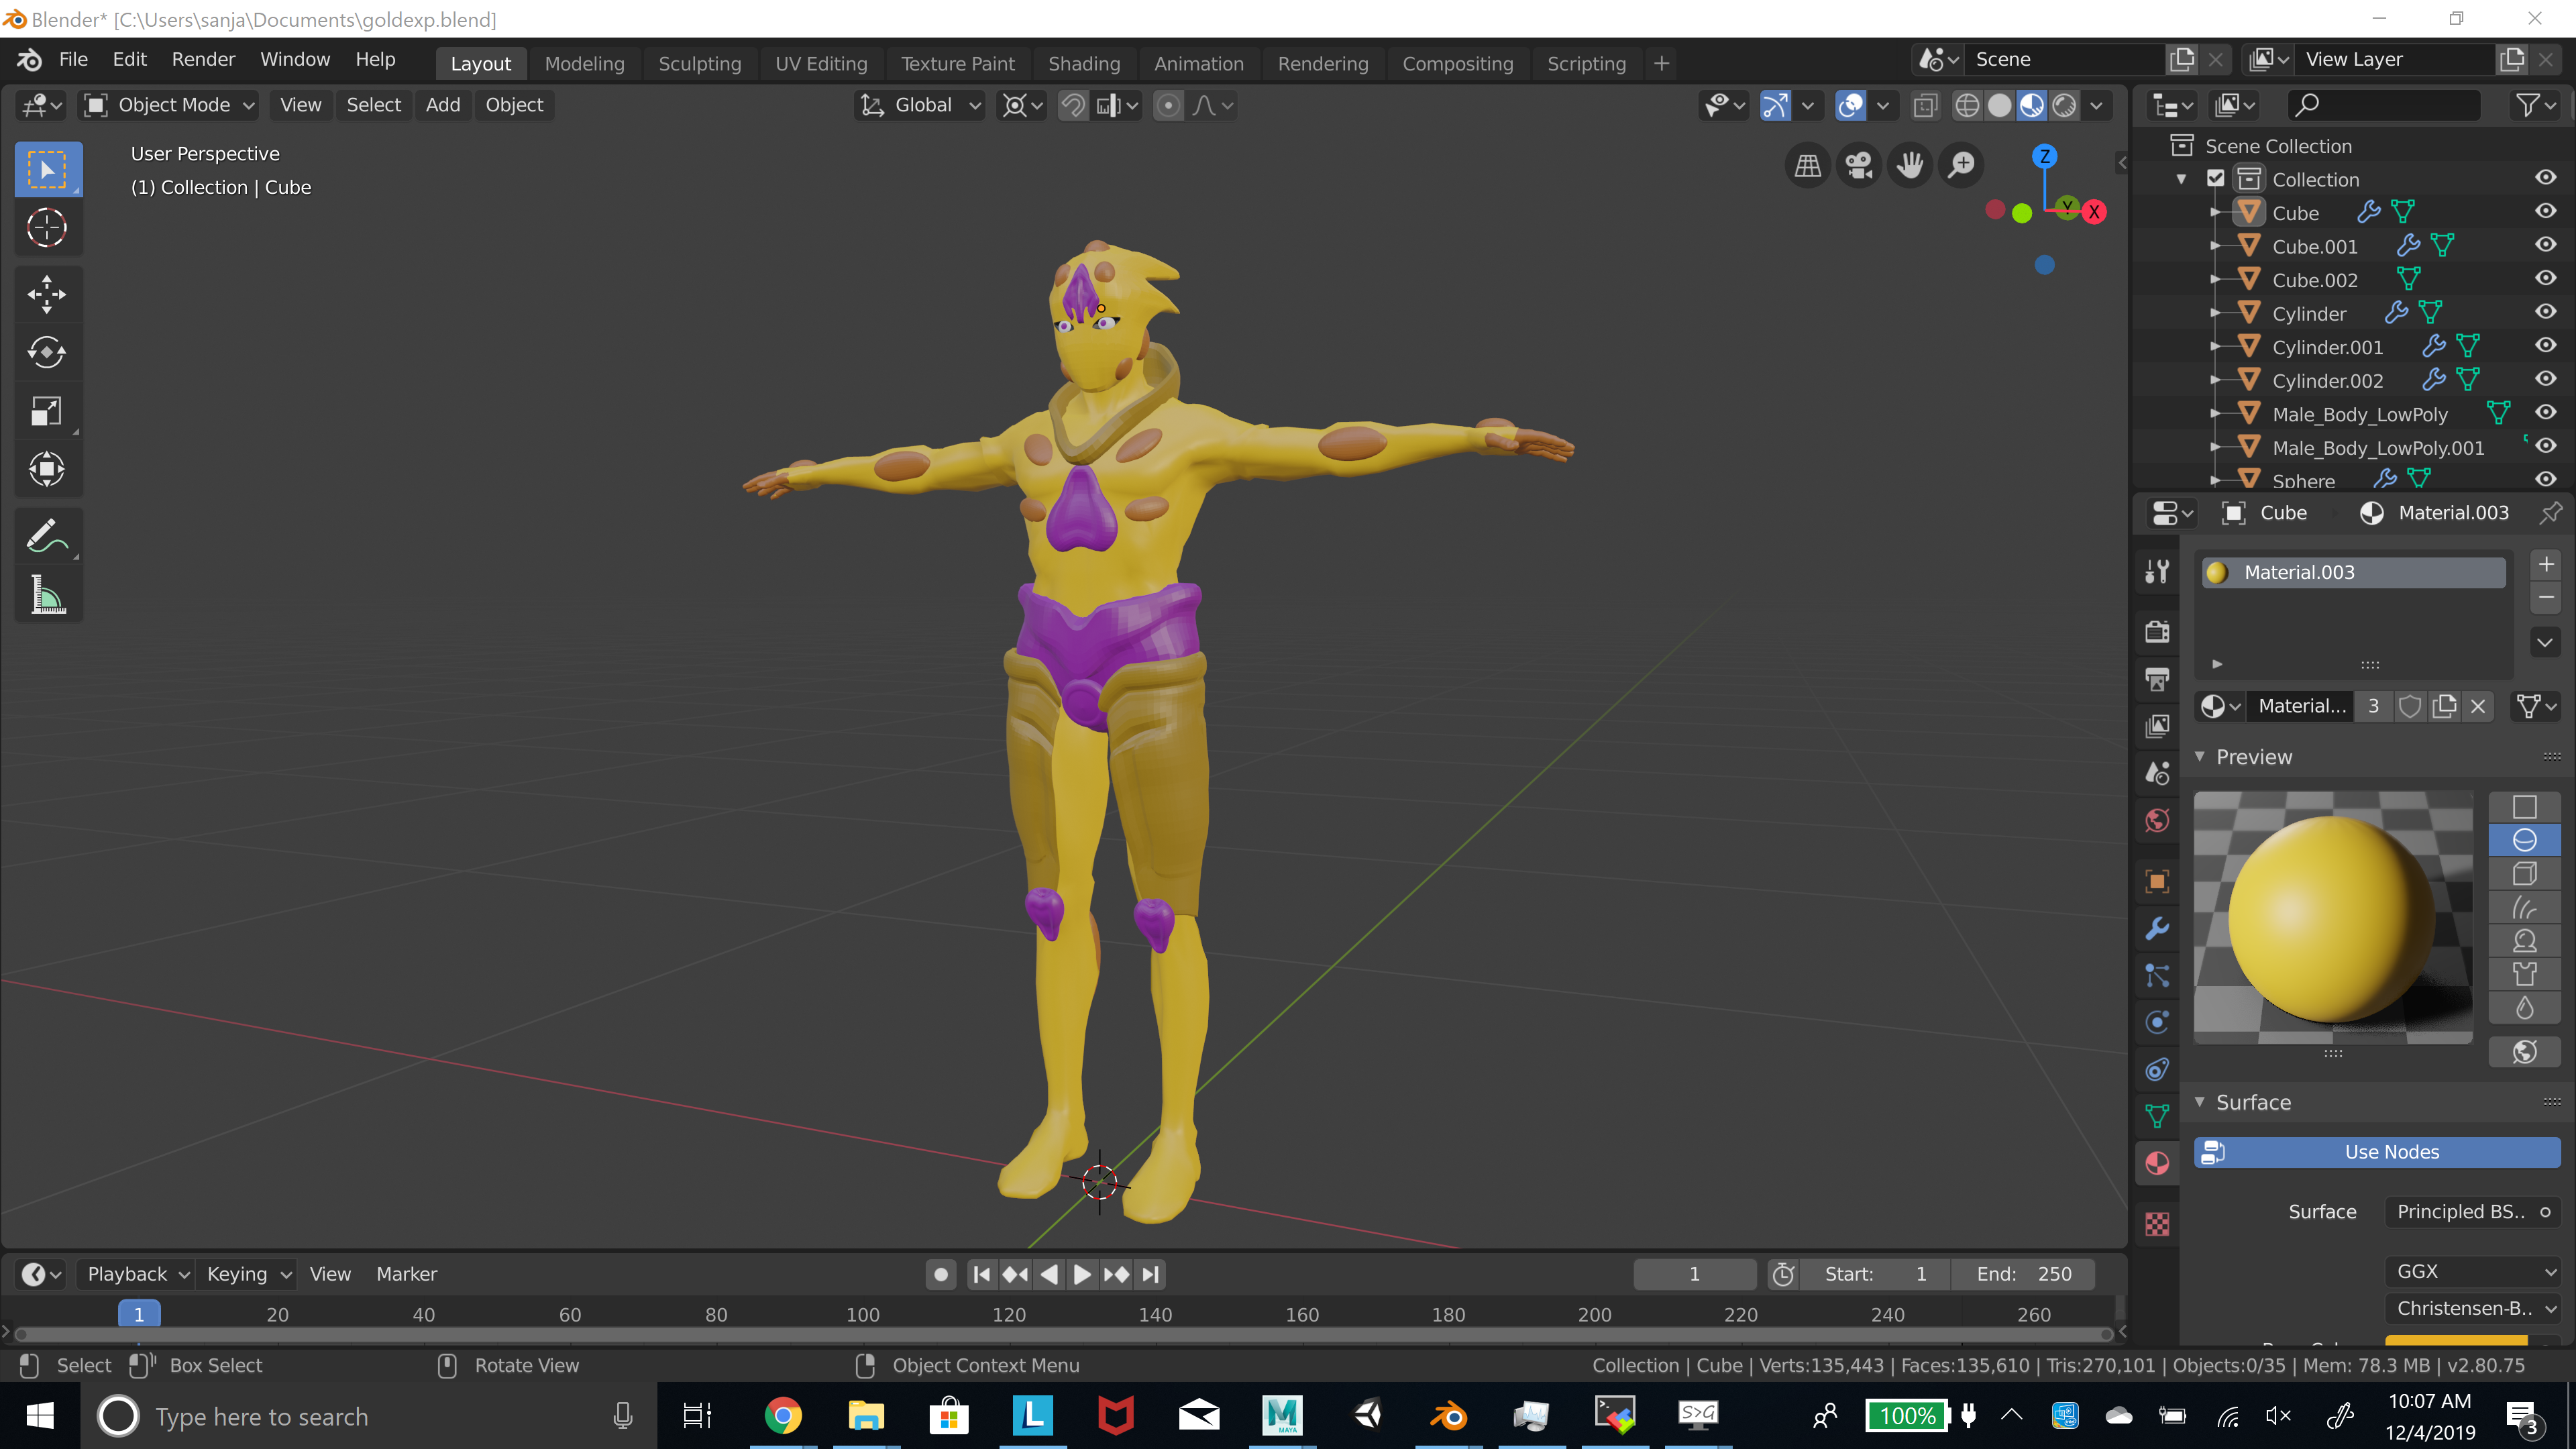 (3D model done in blender)
vikz/meh-Final
Updated Duck AR
gray-final
Augmentation: Relaxation Transportation (ART)
This project is a revision of my AR sculpture project, and it's a lot closer to my original idea. I wanted to make the city bus experience more like a long car trip through the country. I focused on the best seat of the bus: the right side of the very back row. I changed that seat to a leather chair to be more inviting. I added a robin gliding up and down, which can be used as a guide for a breathing exercise.
Unfortunately, I had to demonstrate this project in a lab environment, under strictly controlled circumstances. In the real world, the AR window gets left behind when the bus starts moving. 🙁
This is the ad:
Technicals
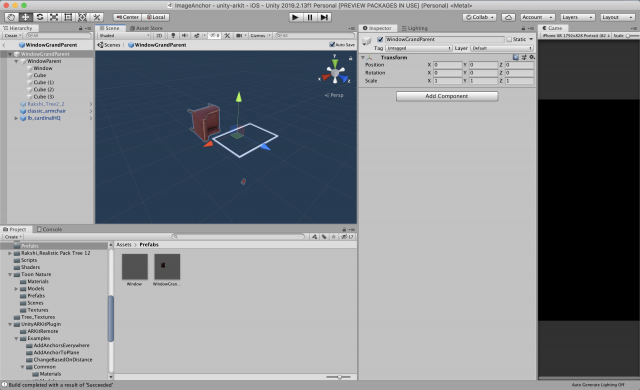
The two main tech-techs (technical techniques) that I used were image targets and stencils. For the image target, I just used Connie's examples, which are great. I replaced the "Reference Image" and "Prefab To Generate" in the GenerateImageAnchor object.
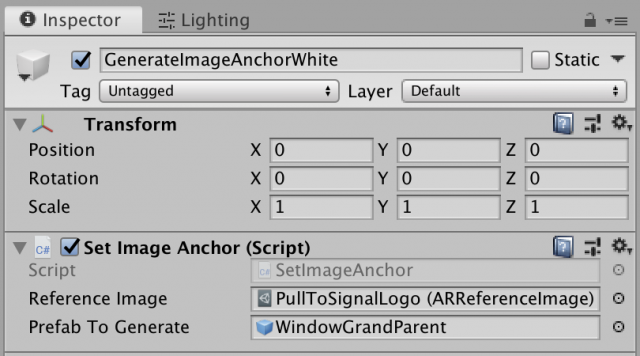
I learned that the Transform of the prefab doesn't matter, because the image anchor script adjusts all of it on its own, so I made a wrapper in the prefab to be able to move & rotate the whole thing relative to the image. I also learned that you can imagine the image's center at 0,0,0 in the prefab world and laying flat, facing up. I went through a lot of builds getting the orientation of the prefab right.
I got the window to work using stencils, which I learned from this wonderful man, PiratesJustAR, in his "How to Unity AR Portal" series: https://www.youtube.com/channel/UCuqVdyk3I8wUtqOAzCoQJIA
I didn't use all of his stuff, because I didn't need to be able to go through the portal. I basically just used two code snippets:
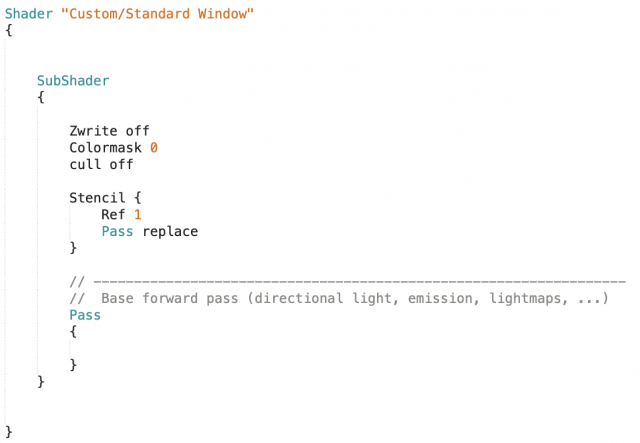
This is the shader that I put on the window itself, which is a quad in the middle of that white frame. I just put the shader on a new material, and then put that material on the window.
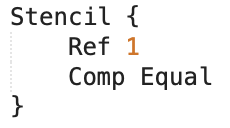
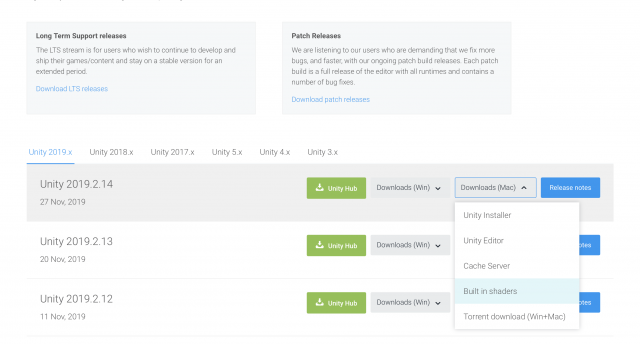
This bit of code goes on every shader that is being used by objects that you want to be outside the window (in my project, that's everything but the chair). Then, you will only be able to see that material through the window, and otherwise it will not be rendered. You have to go through all the materials being used, which is kind of a pain, and then find the shader file that they're using by downloading the standard shaders (https://unity3d.com/get-unity/download/archive) and searching through them for the shader that your object is using (for me, all the shaders on the trees and ground and mountain and bird).
Then, you make a copy of that file, add the Stencil { Ref 1 Comp Equal } inside the Subshader {} brackets.
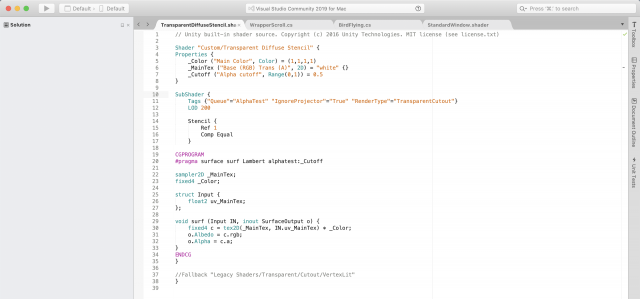
Another thing is that you should rename the shader at the top, which I change to "Custom/[Whatever The Name Of The Shader Is] Stencil".
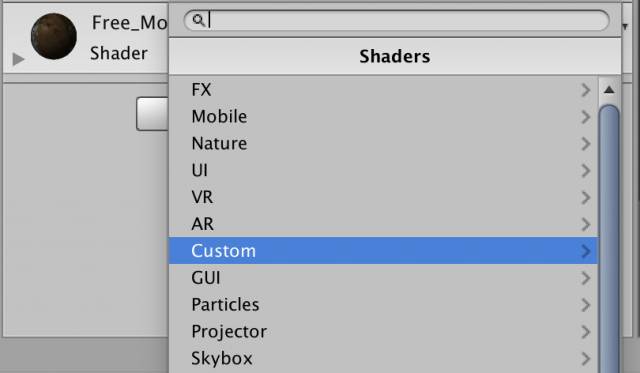
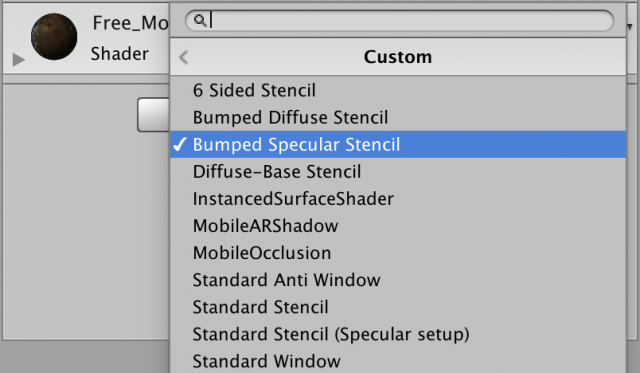
Then add the shader to the materials your project is using. The whole process is kind of a hassle, but it works. The video by PiratesJustAR explains it all really in depth and really well.
MoMar-Final
Looking Glass Puzzle Game
This is my Looking Glass project and the first game that I made in Unity by myself. This project was an excuse to work on the Looking Glass and get to know Unity better.
I am proud to say that this accomplished that.
Puzzle Game:
You control a moving cylinder.
You are supposed to move your head around to find niches in the environment.
The niches contain trigger which unblocks areas that are blocked by striped cubes.
If I had more time I would have made a couple more levels and puzzle types (multiple niche puzzles).
You move left and right using the arrow keys. You move back using the square, and move forward using the circle.
ilovit-arsculpture
The Concept is to add Groucho glasses to the portraits in the Carnegie Museum of Art.
Portraits, especially older portraits of rich people, tend to be very posh and stuffy. Groucho glasses instantly turn them silly, especially if they raise their eyebrows at you.
I didn't get the AR working in time. I made some nice Groucho Glasses though:
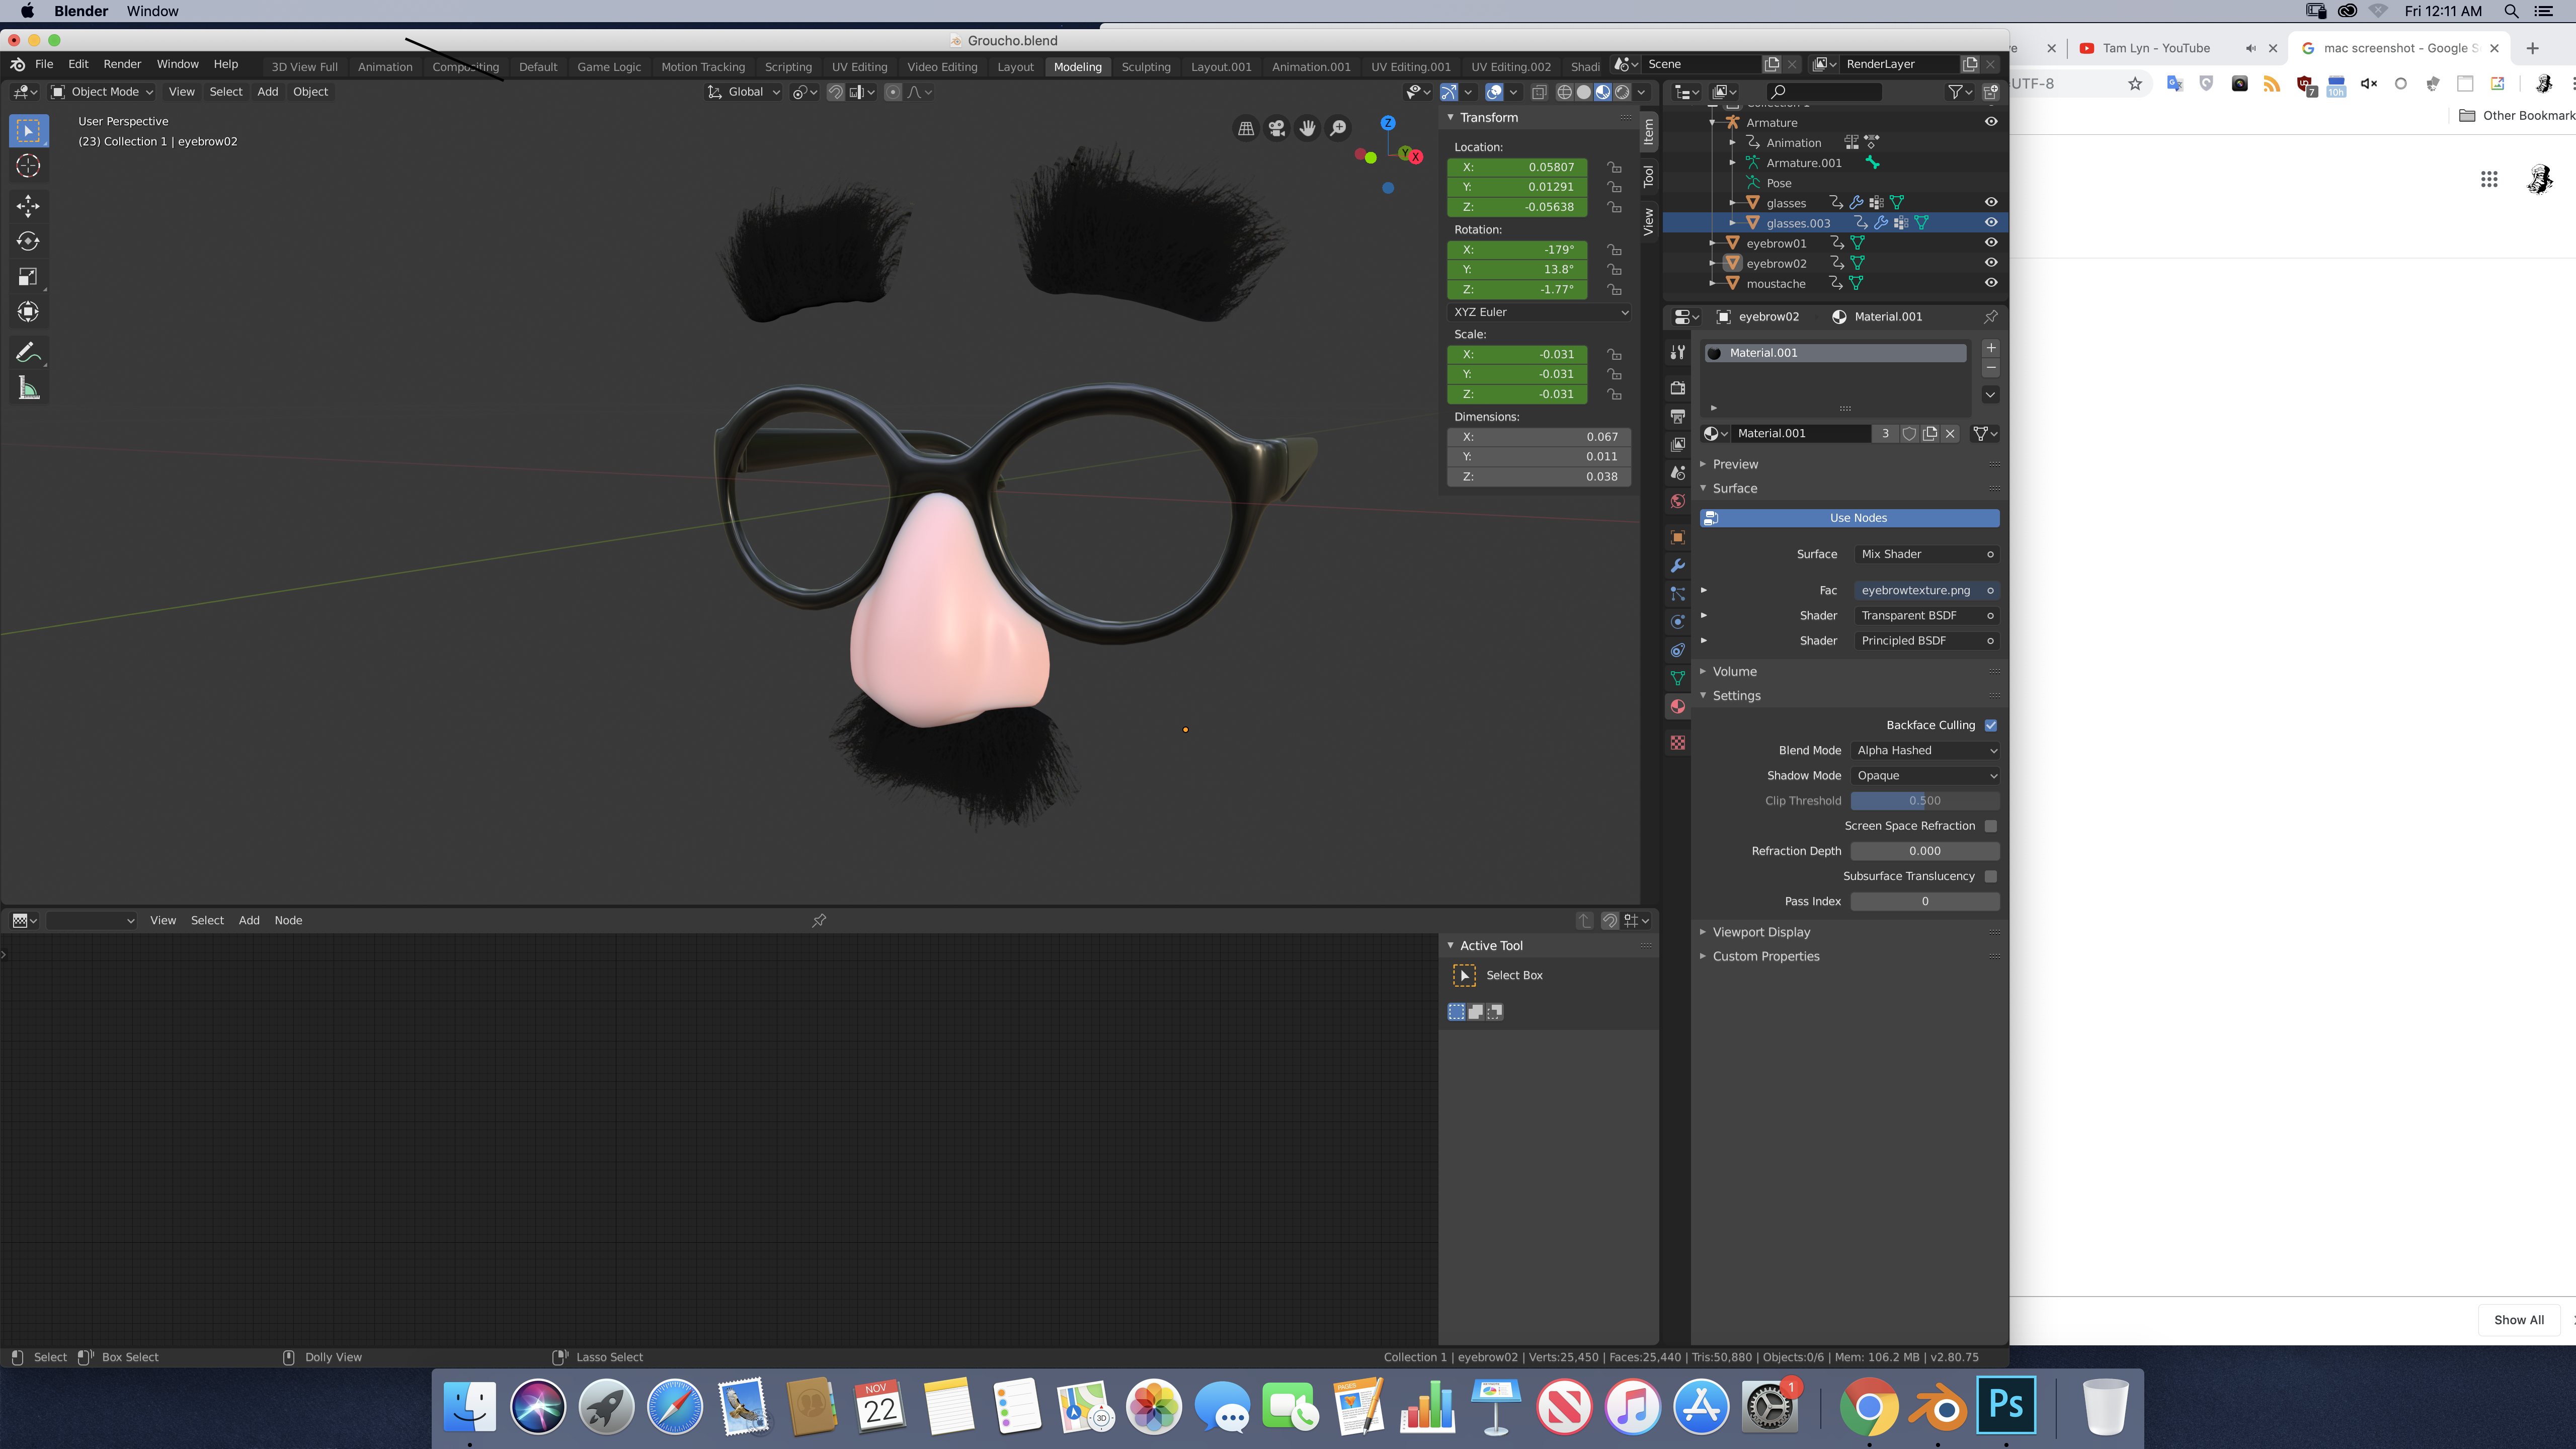
Edit: AR kinda working. Enough to make the following documentation:
It still doesn't totally work.
The Augmented Faces only works with the front facing camera - the video is achieved with camera trickery. I futzed for a long time with image targets, but I couldn't get the glasses to line up with the portraits consistently. I then found that the easiest way to get results was to detect faces in the portraits, but that can only be used with the selfie camera: not a good state of things for an AR that you want to point at things other than yourself.