Deliverables 05 (D. 10/14)
Deliverables 05 are due Friday, October 14 at the beginning of class.
There are four parts:
- Looking Outwards 05: Weird Reality
- Check out each others’ Plot projects
- Reading: Faces and Software
- A Face-Controlled Software
1. Looking Outwards 05: Weird Reality
For this Looking Outwards, you’re asked to write about a project created by one of the 60+ speakers at the Weird Reality symposium, which features many emerging and established artists who work in augmented and virtual reality. Feel free to ask for recommendations.
The exception is that you may not write about anyone who currently works or studies at CMU (e.g. Golan, Angela, Ali, Larry, Claire, Alicia, Charlotte, etc.).
- Please title your post as nickname-lookingoutwards05
- Please categorize your post with LookingOutwards05
2. Check out each others’ Plot projects
Really: it’s worth it. You did an amazing job with your Plot projects, and the documentation you all made is, overall, at a very high level. Before our next meeting, I ask that you examine all of the Plot projects and their documentation, which you can find at this link. This will take about 15-20 minutes.
No written response or blog post is requested, but it would be great if you could identify (in your own mind, and/or in your notebook) one or two projects that you found particularly noteworthy.
3. Readings
Please read the following two fun, lightweight articles about faces and software. No written response or blog post is requested.
- Face as Interface (2012) by Kyle McDonald
- Machine Pareidolia (2012) by Greg Borenstein
4. A Face-Controlled Software
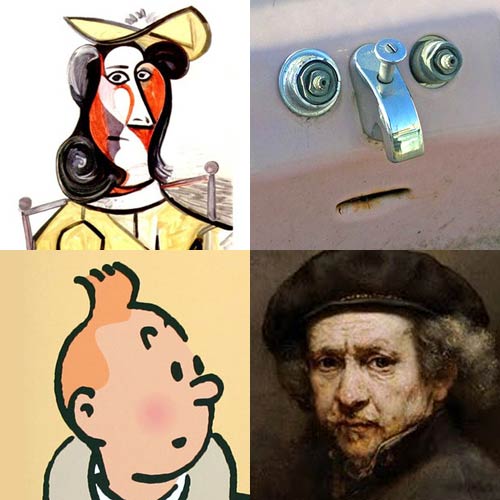
Humans are equipped with an exquisite sensitivity to faces. We easily recognize faces, and can detect very subtle shifts in facial expressions, often being able to discern the slightest change in mood and sincerity in ways that (for now) remain impossible for computers. From faces we also are readily able to identify family resemblances, or “strangers” in crowds, and we are transfixed by the ways in which the lines on a face can reveal a person’s life history.
The face is the most intimate, yet most public, of all our features. A significant portion of our brain is dedicated to processing and interpreting the faces of those around us. The face is one of the few visual patterns which, it is believed, is innately understood by newborn infants. Kyle McDonald writes:
“One of the most salient objects in our day-to-day life is the human face. Faces are so important that the impairment of our face-processing ability is seen as a disorder, called prosopagnosia, while unconsciously seeing faces where there are none is an almost universal kind of pareidolia.”
In this assignment, you are asked to create an interesting piece of face-controlled software, and you are provided with FaceOSC, a high-quality real-time face tracker, in order to make it. Most likely, I anticipate that you will create an avatar or parametric facial puppet which is controlled by signals from FaceOSC — some kind of animated portrait or character. But you could also make things like: a game that you play with your face; an information visualization of your face gestures; a “face-responsive abstraction”; or some other composition or software that responds to your facial expressions.
Broadly speaking, your challenge is to create an interesting system which responds to real-time input from a high-quality facial analysis tool. The pedagogic purpose (and learning outcome) of this assignment is threefold:
- To increase your fluency in the craft and conceptual application of computation to interactive form, through practice;
- To familiarize you with OSC, the most widely used protocol for inter-process data communications in the media arts;
- To familiarize you with the logistics of installing an extension library in Processing, a basic skill that significantly expands your tool-kit.
If you do elect to make a puppet or avatar:
- Consider whether your puppet face is 2D or 3D.
- 2D graphics are fine. But, just so you know:
- Unlike p5.js, Processing can produce fast, decent-quality 3D graphics. You can find tutorials and other helpful information about this, such as in this tutorial, or here, and in many of Dan Shiffman’s videos. There are also many interesting libraries for Processing that allow you to play with 3D, such as loading 3D models or lofting 3D surfaces.
- Give special consideration to controlling the shape of your puppet’s face parts, such as the curves of its nose, chin, ears, and jowls.
- Consider characteristics like skin color, stubble, hairstyle, blemishes, inter-pupillary distance, facial asymmetry, cephalic index, prognathism, etc.
- Consider adding functionality to your puppet’s face so that it responds to microphone input as well. You can use the new Processing audio library for this.
FaceOSC Assignment Specifications
This is the part where I kvetch at you if you’re missing something. Please read carefully and do all the things. If you’re having a problem, ask for help.
- Sketch first!
- Develop a program that responds to data from the FaceOSC face tracker.
- Template code for Processing has been provided to you. See the technical section below for more information, downloads and links.
- You are permitted to use another programming environment that receives OSC (such as Unity3D, openFrameworks, Max/MSP, etc.) as an alternative to Processing, but classroom support is not provided for those tools.
- FaceOSC provides the ability to track faces in a stored video, instead of a live webcam. You are permitted to develop a piece of software that responds to the faces in a specific video. If you elect to do this, include some explanation about why you selected the video you did, and the ways in which your software is specially tuned to it.
- Create a blog post on this site to present your documentation and discussion of the project. Please title your blog post nickname-faceosc, and categorize your blog post with the WordPress category, FaceOSC.
- Document your software by capturing 30-60 seconds of screen-grabbed video, in which you are controlling/puppeteering your design in real time. You may wish to practice a short monologue or other routine, and record a screen-captured video performance with your avatar.
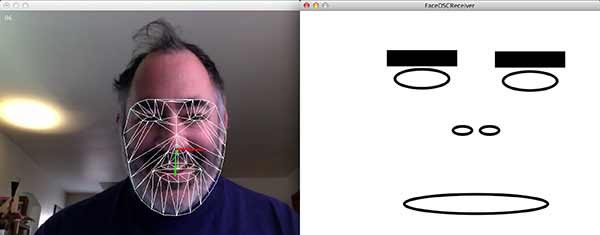
- Make your video documentation effective. It’s important to see how your project actually responds to a face. When documenting your project, one possibility I recommend (if you are comfortable doing so) is to use a “split-screen” format, as shown here. The purpose of this split-screen layout is to help the viewer understand the relationship of the user’s face actions to the software’s behavior:
If you do not prefer to show your own face in the video documentation (perhaps you wish to maintain your anonymity, or other perfectly acceptable reasons), that’s fine. You may ask a friend to perform in the video for you, or you may use a “readymade” video instead of a live webcam. Another acceptable alternative is to omit video of anyone’s face altogether, but instead include the raw points transmitted by FaceOSC as an overlay, in a corner of your screen: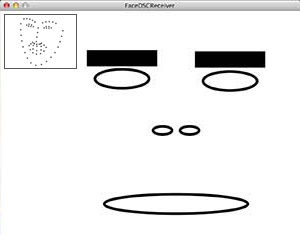
- Upload your documentation video to YouTube or Vimeo, and embed it in your blog post. There are helpful instructions for embedding videos here. Also embed your GIF, too, please.
- Include an animated GIF recording from your video documentation, in addition to the embedded video, as well. This GIF can be brief; just a second or two is fine. (GIFs will persist on this website, whereas I can’t depend on YouTube.)
- Also in your blog post: upload your code by embedding your Processing/Java code using the WP-Syntax Wordpress plugin. There are instructions for using WP-Syntax in the “Embedding syntax-colored code” section of this web page.
- Write a paragraph about your inspirations, goal, and evaluations of your project. In your narrative, mention the specific properties of the face that you used to control your design.
- Include a scan or photo of your sketches, to document your process.
Working with FaceOSC
FaceOSC is a real-time face tracker by Kyle McDonald and Jason Saragih. It tracks 66 landmarks on a person’s face, as well as some additional information, and transmits this data over OSC. Binaries for FaceOSC executables can be found here:
- Mac FaceOSC (v. 1.1) binary
- Windows FaceOSC binary. Please note that this differs slightly from the Mac version, and (as of 10/1/2016) does not include the GUI checkboxes.
- Rebecca Fiebrink maintains a forked version of the Mac OSX FaceOSC and Processing template which is specially modified to work with the Wekinator, her machine-learning toolkit.
Processing templates for receiving OSC messages from FaceOSC:
- Processing template for receiving FaceOSC (see the directory /processing/FaceOSCReceiver in the zip download).
- There’s also some more Processing code below which you might find helpful.
- Important. To receive OSC messages from FaceOSC, you will need to install the oscP5 library into Processing. This can be done with the “Add Library” tool, instructions for which can be found here.
Note: Windows users, you will also need to install the following system components, in order for the FaceOSC application to work properly:
- https://www.microsoft.com/en-us/download/details.aspx?id=48145
- http://filehippo.com/download_klite_codec_pack/67445/ (video codec)
The information below is copied from the README that accompanies the Mac FaceOSC. You can also read about the FaceOSC message specification here.
--------------
Settings

The settings for FaceOSC are are found in the settings.xml file located at:
* Mac OSX: right click on FaceOSC.app, select "Show Package Contents", and navigate to Contents/Resources/data/
* Win & Linux: included in the FaceOSC folder

Further instructions are contained within the settings.xml file.

--------------
Playing Movies

FaceOSC can load a movie instead of using webcam input.
Put the movie file in your home folder and set it in the movie  tag with the full path to the movie aka:

/Users/YourUserAccountName/yourMovie.mov

Change the source  tag to 0 to use the movie as input. Also check the other movie settings (volume, speed).

-------------
Key Controls

* r - reset the face tracker
* m - toggle face mesh drawing
* g - toggle gui's visibility
* p - pause/unpause (only works with movie source)
* up/down - increase/decrease movie playback speed (only works with movie source)

---------------
OSC Information

 * Pose
  * center position: /pose/position
  * scale: /pose/scale
  * orientation (which direction you're facing): /pose/orientation
 * Gestures
  * mouth width: /gesture/mouth/width
  * mouth height: /gesture/mouth/height
  * left eyebrow height: /gesture/eyebrow/left
  * right eyebrow height: /gesture/eyebrow/right
  * left eye openness: /gesture/eye/left
  * right eye openness: /gesture/eye/right
  * jaw openness: /gesture/jaw
  * nostril flate: /gesture/nostrils
 * Raw
  * raw points (66 xy-pairs): /raw
The “pose” data transmitted by FaceOSC represents 3D information about the head’s orientation. Here you can see it being used to control a 3D object.
In case you’re interested, here’s the Processing code for the above face-controlled box:
import oscP5.*;
OscP5 oscP5;

int     found; // global variable, indicates if a face is found
PVector poseOrientation = new PVector(); // stores an (x,y,z)

//----------------------------------
void setup() {
  size(640, 480, OPENGL);
  oscP5 = new OscP5(this, 8338);
  oscP5.plug(this, "found", "/found");
  oscP5.plug(this, "poseOrientation", "/pose/orientation");
}

//----------------------------------
void draw() {
  background (180);
  strokeWeight (3);
  noFill();

  if (found != 0) {
    pushMatrix();
    translate (width/2, height/2, 0);
    rotateY (0 - poseOrientation.y);
    rotateX (0 - poseOrientation.x);
    rotateZ (    poseOrientation.z);
    box (200, 250, 200);
    popMatrix();
  }
}

//----------------------------------
// Event handlers for receiving FaceOSC data
public void found (int i) { found = i; }
public void poseOrientation(float x, float y, float z) {
  poseOrientation.set(x, y, z);
}
Aaaand….
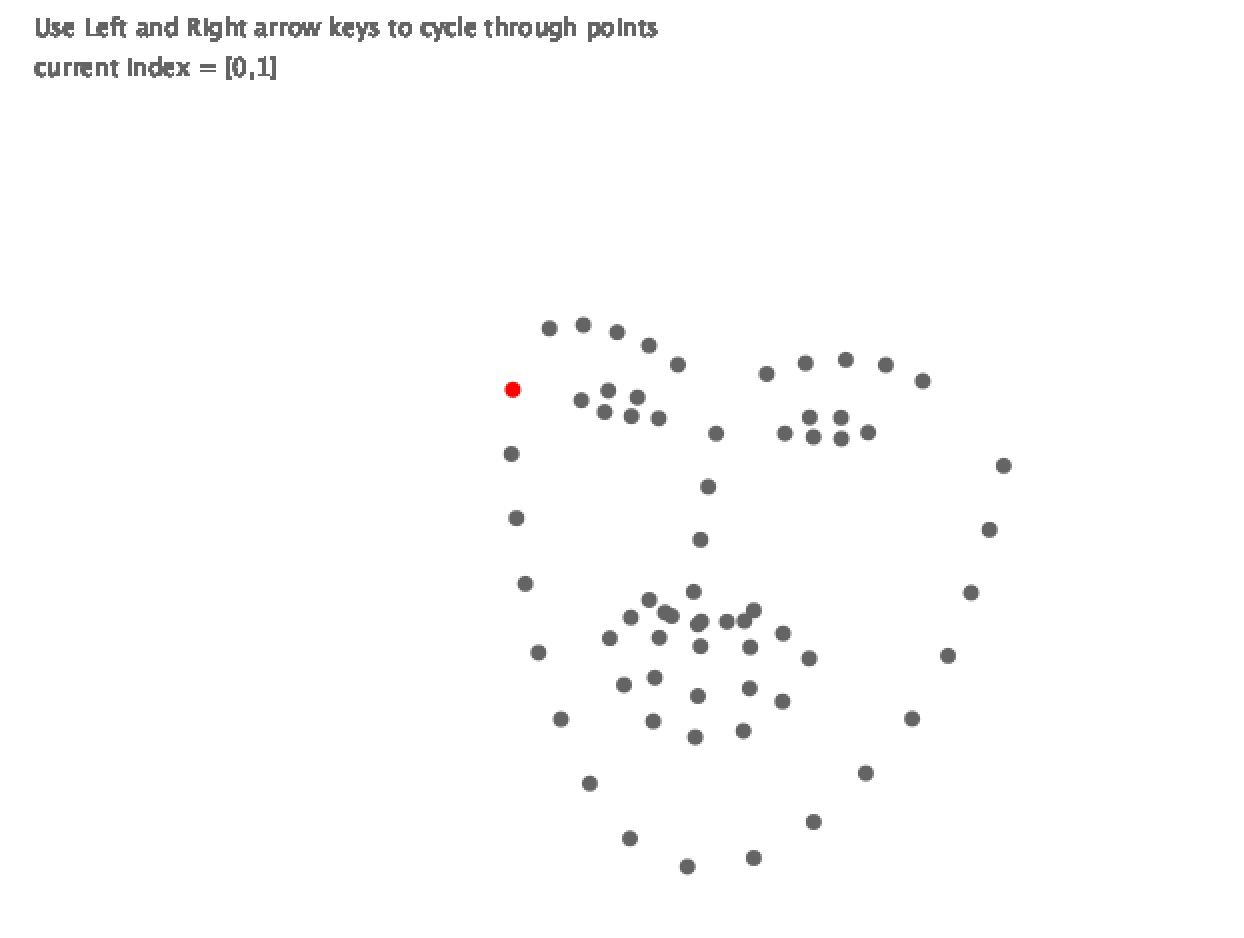
This template code below by Kaleb Crawford shows how you can obtain the raw FaceOSC points:
// Processing 3.0x template for receiving raw points from
// Kyle McDonald's FaceOSC v.1.1
// https://github.com/kylemcdonald/ofxFaceTracker
//
// Adapted by Kaleb Crawford, 2016, after:
// 2012 Dan Wilcox danomatika.com
// for the IACD Spring 2012 class at the CMU School of Art
// adapted from from Greg Borenstein's 2011 example
// https://gist.github.com/1603230

import oscP5.*;
OscP5 oscP5;
int found;
float[] rawArray;
int highlighted; //which point is selected

//--------------------------------------------
void setup() {
  size(640, 480);
  frameRate(30);
  oscP5 = new OscP5(this, 8338);
  oscP5.plug(this, "found", "/found");
  oscP5.plug(this, "rawData", "/raw");
}

//--------------------------------------------
void draw() {
  background(255);
  noStroke();

  if (found != 0) {
    for (int val = 0; val < rawArray.length -1; val+=2) {
      if (val == highlighted) {
        fill(255, 0, 0);
      } else {
        fill(100);
      }

      ellipse(rawArray[val], rawArray[val+1], 8, 8);
      text("Use Left and Right arrow keys to cycle points", 20, 20);
      text( "current index = [" + highlighted + ","
              + int(highlighted + 1) + "]", 20, 40);
    }
  }
}

//--------------------------------------------
public void found(int i) {
  println("found: " + i);
  found = i;
}
public void rawData(float[] raw) {
  rawArray = raw; // stash data in array
}

//--------------------------------------------
void keyPressed() {
  if (keyCode == RIGHT) {
    highlighted = (highlighted + 2) % rawArray.length;
  }
  if (keyCode == LEFT) {
    highlighted = (highlighted - 2) % rawArray.length;
    if (highlighted < 0) {
      highlighted = rawArray.length-1;
    }
  }
}