rigatoni-telematic

Don't Cross Me!
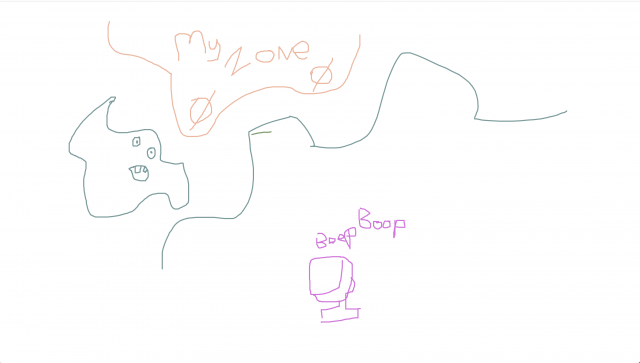
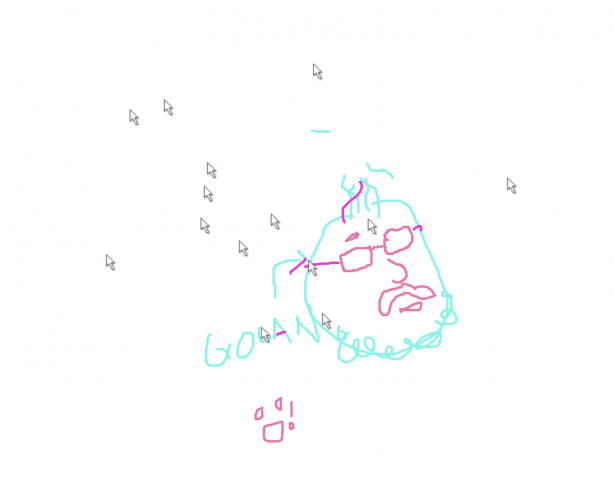
A shared canvas space online where you may draw whatever you'd like, so long as you don't cross anybody else!

See the project here!

Don't Cross Me is intended to be a light-hearted metaphor for our basic expectations for what free speech is: "You may say whatever you want as long as it does not incite harm". Don't Cross Me has no repercussions for hoarding the precious 800x800 canvas space, but if a user draws over another user's line(s) then every participant's lines will be lost forever. This mechanic raises questions about individual expression, unspoken distribution of resources and perhaps gauge whether the resulting behavior of users leans towards unspoken altruism to allow everyone to have a space/voice or towards nihilism and self-centricity.

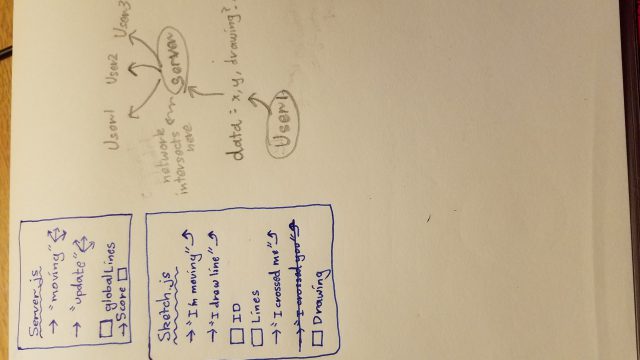
Above: Me trying to figure out sockets and server/client as a relationship

rigatoni – clock

let measure = 10
let size = 150
 
var sWave
var mWave
var hWave
 
var sChunks
var mChunks
 
function setup() {
  createCanvas(720, 720);
  sWave = new p5.Oscillator()
  mWave = new p5.Oscillator()
  hWave = new p5.Oscillator()
 
  sWave.setType("sin")
  sWave.amp(0.2)
  sWave.freq(second()*25)
 
  mWave.setType("triangle")
  mWave.amp(0.3)
  mWave.freq(minute()*20)
 
  hWave.setType("saw")
  hWave.amp(0.5)
  hWave.freq(hour()*5)
 
  sChunks = new SlimeChunks(0, 0)
  mChunks = new SlimeChunks(0, 0)
  hChunks = new SlimeChunks(0, 0)
  sWave.start()
  mWave.start()
  hWave.start()
}
 
function draw() {
  sWave.freq(second()*25)
  mWave.freq(minute()*10)
  hWave.freq(hour()*5)
 
  var s = second()
  var m = minute()
  var h = hour()
  background(0, 30)
  DrawTallyYear()
 
  var sPeriod = measure/second()
  var mPeriod = measure/minute()
  var hPeriod = measure/hour()
  var angle = map(millis()%(1000*measure), 0, 1000, 0, TWO_PI)
 
  var sXPos = map(millis()%(measure*1000), 0, measure*1000, -85, width+85)
  var mXPos = map(millis()%(measure*1000), 0, measure*1000, -85, width+85)
  var hXPos = map(millis()%(measure*1000), 0, measure*1000, -85, width+85)
 
  var sYPos = height/2 + 25*sin(angle/sPeriod)+(2*size)
  var mYPos = height/2 + 25*sin(angle/mPeriod)+0
  var hYPos = height/2 + 25*sin(angle/hPeriod)-(2*size)


  noStroke()
 
  fill(0, 255, 20)
  ellipse(sXPos, sYPos*1.5-390, size, size)
  fill(0, 155, 20)
  ellipse(mXPos, mYPos*1.5-170, size, size)
  fill(0, 135, 20)
  ellipse(hXPos, hYPos*1.5+30, size, size)
  fill(40)
  blendMode(HARD_LIGHT)
  ellipse(width/2, height/2-190, size*0.8, size*0.8)
  ellipse(width/2, height/2, size*0.8, size*0.8)
  ellipse(width/2, height/2+210, size*0.8, size*0.8)
 
	if(sYPos<=(height/2 + -25+(2.01*size)) ) {
		sChunks.AddChunk()
  }
  if(mYPos<=(height/2-24.9) ) {
		mChunks.AddChunk()
  }
 
  sChunks.DrawChunks()
  sChunks.UpdatePos(sXPos, sYPos)
  sChunks.UpdateChunks()
 
  mChunks.DrawChunks()
  mChunks.UpdatePos(mXPos, mYPos+75)
  mChunks.UpdateChunks()
}
 
function DrawTallyYear() {
	var tallies = floor(2018/5)
  var rem = 2018%5
  var cellSize = 100
  push()
  translate(-60, 40)
  for(var i=0; i<width; i+=cellSize) {
		for(var j=0; j<height; j+=cellSize) {
			DrawTallyMark(i, j, 5, 10)
    }
  }
  pop()
}
 
function DrawTallyMark(x, y, c, w) {
	for(var i=0; i<c*w; i+=w) {
    stroke(135)
		line(x+i+map(random(), 0, 1, -2, 2), y+map(random(), 0, 1, -2, 2), 
        x+i+map(random(), 0, 1, -2, 2), y+c*w+map(random(), 0, 1, -2, 2))
  }
  line(x-w+map(random(), 0, 1, -2, 2), y-w+map(random(), 0, 1, -2, 2), 
    	 x+c*w+map(random(), 0, 1, -2, 2), y+c*w+map(random(), 0, 1, -2, 2))
}
 
function SlimeChunks(x, y, amount=1) {
	this.x = x
  this.y = y
  this.amount = amount
  this.chunks = []
 
  this.AddChunk = function() {
		this.chunks.push([this.x+round(random()*25), this.y]) 
  }
 
  this.DrawChunks = function() {
		for(i=0; i<this.chunks.length; i++) {
      fill(0, 140, 0)
			ellipse(this.chunks[i][0], this.chunks[i][1], 10, 10) 
    }
  }
 
  this.UpdatePos = function(x, y) {
		this.x = x
    this.y = y
  }
 
  this.UpdateChunks = function() {
		for(i=0; i<this.chunks.length; i++) {
      this.chunks[i][0] -= noise(this.chunks[i][0])
      this.chunks[i][1] += 3
    }
  }
}

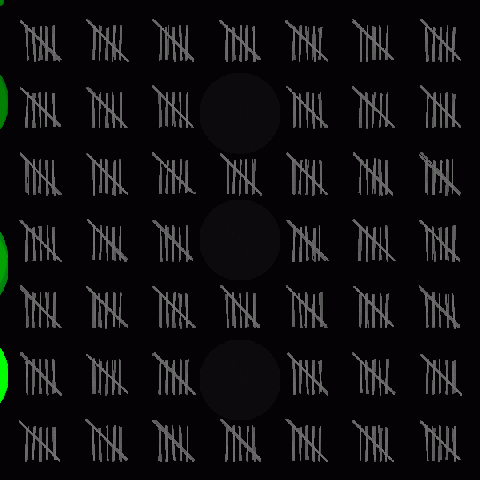
For my interpretation of the Clocks I wanted to create a sonic representation of time. Time is almost exclusively expressed visually, through clocks, sundials, or some other perpetual accumulation of visual data. In the context of sound though, even in a simple interpretation like mine, there's a tension of evolving dissonance and harmony; some points in time are pleasing to experience while others are unsettling and strange. In retrospect, this project would have been stronger had I left the visual component out altogether. In my rush to explore how far I could push different representations of oscillation I undermined my original idea, that being the audio representation of time.

rigatoni-LookingOutwards02

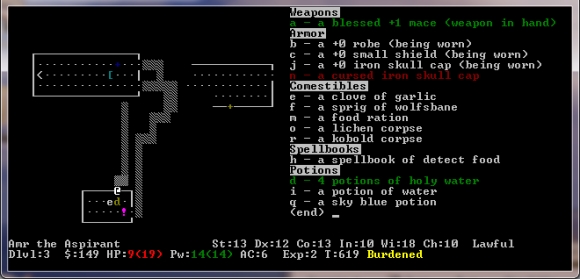
Rogue (1980) is the progenitor of a PCG genre known as "Rogue-like". A player (denoted typically with an '@' character) traverses the floors of a procedurally generated 2D map, navigating obstacles, traps and enemies to get to the bottom. The player has a limited amount of food that may be replenished by looting, but each move in this turn-based tile game costs food; to venture further into the floors is to risk starvation and the brutal perma-death mechanic of this game.

Rogue, and its spin-off Nethack, was my first experience with games that run in the command line. I can only imagine the complexity that co-creators Michael Toy and Glenn Wichman faced as they developed this game for Unix, using a very nascent graphics library known as curses (developed by Ken Arnold. They also were restricted to only using ASCII character to represent their procedurally generated world. Rogue ended up being included in a popular distribution to the internet's predecessor, ARPANET.

"Rogue is the biggest waste of CPU cycles in history." --Denis Ritchie

The map generation algorithm used in Rogue, and consequently many titles in the "rogue-like" genre, follows the following instructions
1) Divide the map into 3x2 cells
2) Choose to/not to draw a room within each cell
3) Use a "drunken walk" to connect the rooms

Prior to Rogue, most adventure games lacked replay value and complexity. Toy and Wichman realized this, and came up with two clever ways to deal with effective complexity, the first of course being the procedural map generation and mob placement algorithm. The other one being "perma-death" was a controversial topic during development. I would argue the "perma-death" mechanic aids the effective complexity of Rogue since the player is unlikely to come across similar levels given the persistent consequences of death.

Here's a video of one of my favorite Youtubers, Scott Manley, playing the original Rogue game.

rigatoni-Reading01

technical novelty in relation to the arts

I'm glad I read Naimark's essay when I did because I have been doing a lot of thinking regarding my position on the spectrum between first and last word art. For the longest time I think I have stayed within my comfort zone of being a "last word artist"; so paranoid about making mistakes and failed projects that I would only attempt projects I knew would be successful. But I see now that failure is an inevitable part of the creative process, so I may as well take risks. Furthermore, I've noticed that when I try something that's along the lines of "first word" art, even my failures end up having some kind of admirable quality. I think this is because when I attempt something strongly grounded in an existing style or technique, when I deviate from the norm (either out of failure or by creative liberty) there is always a comparison that must be drawn between my work and the vast body of work that has already been produced.

Let's say for instance that I am working on a dual stick FPS game. If I choose to not add motion blur, head bob, or fail to align my camera correctly, there's so many examples of games that "got it right" to compare my work against. I'd like to contrast this with one of my only examples of truly original work; a third-person detective game called The Red Scare. This project of mine had many shortcomings and rough edges, but there was something charming about this game, and there was nothing else like it on the virtual marketplace I posted it on to compare with. And thus a project ridden with failures ended up being a success and became the top downloaded project in my humble array of finished products. I want to keep moving towards "first word" art. I realize now that risk is something to be cherished, not avoided.

A concrete example of technical novelty that I want to explore is the ideas of "squishyness", bubbles and soft bodies. I think the technical arts field at large has become highly proficient in rendering hard, non-organic forms via vertex manipulation, texturing and rigging. The same cannot be said for the opposite end of the spectrum. To do this I need to delve underneath the abstracted and high-level APIs that I am used to working with, and reacquaint myself with the building blocks of what makes these tools possible.

rigatoni-Scope

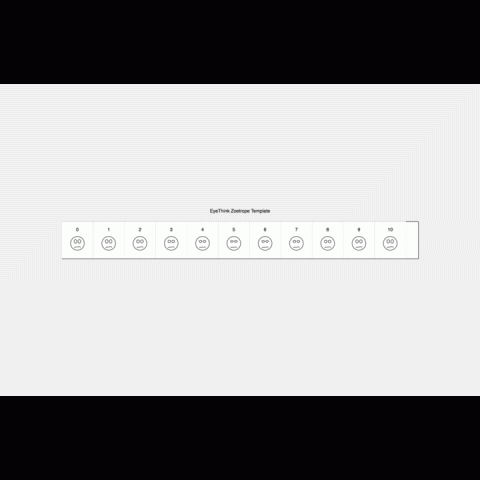
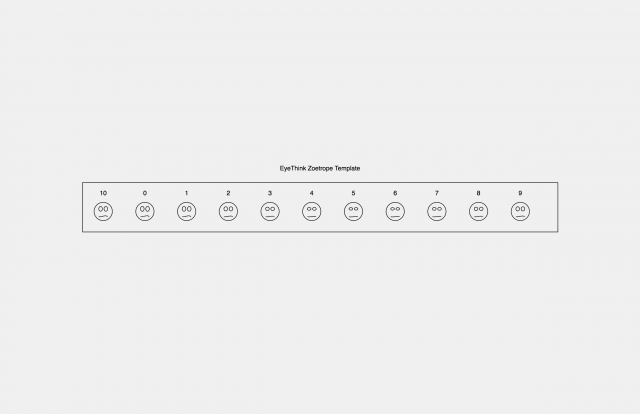
At first I was pretty daunted by the thought of figuring out what the entire zoetrope template was all about. The comments were quite helpful though and I figured out how to put together my "skeptical emoji" using a few ellipses and a curve. Reading through the template I also found a much better way to handle "per-frame" actions than I had been doing up until this point.

rigatoni-Reading2

Question 1A
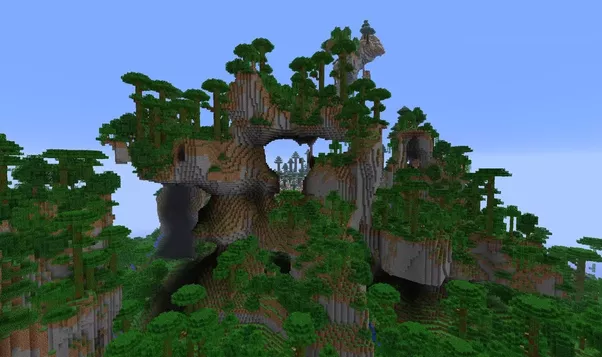
This is perhaps an obvious example of a generative work exhibiting effective complexity, but Markus Pearsson's Minecraft in my opinion sits in a very pleasing balance between total order and total randomness. The terrain generating algorithm and mob spawning behavior has just enough order to it so as to create a gameplay experience that the player feels is fair and can adapt to, but there are so many examples of simply bizarre and wonderful points of interest that are generated within the order of these terrain chunks that makes every player's experience unique and memorable.

The footage above is from an "amplified" world generated in Minecraft. The noise used to generate this chunk makes much more of an extreme use of LOD and falloff as opposed to its "normal" counterpart.

Question 1B
I chose to address the Problem of Creativity over the other problems that Galanter puts forth because I find myself constantly weighing if I have become too technical in my work. I found this reading productive because it helped me understand what creativity even is, and I think I will be carrying the terms p-creativity and h-creativity with me as I further analyze my practices as an artist.
I am not convinced by the argument that in order for a complex system to be creative it must also be adaptive. I believe the creator of generative art is still strongly affiliated with the audience's experience. Going back to the example I used in 1A, the dev team behind Minecraft listens to its playerbase and regularly releases updates that best serves what the players want to see in the game. While Minecraft the software may not be an evolving system that adapts to each player, the creators adapt to the community as a whole in the way they continue to grow their game. In this way I believe a non-adaptive system may still be creative.

rigatoni-AnimatedLoop

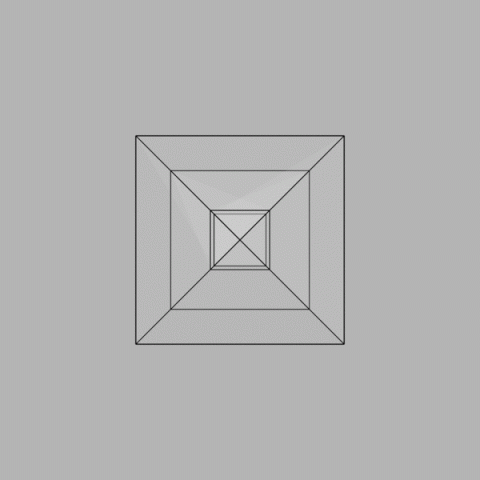
This project felt like jumping into the deep end as far as rendering goes. I was inspired by Dan Shiffman's 4D Tesseract challenge, although I wanted to make the gif my own. Until now I hadn't really given any thought to there being dimensions beyond the ones we can comfortably perceive and how they work, and thinking about higher dimensions led me down a rabbit hole of awesome math and logic content by channels like Numberphile and 3B1B. Dan Shiffman's challenge in particular was in Java and was a lot more conducive to 3d with its P3D renderer, but I think I found a suitable workaround by drawing quads instead of individual points using WEBGL. I was also treating the easing function (doubleExpSig) as an after thought, but once I actually used it to control what I see as distance along the 4th dimension I was surprised by what a huge role it played in the aesthetic of the loop. I can't imagine pulling off a smooth and natural motion without it. That being said however, the gif doesn't convincingly feel "4D" and I was to revisit it once I have more time.

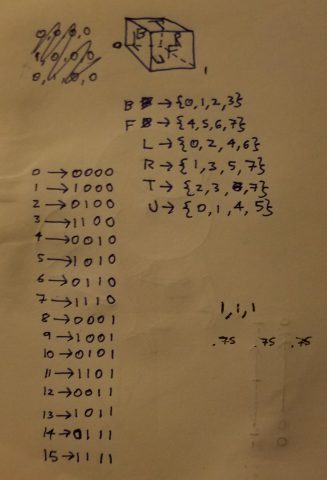
I didn't end up sketching very much for this assignment, but here's a few things I did that helped me keep track of what I was doing

I realized pretty early into the project that hardcoding in each of the 16 4d vertices was time-consuming and I often drew the quads in the wrong order. I decided to make use of modulus and int division to set the points in the right order.

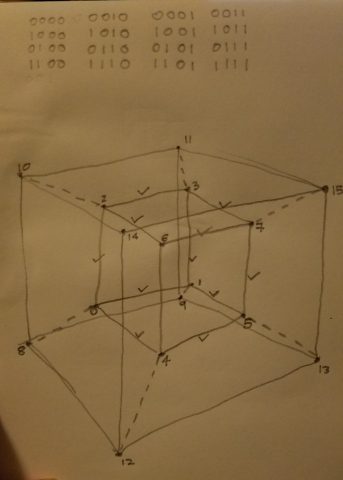
This is me marking the points needed to make up each face. This is maybe a quarter of what I ended up needing and I think I could have spent more time on this planning phase.

// This is a template for creating a looping animation in p5.js (JavaScript). 
// When you press the 'F' key, this program will export a series of images into
// your default Downloads folder. These can then be made into an animated gif. 
// This code is known to work with p5.js version 0.6.0
// Prof. Golan Levin, 28 January 2018
 
// INSTRUCTIONS FOR EXPORTING FRAMES (from which to make a GIF): 
// 1. Run a local server, using instructions from here:
//    https://github.com/processing/p5.js/wiki/Local-server
// 2. Set the bEnableExport variable to true.
// 3. Set the myNickname variable to your name.
// 4. Run the program from Chrome, press 'f'. 
//    Look in your 'Downloads' folder for the generated frames.
// 5. Note: Retina screens may export frames at twice the resolution.
 
 
//===================================================
// User-modifiable global variables. 
var myNickname = "rigatoni";
var nFramesInLoop = 60;
var bEnableExport = true;
 
// Other global variables you don't need to touch.
var nElapsedFrames;
var bRecording;
var theCanvas;
 
//===================================================
function setup() {
  theCanvas = createCanvas(720, 720, WEBGL);
  bRecording = false;
  nElapsedFrames = 0;
}
 
//===================================================
function keyTyped() {
  if (bEnableExport) {
    if ((key === 'f') || (key === 'F')) {
      bRecording = true;
      nElapsedFrames = 0;
    }
  }
}
 
//===================================================
function draw() {
 
  // Compute a percentage (0...1) representing where we are in the loop.
  var percentCompleteFraction = 0;
  if (bRecording) {
    percentCompleteFraction = float(nElapsedFrames) / float(nFramesInLoop);
  } else {
    percentCompleteFraction = float(frameCount % nFramesInLoop) / float(nFramesInLoop);
  }
 
  // Render the design, based on that percentage. 
  // This function renderMyDesign() is the one for you to change. 
  renderMyDesign (percentCompleteFraction);
 
  // If we're recording the output, save the frame to a file. 
  // Note that the output images may be 2x large if you have a Retina mac. 
  // You can compile these frames into an animated GIF using a tool like: 
  if (bRecording && bEnableExport) {
    var frameOutputFilename = myNickname + "_frame_" + nf(nElapsedFrames, 4) + ".png";
    print("Saving output image: " + frameOutputFilename);
    saveCanvas(theCanvas, frameOutputFilename, 'png');
    nElapsedFrames++;
 
    if (nElapsedFrames >= nFramesInLoop) {
      bRecording = false;
    }
  }
}
 
//===================================================
function renderMyDesign (percent) {
  background(180);
  var cube = new Hypercube(500, percent)
  rotateY(percent*PI)
  cube.Draw()
}
 
function Hypercube(size, margin) {
	this.points = []
  margin -= 1
  margin = doubleExponentialSigmoid(margin)
	for(var i=0; i<16; i++) {
    var j = i
		var w = floor(j/8)*margin
    j=j%8 
    var stereo = 1/(2-w)
    var z = floor(j/4)*stereo-(0.5*stereo)
    j=j%4
    var y = floor(j/2)*stereo-(0.5*stereo)
    j=j%2
    var x = floor(j/1)*stereo-(0.5*stereo)
  	this.points[i] = new P4(x*size, y*size, z*size, 0)
  }
  this.Draw = function() {
    fill(225,15)
		var front = new Face(this.points[4], this.points[5], 
                         this.points[6], this.points[7])
		var back = new Face(this.points[0], this.points[1], 
                         this.points[2], this.points[3])
		var left = new Face(this.points[0], this.points[2], 
                         this.points[4], this.points[6]) 
    var right = new Face(this.points[1], this.points[3], 
                     this.points[5], this.points[7]) 
		var top = new Face(this.points[2], this.points[3], 
                         this.points[6], this.points[7]) 
		var bottom = new Face(this.points[0], this.points[1], 
                         this.points[4], this.points[5]) 
		var sFront = new Face(this.points[12], this.points[13], 
                         this.points[14], this.points[15])
		var sBack = new Face(this.points[8], this.points[9], 
                         this.points[10], this.points[11])
		var sLeft = new Face(this.points[8], this.points[10], 
                         this.points[12], this.points[14]) 
    var sRight = new Face(this.points[9], this.points[11], 
                     this.points[13], this.points[15]) 
		var sTop = new Face(this.points[10], this.points[11], 
                         this.points[14], this.points[15]) 
		var sBottom = new Face(this.points[8], this.points[9], 
                         this.points[12], this.points[13]) 
 
    var pfront = new Face(this.points[4], this.points[5], 
                         this.points[12], this.points[13])
		var pback = new Face(this.points[0], this.points[1], 
                         this.points[8], this.points[9])
		var pleft = new Face(this.points[0], this.points[2], 
                         this.points[8], this.points[10]) 
    var pright = new Face(this.points[1], this.points[3], 
                     this.points[9], this.points[11]) 
		var ptop = new Face(this.points[2], this.points[3], 
                         this.points[10], this.points[11]) 
		var pbottom = new Face(this.points[0], this.points[4], 
                         this.points[8], this.points[12]) 
		var psFront = new Face(this.points[1], this.points[5], 
                         this.points[9], this.points[13])
		var psBack = new Face(this.points[5], this.points[7], 
                         this.points[13], this.points[15])
		var psLeft = new Face(this.points[3], this.points[7], 
                         this.points[11], this.points[15]) 
    var psRight = new Face(this.points[2], this.points[6], 
                     this.points[10], this.points[14]) 
		var psTop = new Face(this.points[6], this.points[7], 
                         this.points[14], this.points[15]) 
		var psBottom = new Face(this.points[4], this.points[6], 
                         this.points[12], this.points[14]) 
 
  	front.Draw()
    back.Draw()
    left.Draw()
    right.Draw()
    sFront.Draw()
    sBack.Draw()
    sLeft.Draw()
    sRight.Draw()
  	pfront.Draw()
    pback.Draw()
    pleft.Draw()
    pright.Draw()
    psFront.Draw()
    psBack.Draw()
    psLeft.Draw()
    psRight.Draw() 
  }
}
 
function Face(p1, p2, p3, p4) {
  var distance = 200
  this.p1 = p1
  this.p2 = p2
  this.p3 = p3
  this.p4 = p4
 
  this.Draw = function() {
    beginShape()
    	vertex(this.p1.x,this.p1.y,this.p1.z)
    	vertex(this.p2.x,this.p2.y,this.p2.z)
    	vertex(this.p4.x,this.p4.y,this.p4.z)
    	vertex(this.p3.x,this.p3.y,this.p3.z)
    endShape(CLOSE)
  }
 
  this.Print = function() {
  	 this.p1.Print()
     this.p2.Print()
     this.p3.Print()
     this.p4.Print()
  }
}
 
function P4(x,y,z,w) {
	this.x = x
  this.y = y
  this.z = z
  this.w = w
  this.Print = function() {
		print(this.x, this.y, this.z, this.w) 
  }
  this.ScalarMult = function(multiplier) {
		this.x*=multiplier
    this.y*=multiplier
    this.z*=multiplier
    this.w*=multiplier
  }
}
// Symmetric double-element sigmoid function ('_a' is the slope)
// See https://github.com/IDMNYU/p5.js-func/blob/master/lib/p5.func.js
// From: https://idmnyu.github.io/p5.js-func/
//===================================================
function doubleExponentialSigmoid (_x, _a){
  if(!_a) _a = 0.75; // default
 
  var min_param_a = 0.0 + Number.EPSILON;
  var max_param_a = 1.0 - Number.EPSILON;
  _a = constrain(_a, min_param_a, max_param_a);
  _a = 1-_a;
 
  var _y = 0;
  if (_x<=0.5){
    _y = (pow(2.0*_x, 1.0/_a))/2.0;
  }
  else {
    _y = 1.0 - (pow(2.0*(1.0-_x), 1.0/_a))/2.0;
  }
  return(_y);
}

rigatoni – Interruptions01

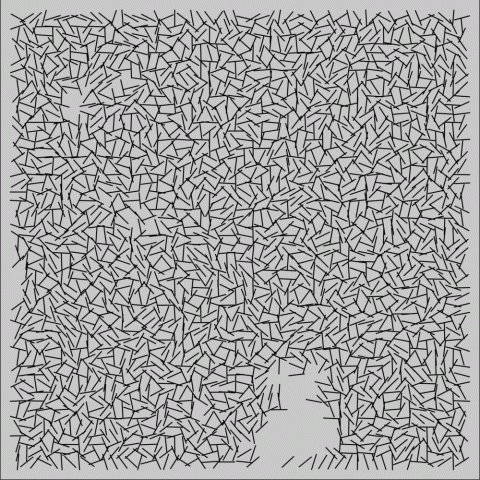
Since working on this project, I was left feeling hugely unsatisfied with the quality of my work. The morning session on Friday (7/9) helped me understand what this assignment was really about, make some fundamental observations about Vera's work and learn what Perlin noise was. Here is my second attempt at interruptions. My original attempt is still available towards the end of this post. Without further ado, Interruptions - The Sequel!

var interval
var lineSize
let redraw = true
function setup() {
  createCanvas(720, 720);
	//The grid in Vera's version was roughly 55x55
	interval = width/55
	lineSize = interval * .9
}
 
function draw() {
  if(redraw) {
  	background(200);
    GenerateLines()
    redraw=false
  }
}
 
function mouseClicked() {
	redraw = true 
}
 
// Helper Methods
function GenerateLines() {
  strokeWeight(1.5)
  noiseDetail(6, .65)
  noiseSeed(random(0, 1000))
  var noiseVal = -1
	for(var x=2*interval; x<width-2*interval; x+=interval) {
		for(var y=2*interval; y<width-2*interval; y+=interval) {
      noiseVal = noise(x/150,y/150)
      var midPoint = new Point(x,y)
      var startPoint = getRandomPointOnCircumference(midPoint, lineSize)
      //print(startPoint)
      var endPoint = getColinearEndPoint(startPoint, midPoint)
			var segment = new Segment(startPoint, endPoint)
      fill(noiseVal*255)
      // Uncomment this to see the noise values being generated per grid cell
      //rect(x,y,x+lineSize,y+lineSize)
      if(noiseVal>=.5) {
        segment.Draw() 
      }
    }
	}
}
 
function getRandomPointOnCircumference(center, radius) {
	var theta = random(0, TWO_PI)
  var x = sin(theta)*radius + center.x
  var y = cos(theta)*radius + center.y
  return new Point(x, y)
}
 
function getColinearEndPoint(startPoint, midPoint) {
	var endPoint = midPoint.Copy()
  var directionVector = midPoint.Copy()
  directionVector.Subtract(startPoint)
  endPoint.Add(directionVector)
  return endPoint
}
 
 
// Classes
function Point(x, y) {
  this.x = x
  this.y = y
  this.Add = function(addend) {
  	this.x += addend.x
    this.y += addend.y
  }
  this.Subtract = function(addend) {
		this.x -= addend.x
    this.y -= addend.y
  }
  this.Copy = function() {
		return new Point(this.x, this.y) 
  }
}
 
function Segment(startPoint, endPoint) {
	this.startPoint = startPoint
  this.endPoint = endPoint
  this.Draw = function() {
		line(startPoint.x, startPoint.y, endPoint.x, endPoint.y) 
  }
}
 
function LineGrid() {
	this.lines = []
  this.count = 0
  this.AddLine = function(_line) {
		this.lines.push(_line)
  }
  this.RemoveLine = function(_line) {
  	this.lines.pop(_line)
  }
}

Below you will find my original attempt at Interruptions.

via GIPHY

INITIAL OBSERVATIONS
(1) The lines are all roughly the same length
(2) There's patches where the lines don't appear
(3) The intersections of lines occur roughly towards the ends of the lines
(4) There's no real clumping/pattern; it seems random (as opposed to Perlin?)
(5) There are multiple hundreds of lines here
(6) There is no variance in thickness or transparency
(7) The compositions are all square
(8) Although there are gaps, the work is still densely populated
(9) Contrary to the gaps, there aren't areas that are MORE dense; only less
(10) The background isn't a full white, and that's less harsh on the eyes

Of course I realize now that (4) was flawed and I ended up needing Perlin noise after all. I barely scratched the surface though, and I think that would have been key to getting the look right. I wish I had given myself more time to actually figure out how noise works, as right now I am missing the gaps in the lines and the intersections aren't like what I observed in (3). After I was finished I checked out some of the other
attempts at replicating Interruptions and I was blown away by how much detail and level of control was achieved in some of them. I noticed other
people were making a conscientious effort to preserve the "randomness" and I plan to figure out how that is done next.

let redraw = true
function setup() {
  createCanvas(720, 720);
}
 
function draw() {
  if(redraw) {
    background(150);
    for(var i=0; i<3000; i++) {
      noiseSeed()
      var x1 = random(50, width-50)
    	var y1 = random(50, height-50)
      var x2 = (noise(x1)-.5)*200+x1
      var y2 = (noise(y1)-.5)*200+y1
      if(x2>50 && x2<width-50 && y2>50 && y2<height-50) {
      	line(x1, y1, x2, y2)
      }
    }
    redraw=false
  }
}
 
function mouseClicked() {
	redraw = true 
}

rigatoni – Intersections01

via GIPHY

let redraw = true
function setup() {
  createCanvas(400, 400);
}
 
function draw() {
  if(redraw) {
  	background(180);
  	var lineArray = new LineArray(20)
  	lineArray.draw()
    redraw = false
  }
}
 
function mouseClicked() {
	redraw = true
}
 
// CLASS CONSTRUCTORS //
 
function LineArray(lineCount) {
	this.lines = []
  for(i=0; i<lineCount; i++) {
		this.lines[i] = new Line(random(width), random(width), random(width), random(width))
  }
 
  this.draw = function(displayIntersections=false) {
		for(i=0; i<lineCount; i++) {
			this.lines[i].draw()
      for(j=0; j<i; j++) {
				var intersection = getIntersection(this.lines[j], 
                                           this.lines[i])
        fill(0,0,0)
        if(isWithinSegment(intersection, this.lines[i]) &&
           isWithinSegment(intersection, this.lines[j])) {
        	ellipse(intersection[0], intersection[1], 5, 5)  
        }
      }
    }
  }
}
 
function Line(x1, y1, x2, y2) {
	this.x1=x1
  this.y1=y1
  this.x2=x2
  this.y2=y2
 
  this.draw = function() {
    stroke(5)
		line(this.x1, this.y1, this.x2, this.y2) 
  }
}
 
//HELPER METHODS //
 
// All the calculations here were informed by Paul Bourke's work
// http://paulbourke.net/geometry/pointlineplane/
function getIntersection(line1, line2) {
	var coef = (line2.x2-line2.x1)*(line1.y1-line2.y1)
  coef -= (line2.y2-line2.y1)*(line1.x1-line2.x1)
  var denom = (line2.y2-line2.y1)*(line1.x2-line1.x1)
  denom -= (line2.x2-line2.x1)*(line1.y2-line1.y1)
	coef = coef/denom
 
  var x = line1.x1 + coef*(line1.x2-line1.x1)
  var y = line1.y1 + coef*(line1.y2-line1.y1)
  var intersection = [x,y]
  return intersection
}
 
// I learnt how to do cross & dot products from here: 
// https://stackoverflow.com/questions/328107
// heavily based on the pseudocode written by user Cyrille Ka
function isWithinSegment(p, seg) {
	let x1 = min(seg.x1, seg.x2)
  let y1 = min(seg.y1, seg.y2)
  let x2 = max(seg.x1, seg.x2)
  let y2 = max(seg.y1, seg.y2)
 
  if((p[0]>=x1 && p[0]<=x2 && p[1]>=y1 && p[1]<=y2)==false) {
    return false
  }
  return true 
}

rigatoni – Iteration Exercise

We have entered the T H I R D  D I M E N S I O N

/*A lot of the code I have written was informed by both the References section of
  p5 as well Dan Shiffman's Youtube Channel, The Learning Train. The specific 
  tutorials I looked at are listed below:
  The Learning Channel 18.3
  The Learning Channel Coding Challenge #86
*/
 
let redraw = true
 
function setup() {
  createCanvas(500, 500, WEBGL);
  camera(500, -500, (height/2.0) / tan(PI*45.0 / 360), 0, 0, 0, 0, 1, 0)
  setLighting()
}
 
function draw() {
  if(redraw) {
    background(0);
    drawGrid()
    redraw=false
  } 
}
 
function mouseClicked() {
    redraw=true 
}
 
function drawGrid() {
  noStroke()
  translate(-250,0,250)
  for(x=0; x<10; x++) {
    translate(50,0,0)
    for(y=0; y<10; y++) {
      translate(0,0,-50)
      pickRandom(drawCube, drawSphere, .8)
    }
    //this is like setting a typewriter slide back to start
    translate(0,0,500)
  }
}
 
//the ratio is how likely pickRandom will choose method1 over method2
function pickRandom(method1, method2, ratio) {
  //using square roots helped reduce the weird looking "random" patterns
  if((random(1)*random(1))<(ratio*ratio)) {
    method1()
  } else {
    method2()
  }
}
 
function setLighting() {
  ambientLight(50,0,0)
  directionalLight(255,255,255, 25, 0, -25)
}
 
function drawCube() {
  ambientMaterial(255, 0, 0)
  box(43)
}
 
//Spheres also cast a point light around them so it looks better
function drawSphere() {
  ambientMaterial(0, 255, 0)
  pointLight(255, 255, 255)
  sphere(20)
}

via GIPHY

sketch