My mocap project! The lighting in the gif shows you more, still learning about directional light and cameras so it’s hard to see the body that has spheres with shifting x coordinates because it is poorly lighted.
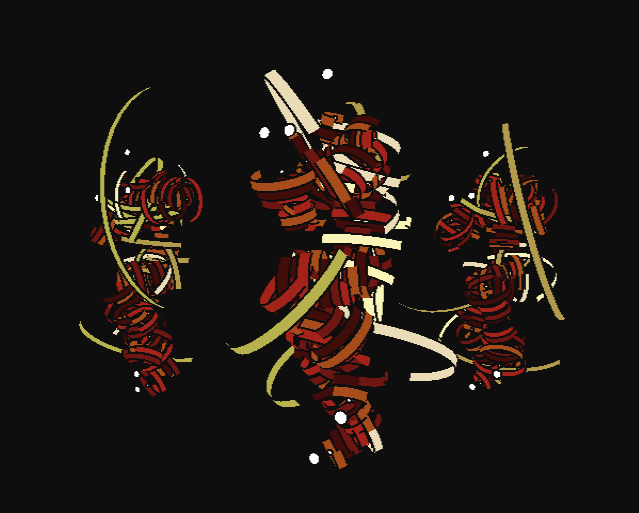
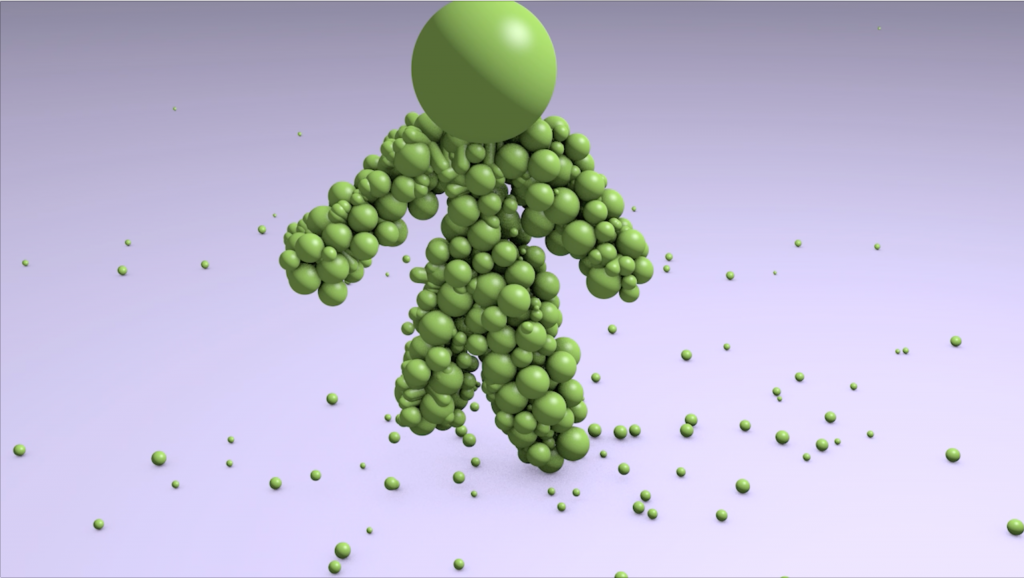
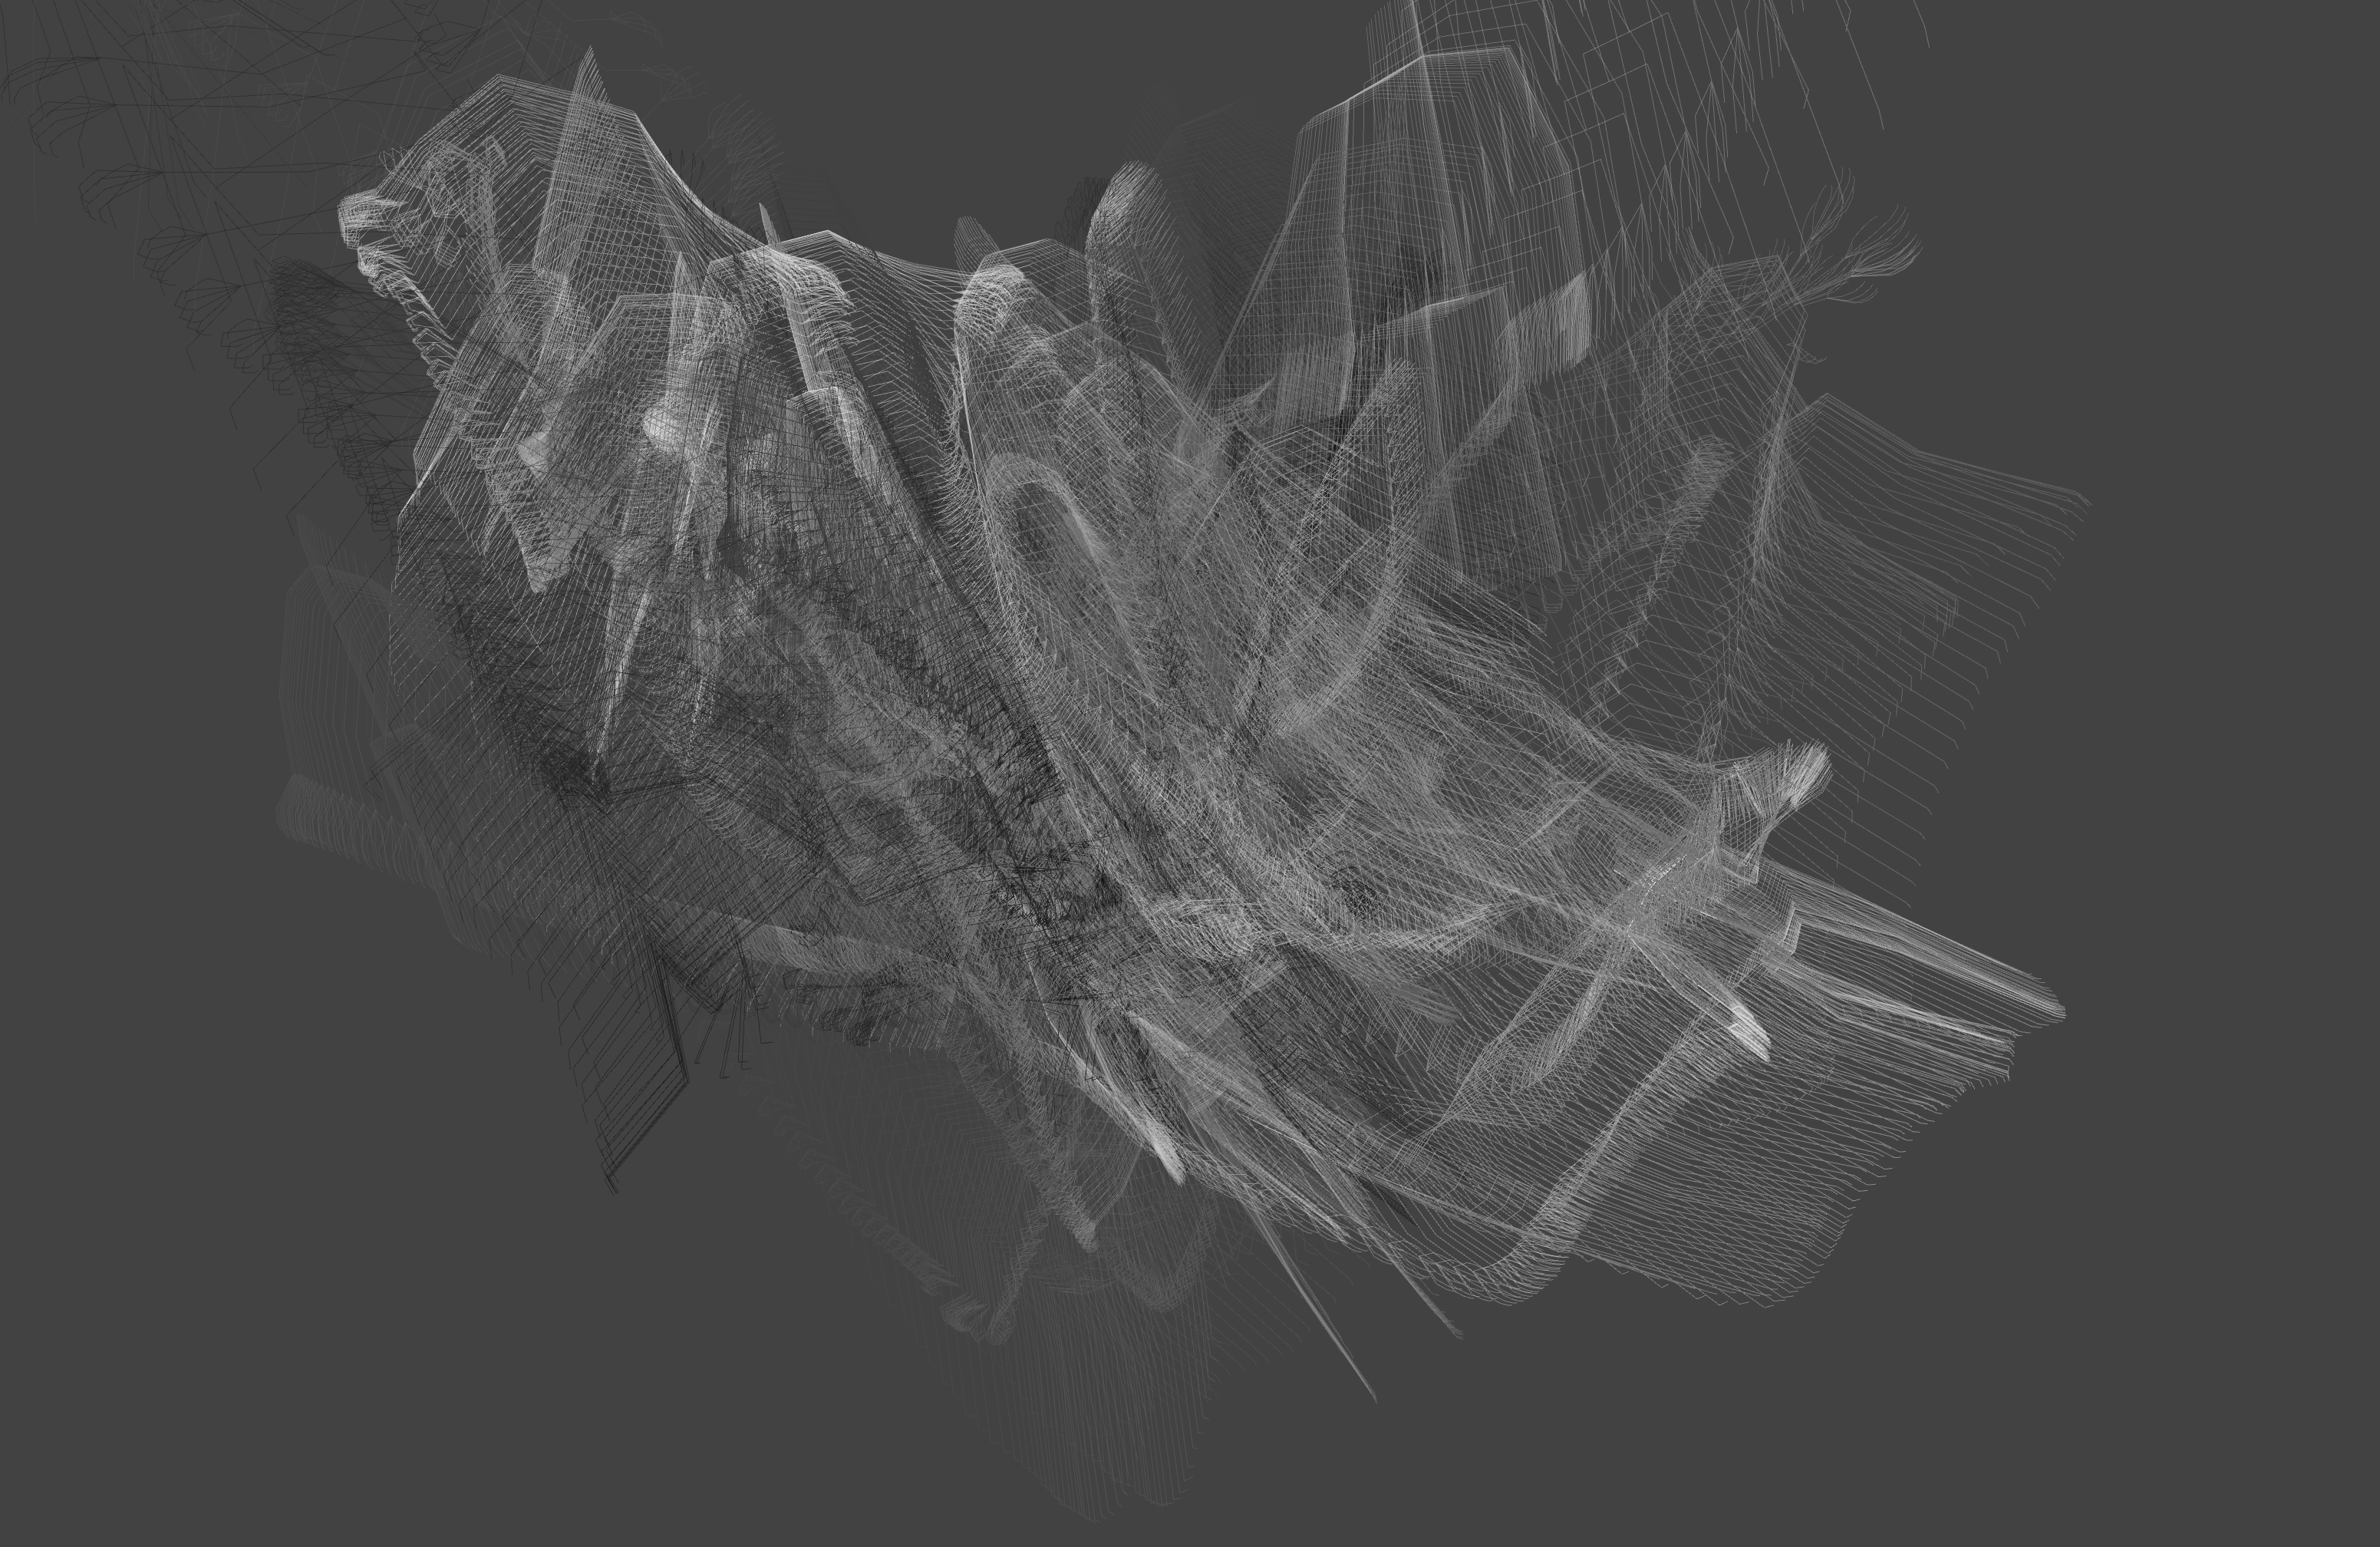
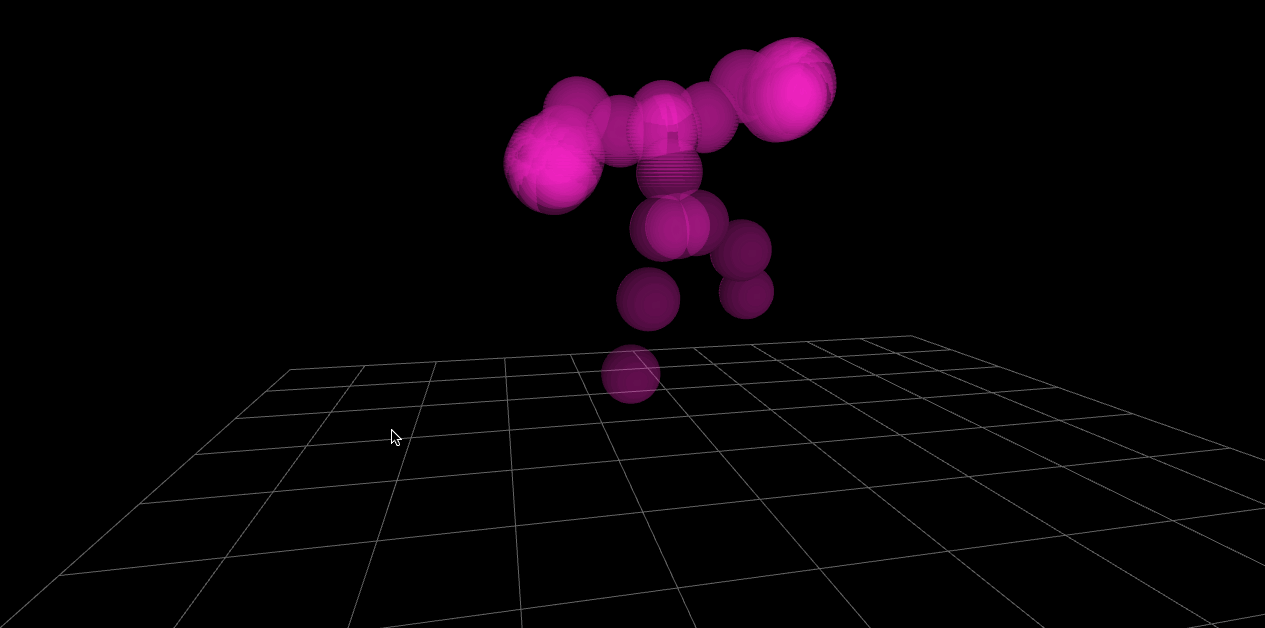
So I used the data from Perfume, only I used one of the bodies rather than all three. One body continues to stretch horizontally because the spheres’ x values space out over time, the one in the middle has spheres that spin around really fast, and the one in the front, which reminds me of a slinky,kind of dips into the ground and ends up upside down, then comes back up from the ground.
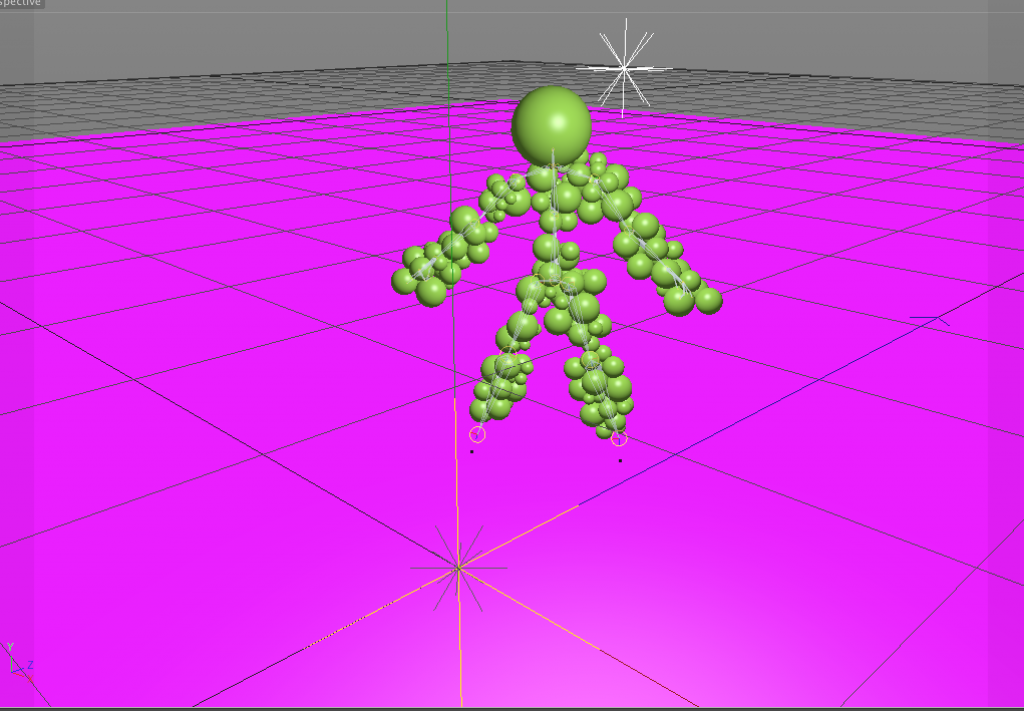
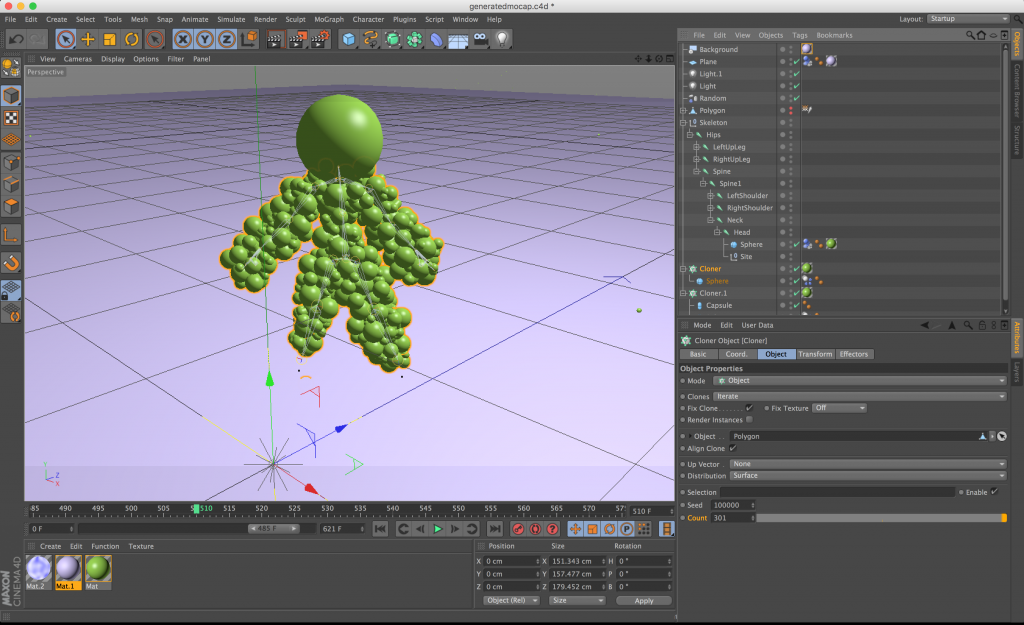
I would call this piece “Day at the Gym” and ironically, all of the spheres have a skin of my cartoon self (I don’t GO to the gym!!!! This is what would happen if I did!!!!)
So this was actually as assignment I did for Concept Studio, not this class, but it’s very much in the same vein as the motion capture assignment, so I thought I’d throw it up here for anyone who cares. The prompt was the imagine a scene that would tell the story of our lives 2000 years in the future (not exactly obvious from the final product).
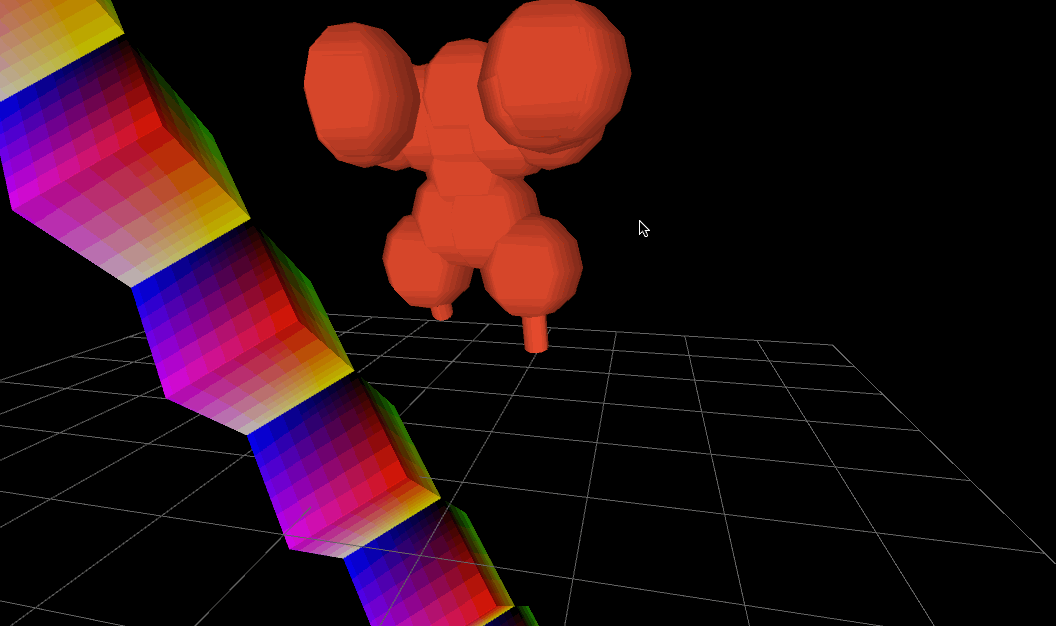
I wanted to have decorate to bodies through this mocap project. Both figures would be created by cubes. Figure A would be the light source, mostly dark since the inner light would cast a shadow on the visible parts of its cubes, and figure B would be lit only by figure A’s light. I liked the irony of the light source being dark, and the figure without its own light being bright.
When I was about 12, I visited the North American veterinary conference (NAVC) with my mom in Orlando, Florida. I was walking around the show floor with my mom when we decided to stop at the Bayer booth. In the middle of the booth was an original Microsoft Surface table — many people were congregating around to to see what it was all about. My mom and I played with it for awhile and then she left to enjoy the rest of the conference, but I stayed in the Bayer booth for easily 3 or 4 more hours becoming good friends with the booth attendants. I think it was the first highly responsive touch interface I’d ever used and it played on in my dreams for weeks. When I returned home, I tried to get my dad to buy one for our house, but at the time it was ~10-15K to install and you had to be a commercial partner…
extra left arm on right hand and right arm on left hand
extra right arm on left knee and left arm on right knee
‘antler arms’ extra arms attached at hand
mouth grabbers, extra arms attached at face
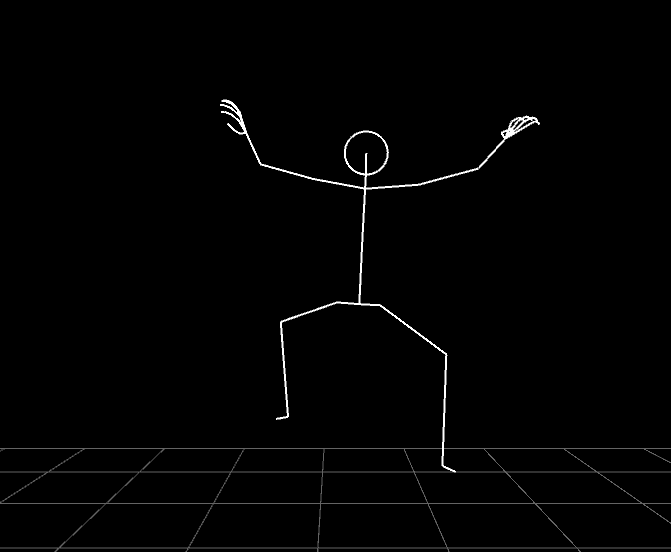
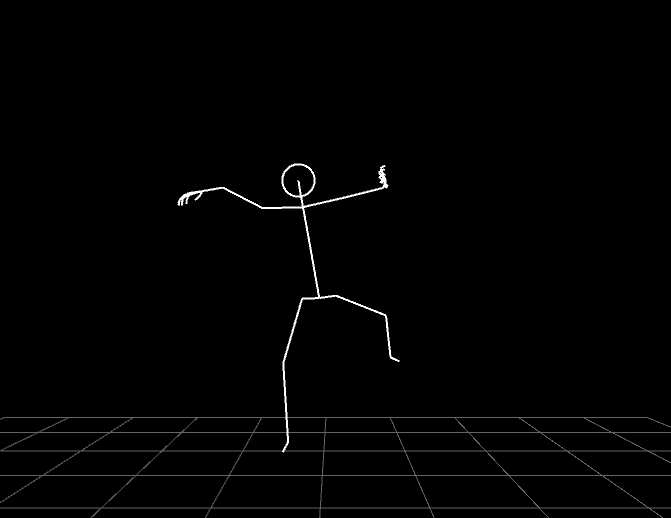
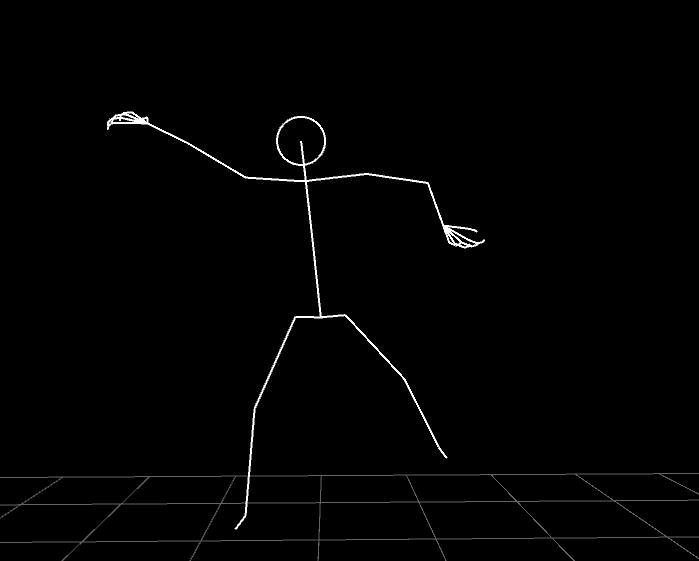
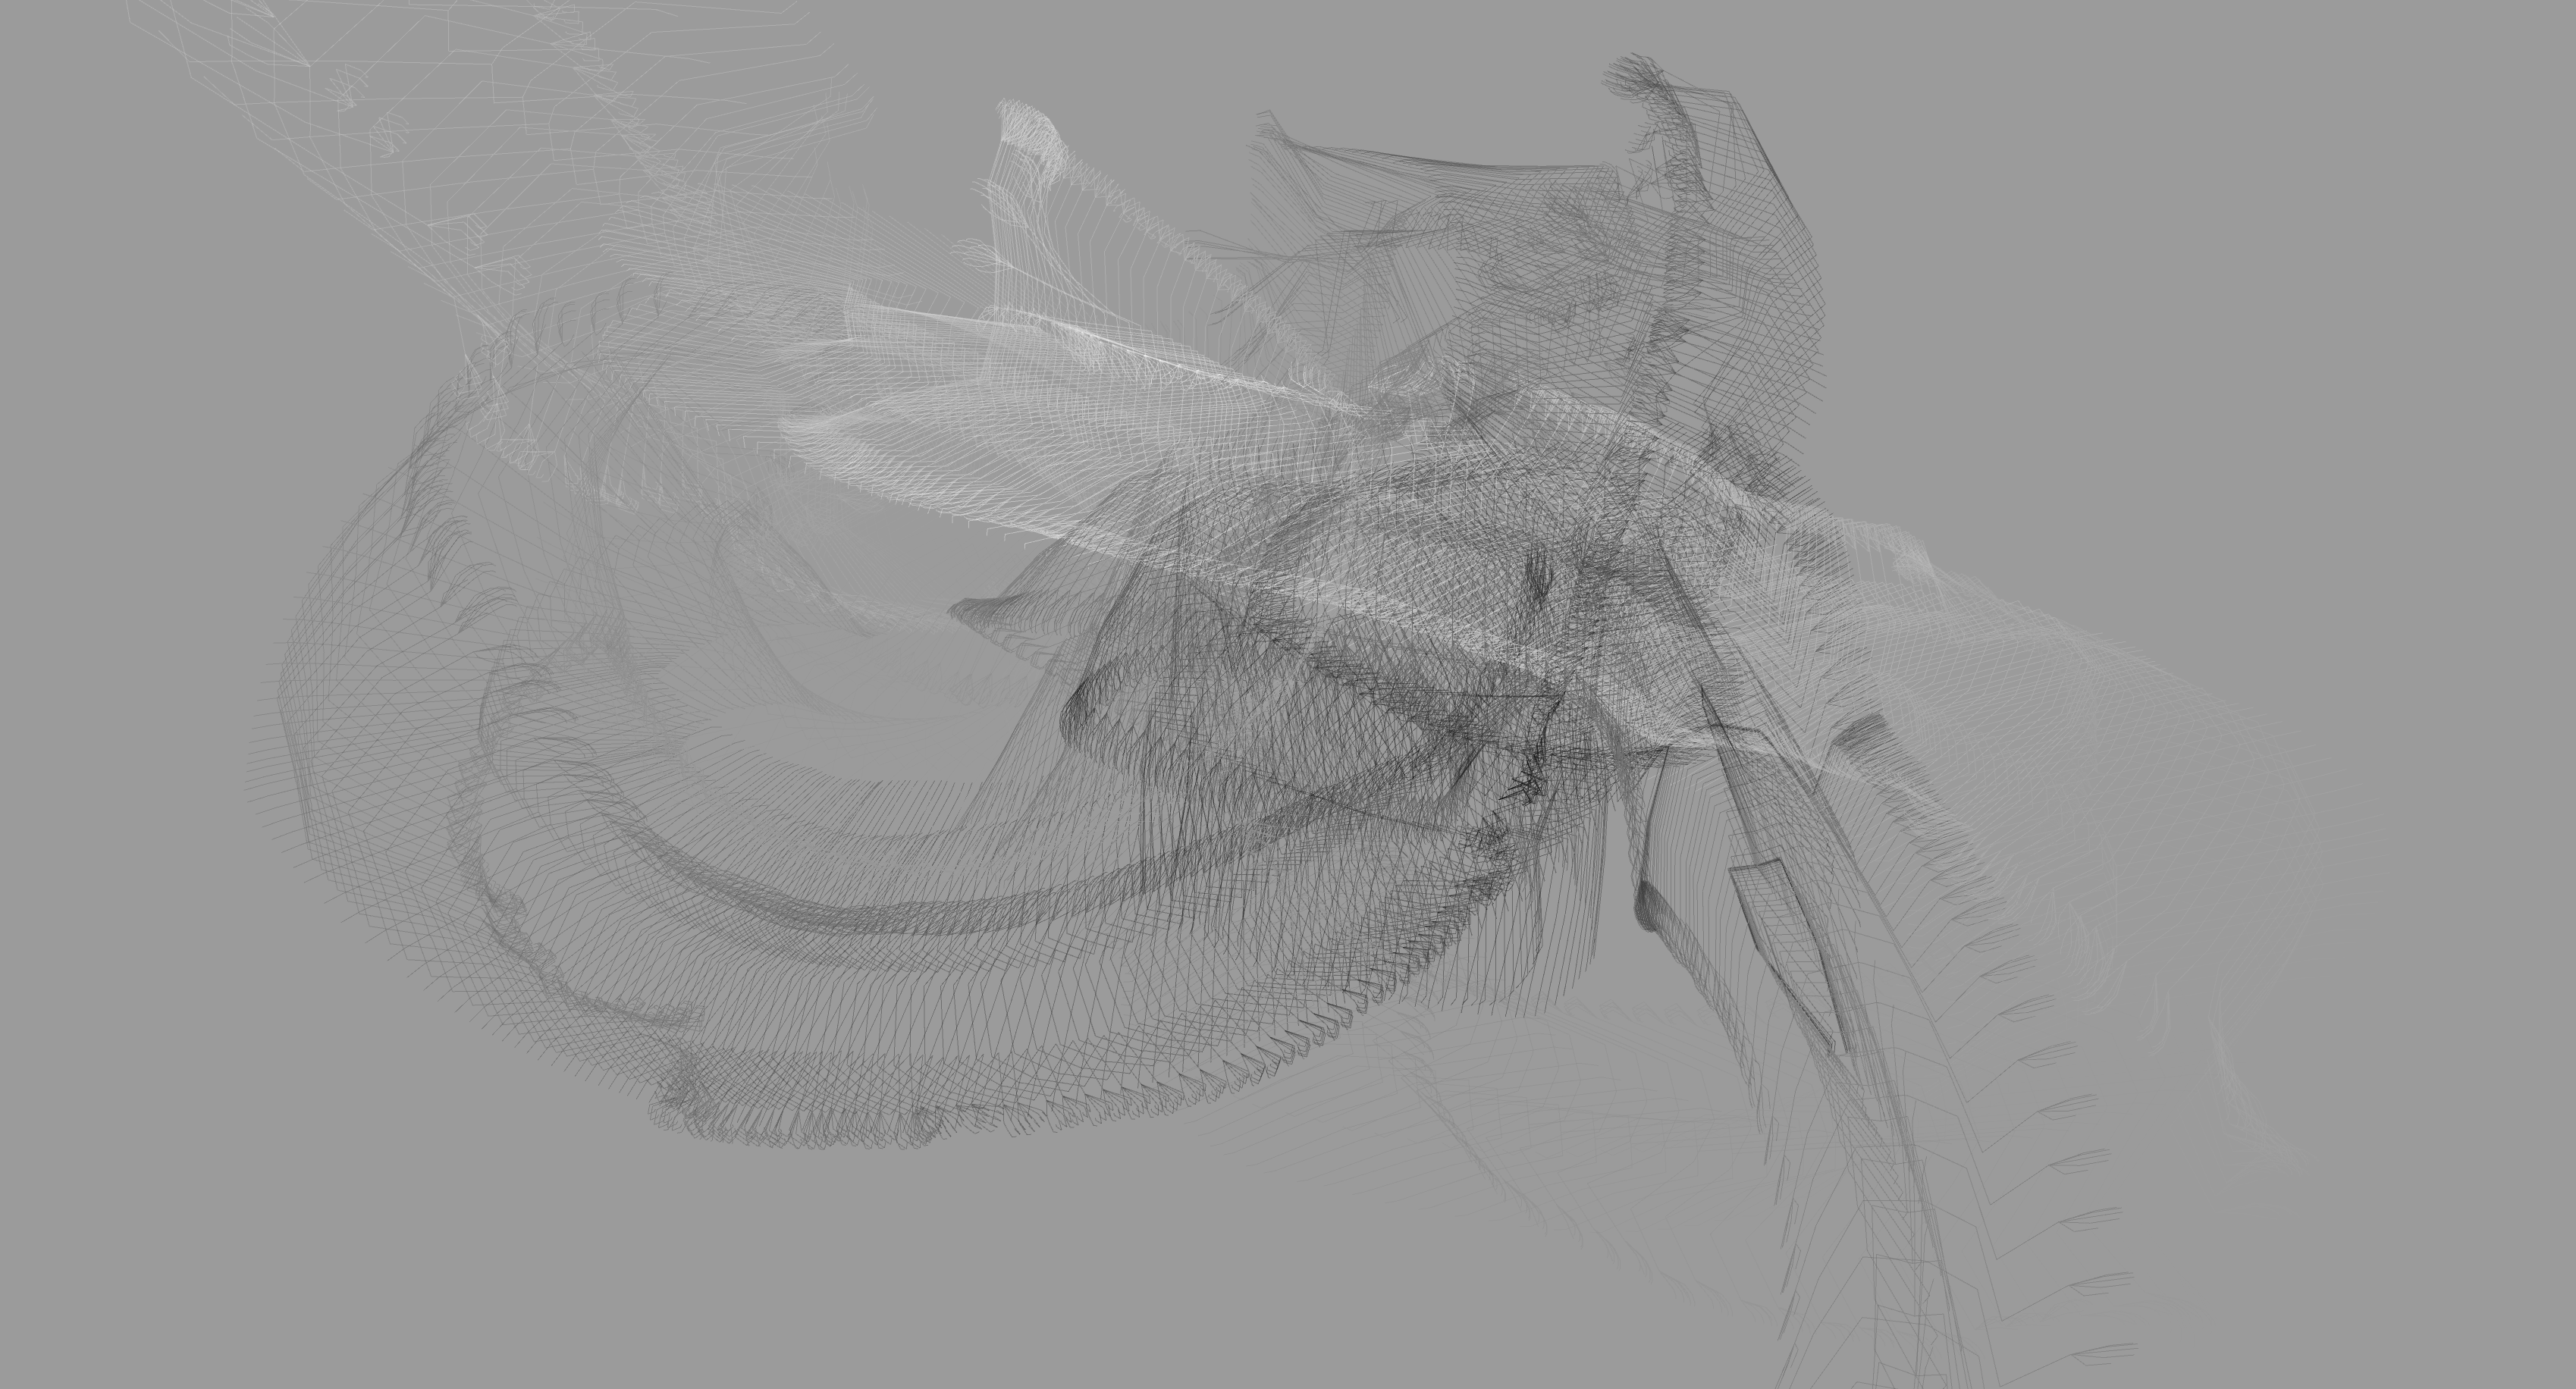
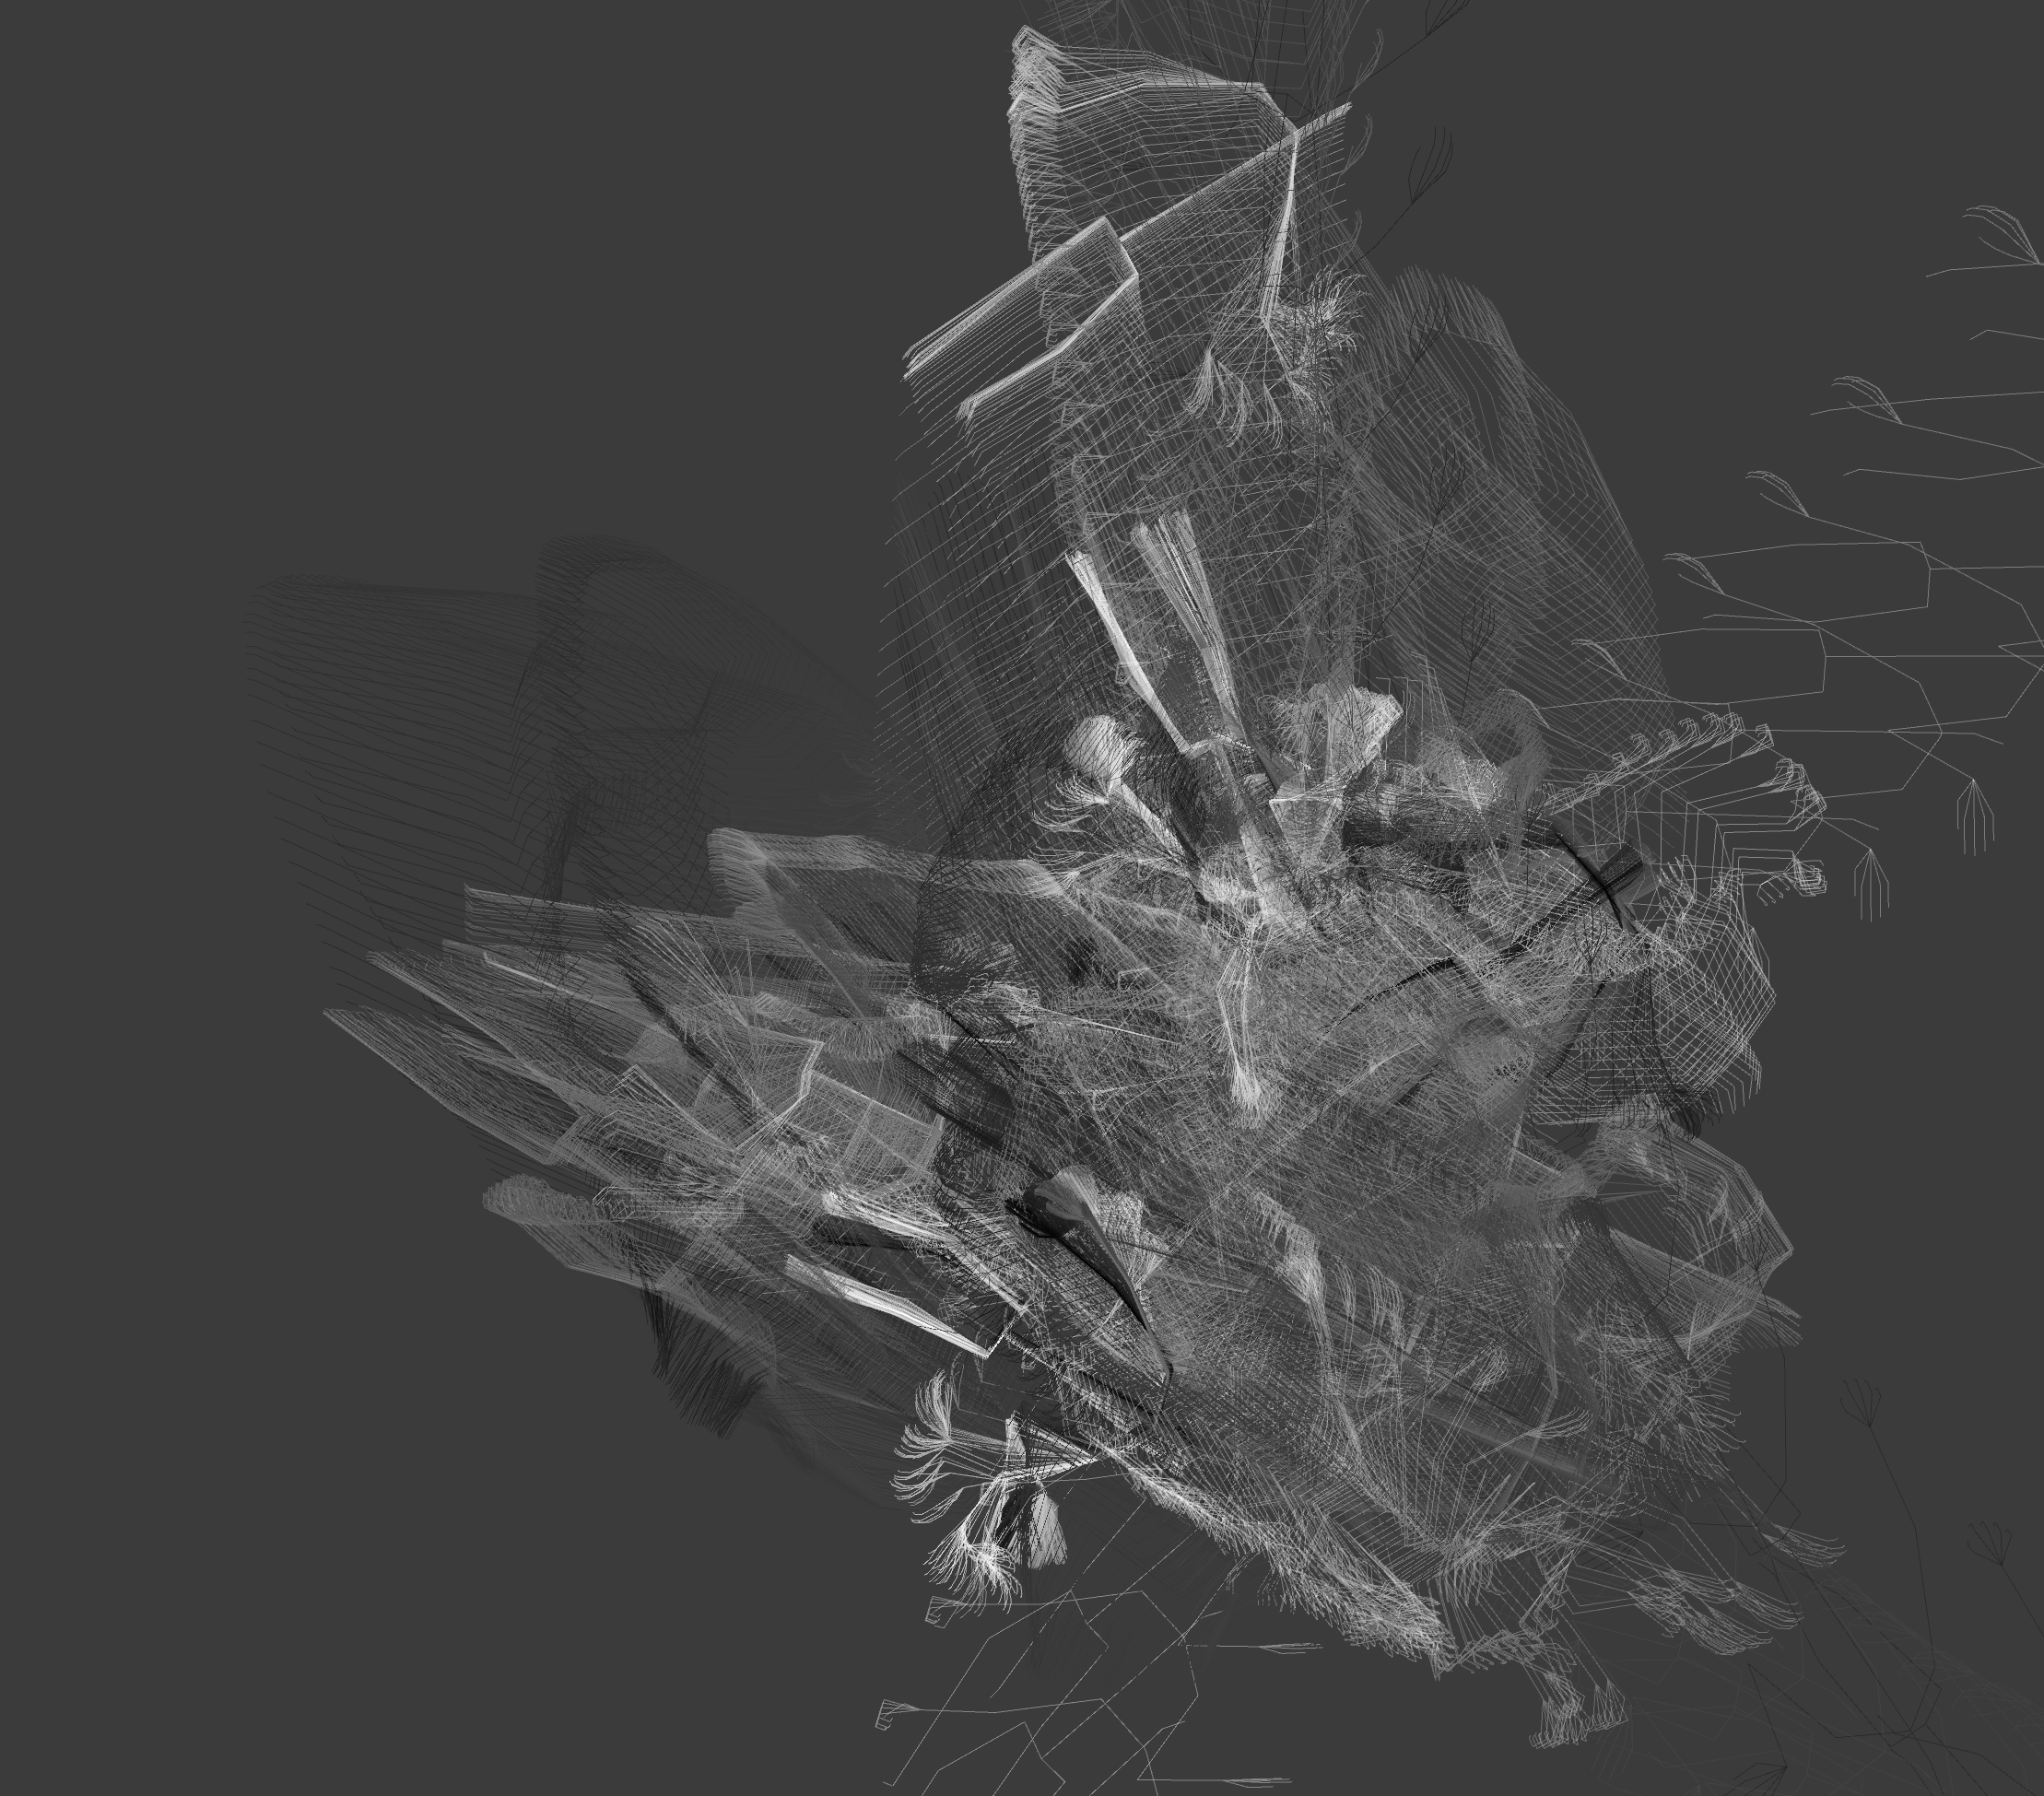
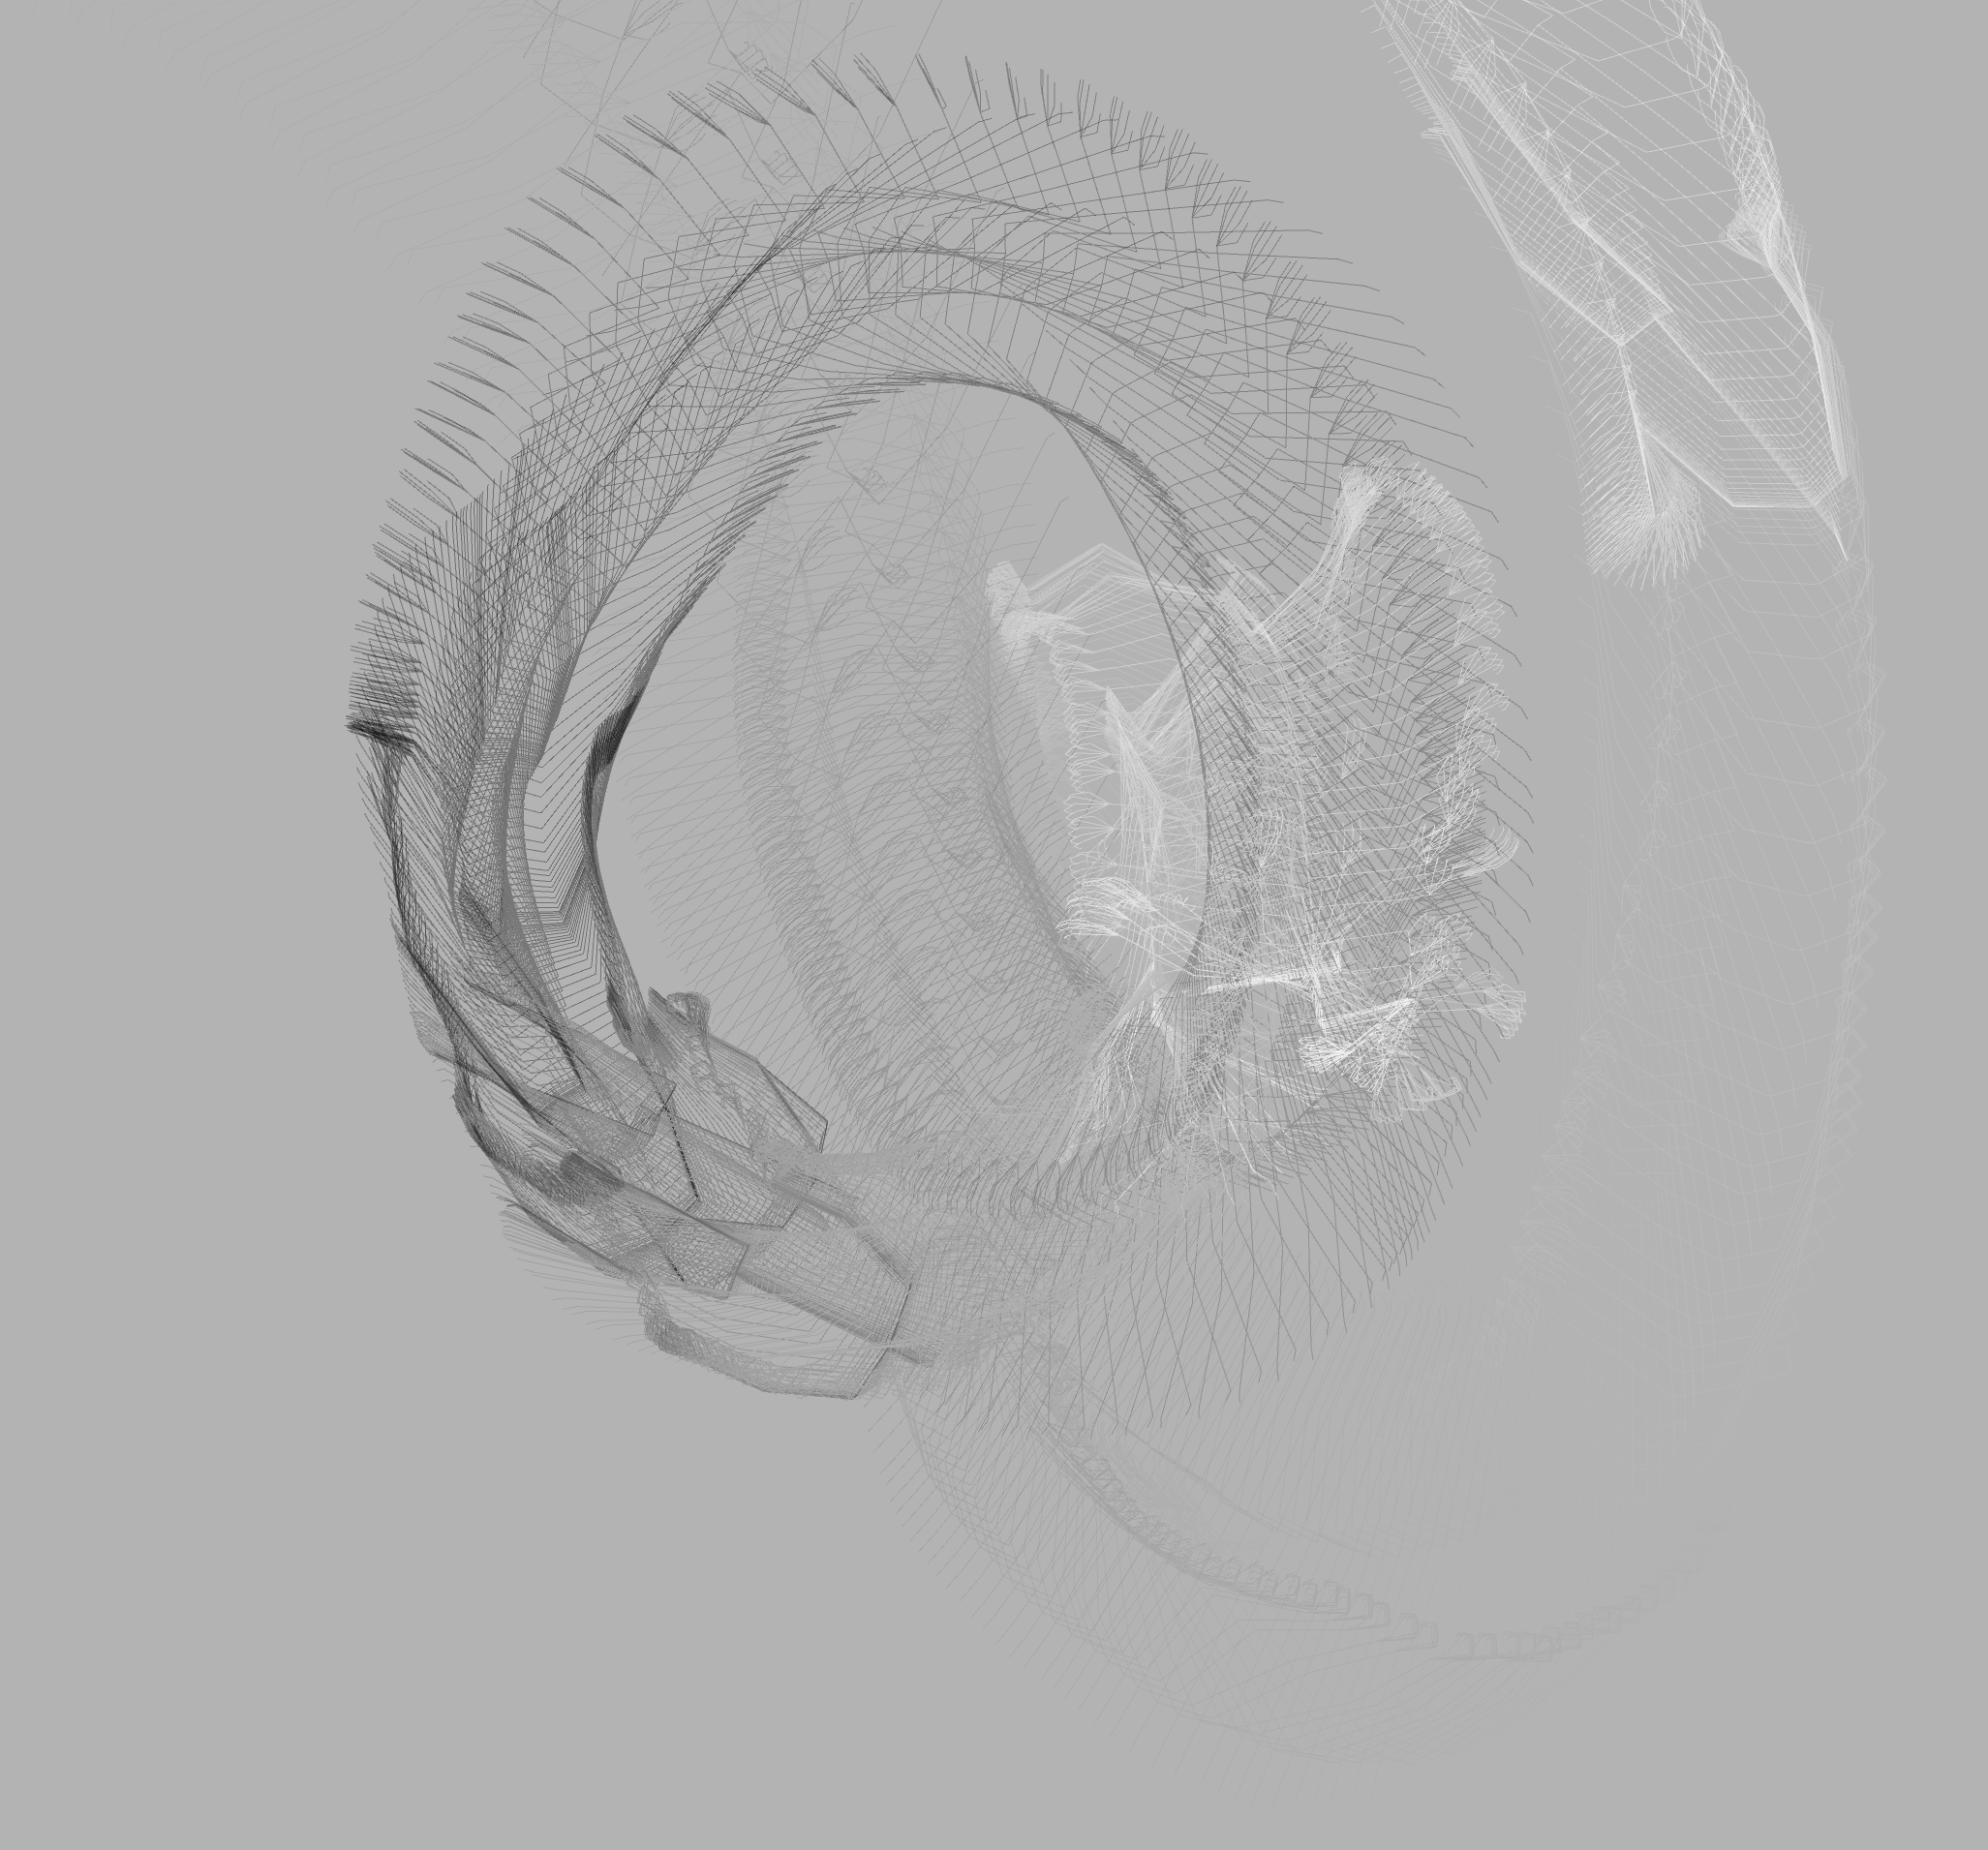
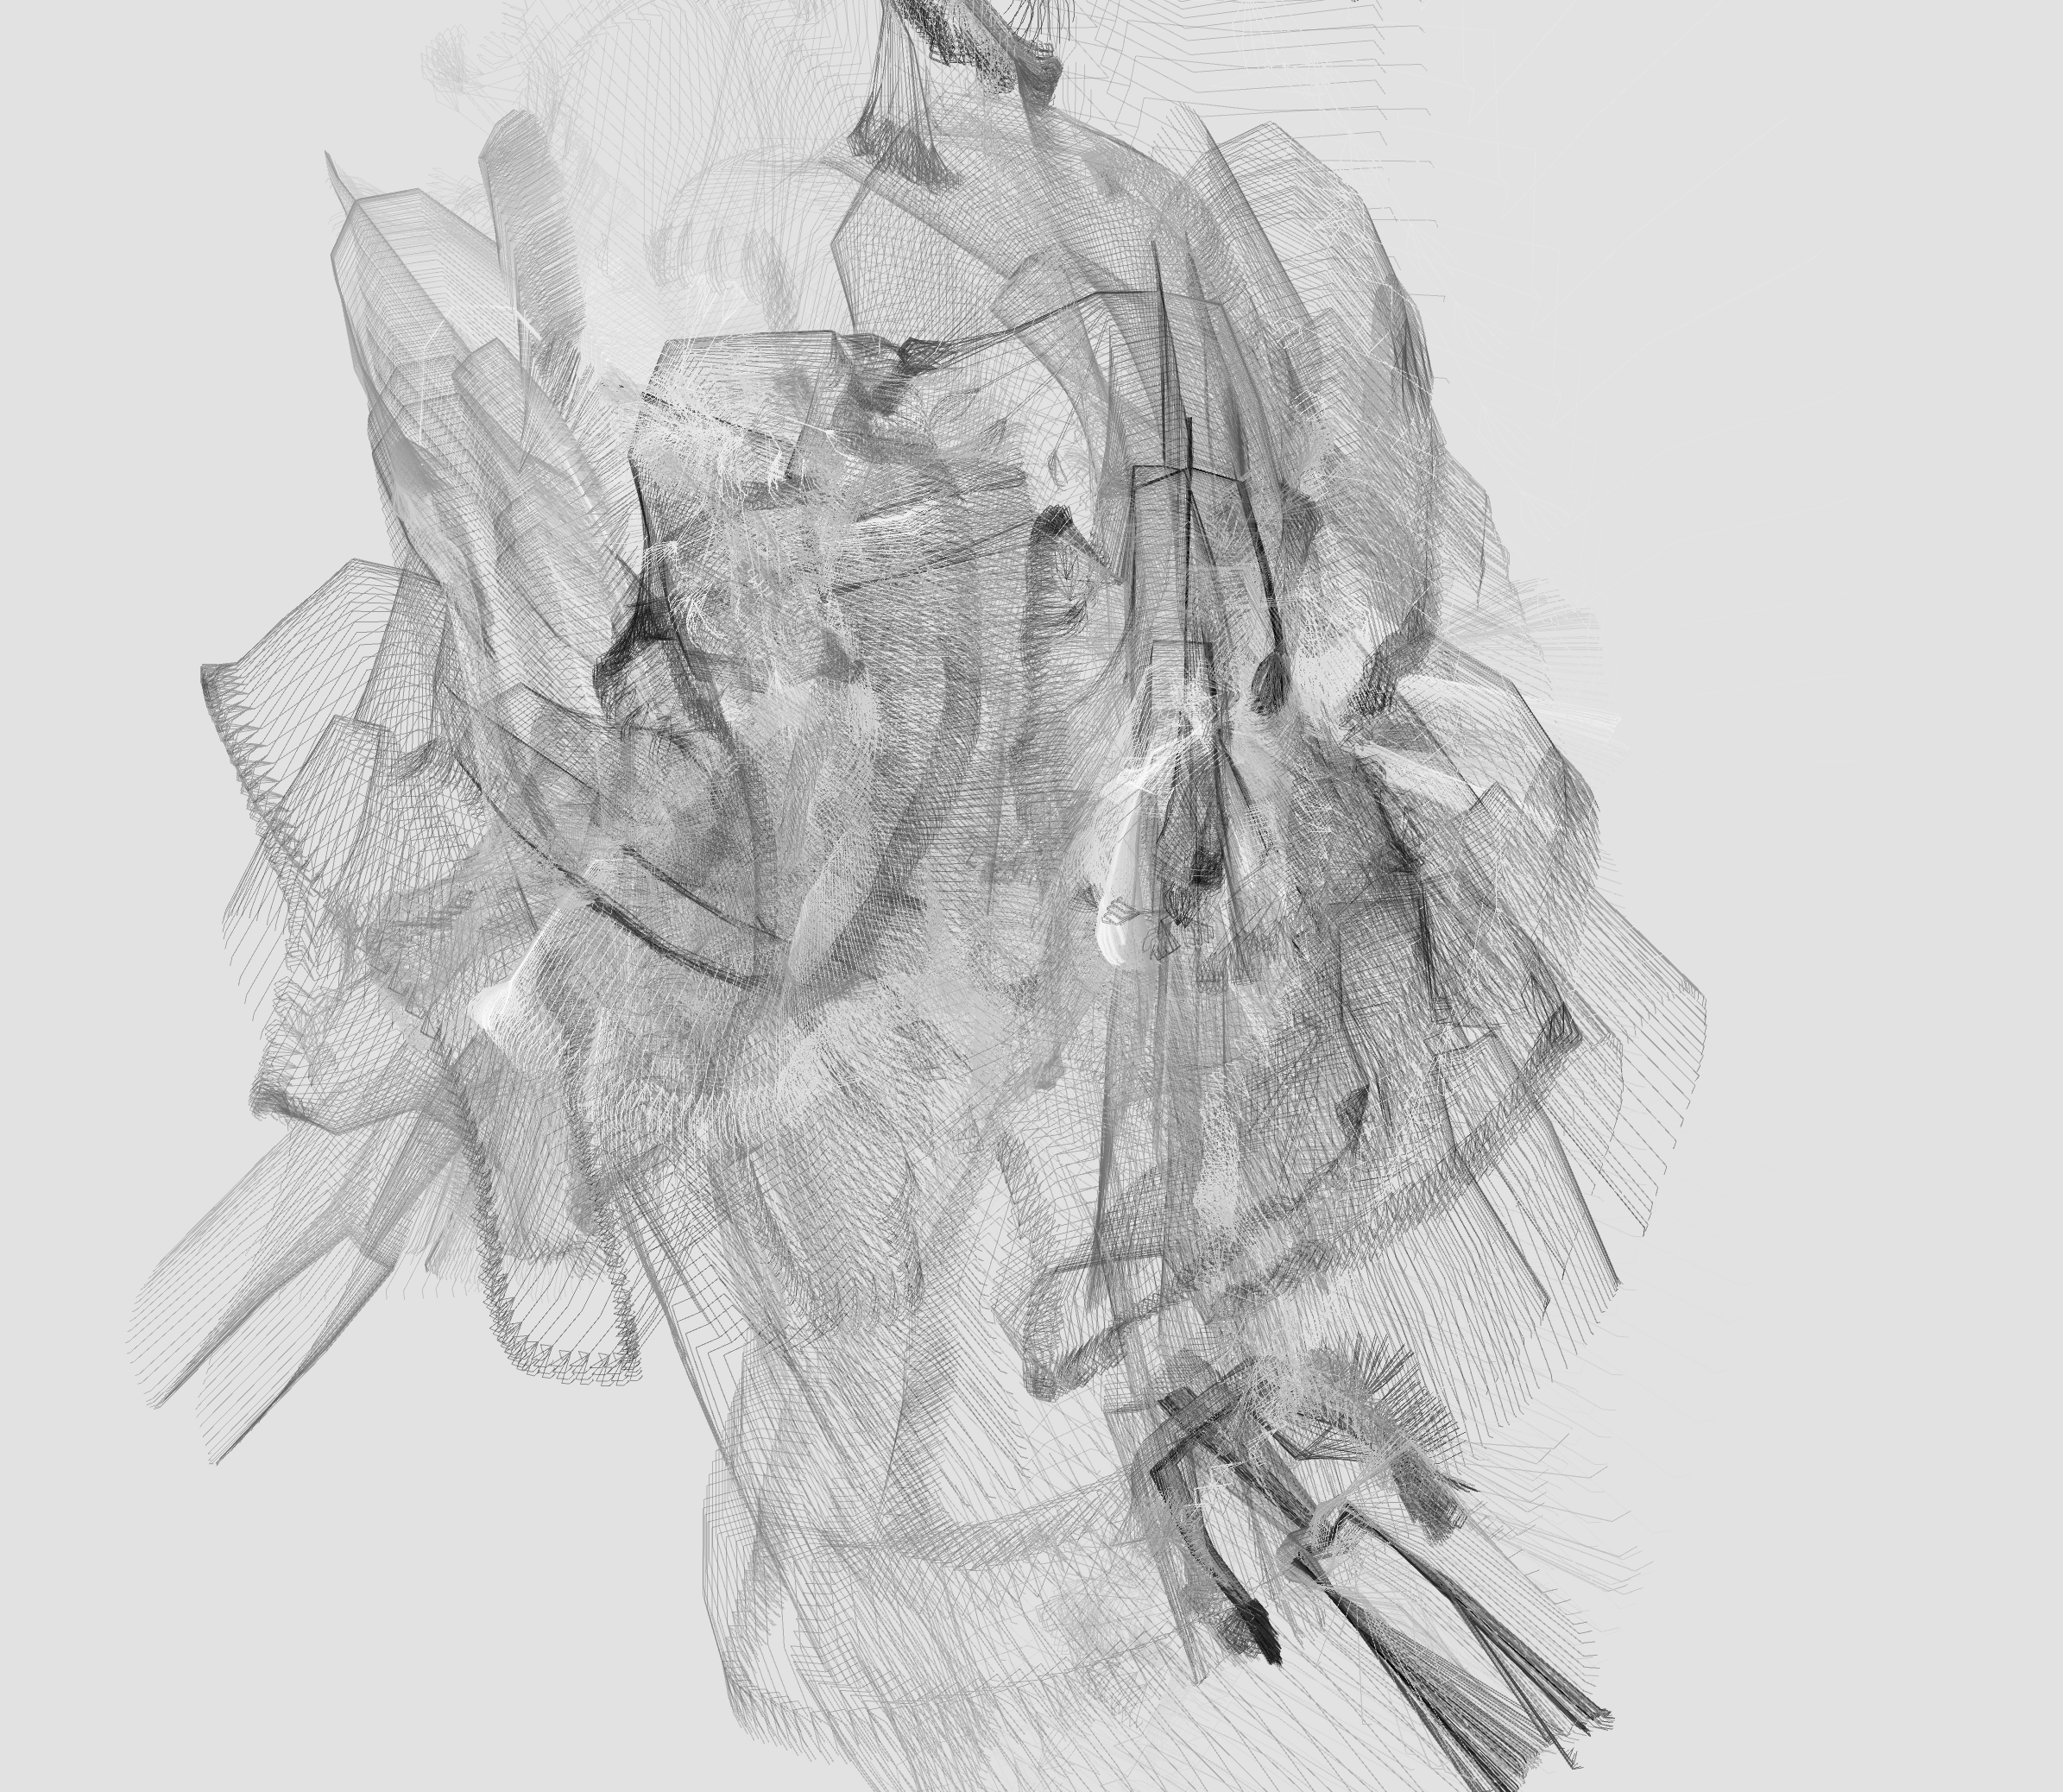
This project was a collaboration with the wonderful Kadoin, where we explored the idea of arbitrary limb duplication to explore strange—sometimes horrific—semi-human skeletons.
By imagining the skeleton as a collection of bones, we looked at what could happen if skeletons could augment themselves by collecting more bones, adding extra limbs, and building new bodies.
The frankensteined results are uncanny but familiar forms that make us wonder about what each of these creatures might do with those extra limbs, how they might walk and interact, and what their unique structure allows them to do.
This project was created in processing, using sample code from Golan’s BVH player. We ran into an unfortunate heap of technical trouble when executing this rather conceptually simple project, which caused bugs with rendering anything other than lines for the limbs, as well as being unable to render the terminals of the duplicated bones.
Ideally, we would have loved to attach more fleshy, deforming geometry to the skeletons, and refine the visual presentation beyond just wireframes, but were satisfied with how compelling the simple output was.
import java.util.List;

class PBvh
{
  BvhParser parser;
  PBvh(String[] data) {
    parser = new BvhParser();
    parser.init();
    parser.parse( data );
  }
  void update( int ms ) {
    parser.moveMsTo( ms );//30-sec loop
    parser.update();
  }
  void drawBones(boolean renderExtras) {
    noFill();
    stroke(255);
    strokeWeight(2);

      List theBvhBones = parser.getBones();
      int nBones = theBvhBones.size();       // How many bones are there?
      BvhBone aBone;

      /////////MAIN BONE LOOP/////////
      for (int i=0; i<nBones; i++) {         // Loop over all the bones

        PVector anchorTranslation = new PVector (0,0,0);
        pushMatrix();

        aBone = theBvhBones.get(i);

        /////////////////////////////////////////////////////////////////
        //Manual Duplicated adding
        if (aBone.getName().equals("LeftForeArm") && renderExtras == true) {
          aBone.duplicates.add("Head");

          stroke(255);

          //draw root bone in original position
          line(
            aBone.absPos.x,
            aBone.absPos.y,
            aBone.absPos.z,
            aBone.getChildren().get(0).absPos.x,
            aBone.getChildren().get(0).absPos.y,
            aBone.getChildren().get(0).absPos.z);

          // Look through duplicates array, find the matching translation Vectors (where to attach the duplicated limb)
          for (String dupe : aBone.duplicates) {
            for (int l = 0; l < theBvhBones.size(); l++) {
              if (theBvhBones.get(l)._name.equals(dupe))
              {
                //then, save the translation in preparation for drawing duplicate
                anchorTranslation = new PVector(theBvhBones.get(l).absPos.x, theBvhBones.get(l).absPos.y, theBvhBones.get(l).absPos.z);
              }//end if
            }//end the for loop
          }//end for dupe

          BvhBone currentBone = aBone;
          float modifier = 4.0;
          translate(-currentBone.absPos.x,-currentBone.absPos.y,-currentBone.absPos.z);
          while (currentBone.hasChildren()) {
            List currentChildren = currentBone.getChildren();

            for (int j = 0; j < currentChildren.size(); j++) {
              pushMatrix();
              translate(anchorTranslation.x,anchorTranslation.y,anchorTranslation.z);

              line(
                currentBone.absPos.x,
                currentBone.absPos.y,
                currentBone.absPos.z,
                currentChildren.get(j).absPos.x,
                currentChildren.get(j).absPos.y,
                currentChildren.get(j).absPos.z);

              println(currentBone);
              println(currentChildren.size());
              println(currentChildren.get(0));
              println("--------");

              List grandchildren =  currentChildren.get(j).getChildren();

              for (int k = 0; k < grandchildren.size(); k++) {

                //line(
                //  currentChildren.get(j).absEndPos.x*0,
                //  currentChildren.get(j).absEndPos.y*0,
                //  currentChildren.get(j).absEndPos.z*0,
                //  grandchildren.get(0).absPos.x,
                //  grandchildren.get(0).absPos.y,
                //  grandchildren.get(0).absPos.z);
              }//end grandchildren for
              popMatrix();
            }//end current children for

            BvhBone nextBone = currentChildren.get(0);
            currentBone = nextBone;

          }//end of while loop
        }//end specific bone if
        /////////////////////////////////////////////////////////////////

        /////////////////////////////////////////////////////////////////
        //Manual Duplicated adding
        if (aBone.getName().equals("RightForeArm") && renderExtras == true) {
          aBone.duplicates.add("Head");

          stroke(255);

          //draw root bone in original position
          line(
            aBone.absPos.x,
            aBone.absPos.y,
            aBone.absPos.z,
            aBone.getChildren().get(0).absPos.x,
            aBone.getChildren().get(0).absPos.y,
            aBone.getChildren().get(0).absPos.z);

          // Look through duplicates array, find the matching translation Vectors (where to attach the duplicated limb)
          for (String dupe : aBone.duplicates) {
            for (int l = 0; l < theBvhBones.size(); l++) {
              if (theBvhBones.get(l)._name.equals(dupe))
              {
                //then, save the translation in preparation for drawing duplicate
                anchorTranslation = new PVector(theBvhBones.get(l).absPos.x, theBvhBones.get(l).absPos.y, theBvhBones.get(l).absPos.z);
              }//end if
            }//end the for loop
          }//end for dupe

          BvhBone currentBone = aBone;
          float modifier = 4.0;
          translate(-currentBone.absPos.x,-currentBone.absPos.y,-currentBone.absPos.z);
          while (currentBone.hasChildren()) {
            List currentChildren = currentBone.getChildren();

            for (int j = 0; j < currentChildren.size(); j++) {
              pushMatrix();
              translate(anchorTranslation.x,anchorTranslation.y,anchorTranslation.z);

              line(
                currentBone.absPos.x,
                currentBone.absPos.y,
                currentBone.absPos.z,
                currentChildren.get(j).absPos.x,
                currentChildren.get(j).absPos.y,
                currentChildren.get(j).absPos.z);

              println(currentBone);
              println(currentChildren.size());
              println(currentChildren.get(0));
              println("--------");

              List grandchildren =  currentChildren.get(j).getChildren();

              for (int k = 0; k < grandchildren.size(); k++) {

                //line(
                //  currentChildren.get(j).absEndPos.x*0,
                //  currentChildren.get(j).absEndPos.y*0,
                //  currentChildren.get(j).absEndPos.z*0,
                //  grandchildren.get(0).absPos.x,
                //  grandchildren.get(0).absPos.y,
                //  grandchildren.get(0).absPos.z);
              }//end grandchildren for
              popMatrix();
            }//end current children for

            BvhBone nextBone = currentChildren.get(0);
            currentBone = nextBone;

          }//end of while loop
        }//end specific bone if
        /////////////////////////////////////////////////////////////////


        ////////////////////////////////STUFF THAT DRAWS THE ORIGINAL SKELETON/////////////////////////////////

        PVector boneCoord0 = aBone.absPos;   // Get its start point
        float x0 = boneCoord0.x;             // Get the (x,y,z) values
        float y0 = boneCoord0.y;             // of its start point
        float z0 = boneCoord0.z;

        if (aBone.hasChildren()) {
          println(aBone);

          // If this bone has children,
          // draw a line from this bone to each of its children
          List childBvhBones = aBone.getChildren();
          int nChildren = childBvhBones.size();
          for (int j=0; j<nChildren; j++) {
            BvhBone aChildBone = childBvhBones.get(j);
            PVector boneCoord1 = aChildBone.absPos;

            float x1 = boneCoord1.x;
            float y1 = boneCoord1.y;
            float z1 = boneCoord1.z;


            line(x0, y0, z0, x1, y1, z1);


          }//end if children loop
        } else {
          // Otherwise, if this bone has no children (it's a terminus)
          // then draw it differently.

          PVector boneCoord1 = aBone.absEndPos;  // Get its start point
          float x1 = boneCoord1.x;
          float y1 = boneCoord1.y;
          float z1 = boneCoord1.z;

          line(x0, y0, z0, x1, y1, z1);

          String boneName = aBone.getName();
          if (boneName.equals("Head")) {
            pushMatrix();
            translate( x1, y1, z1);
            ellipse(0, 0, 30, 30);
            popMatrix();
          } //end if head
        } //end else
        popMatrix();
      }//end loop over all bones
    } //end drawbones
  } //end class BVH
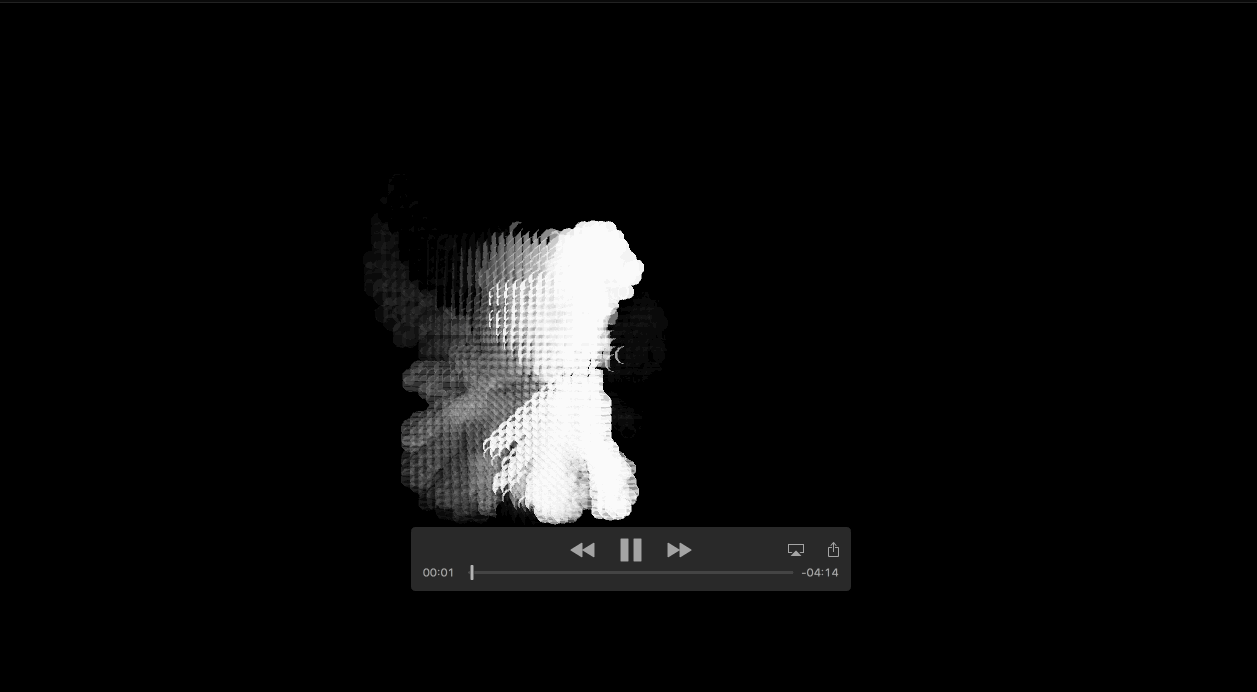
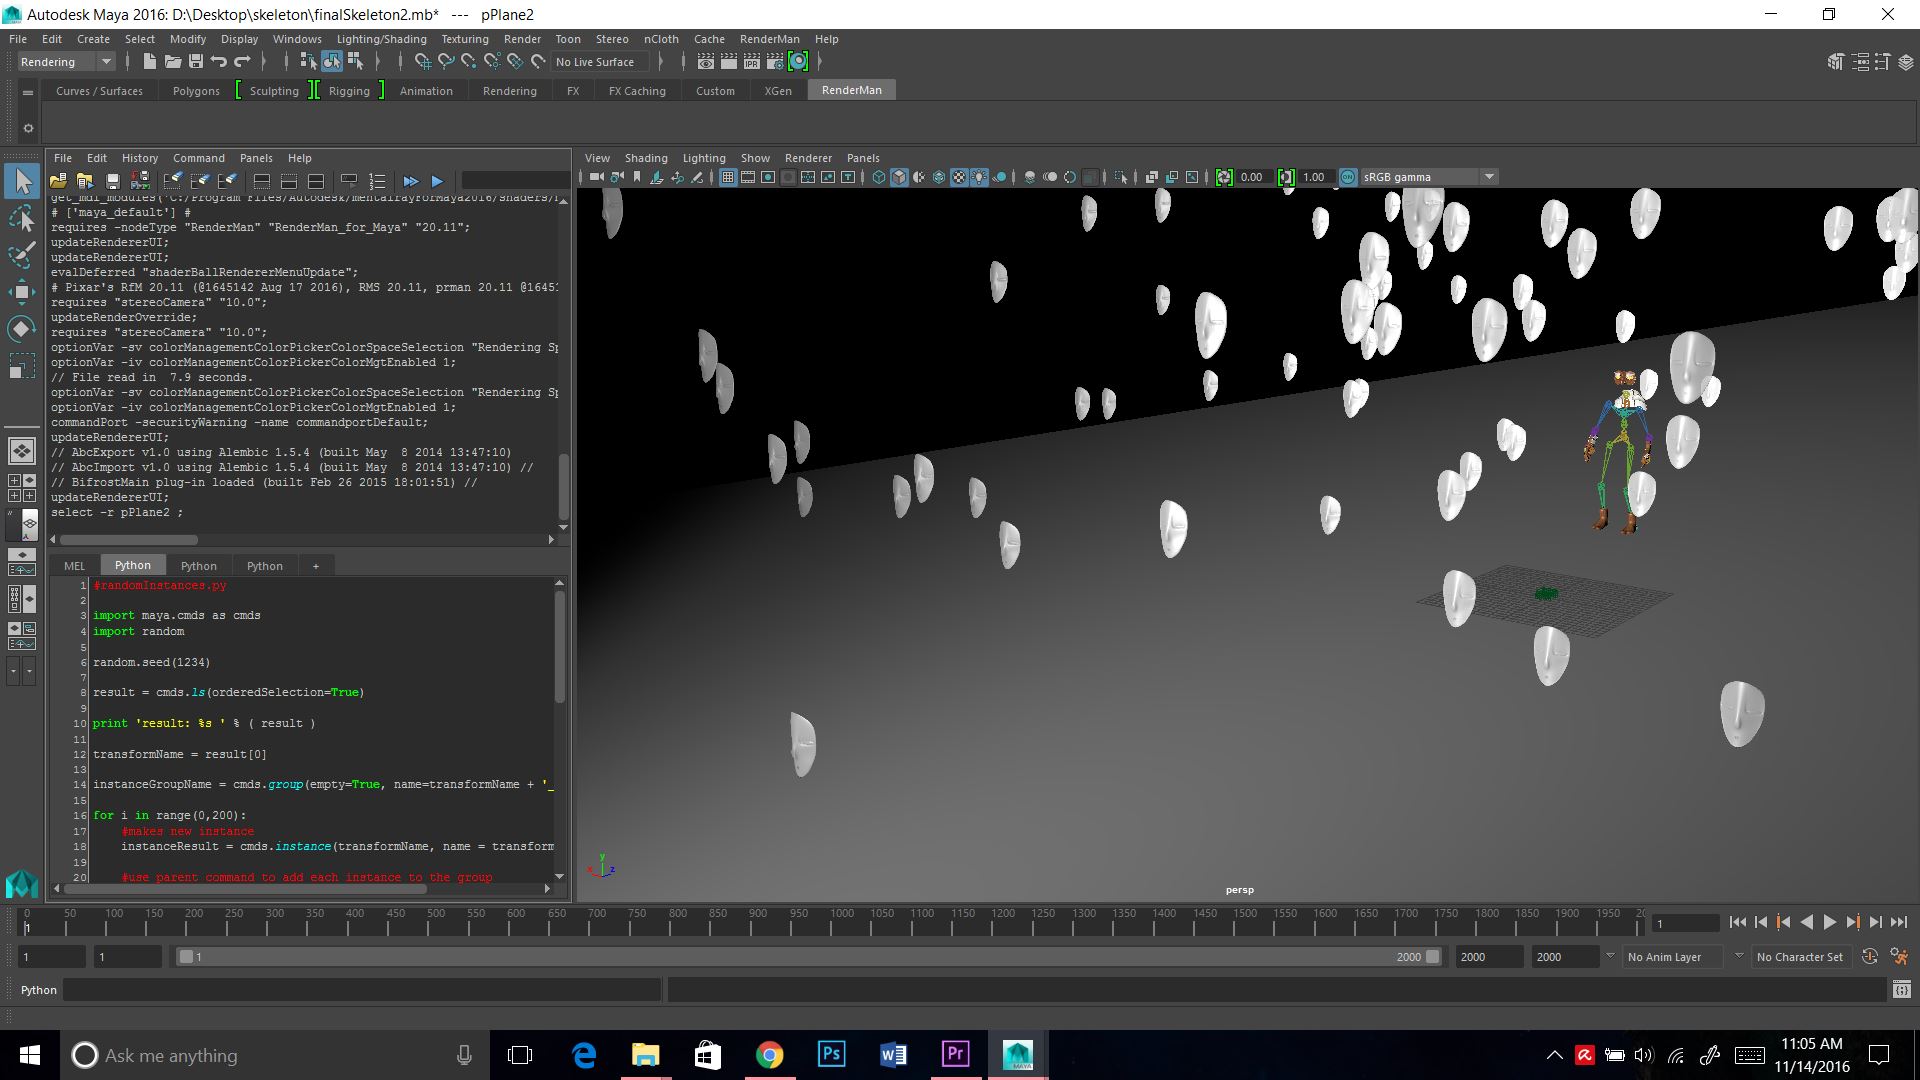
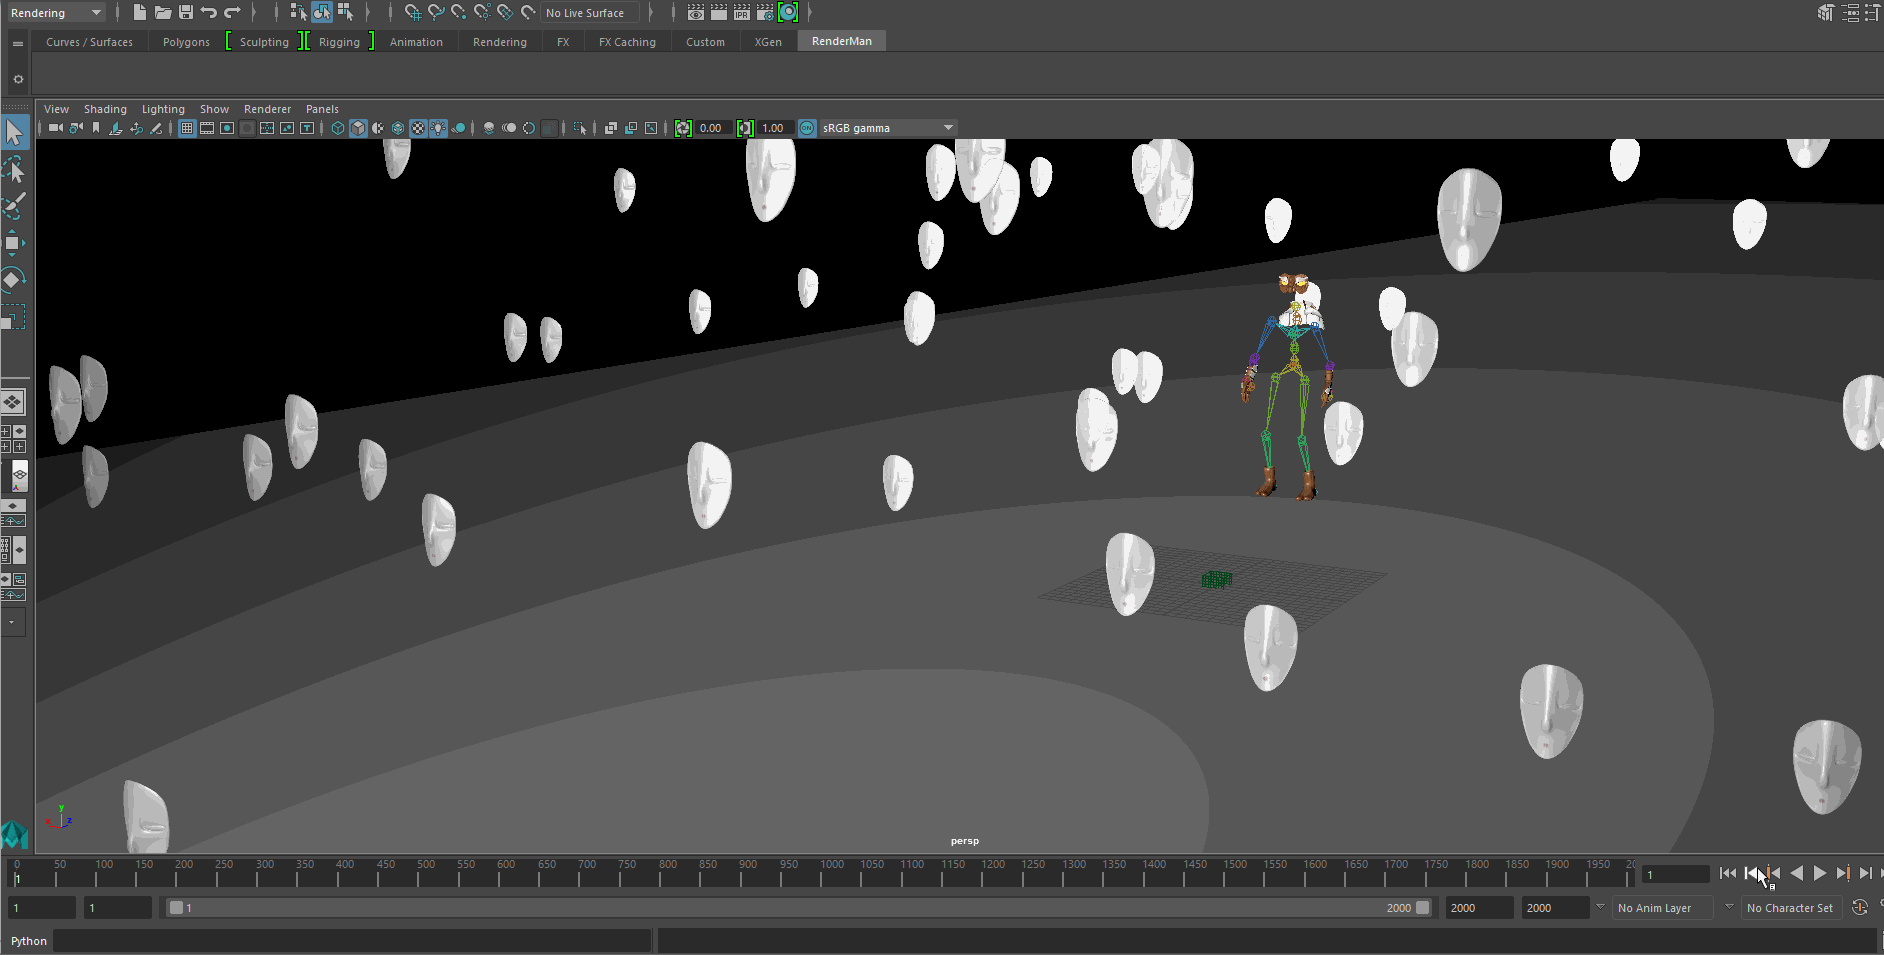
Gif of time slider animation pre-render in Maya (you may need to click it to see it run):
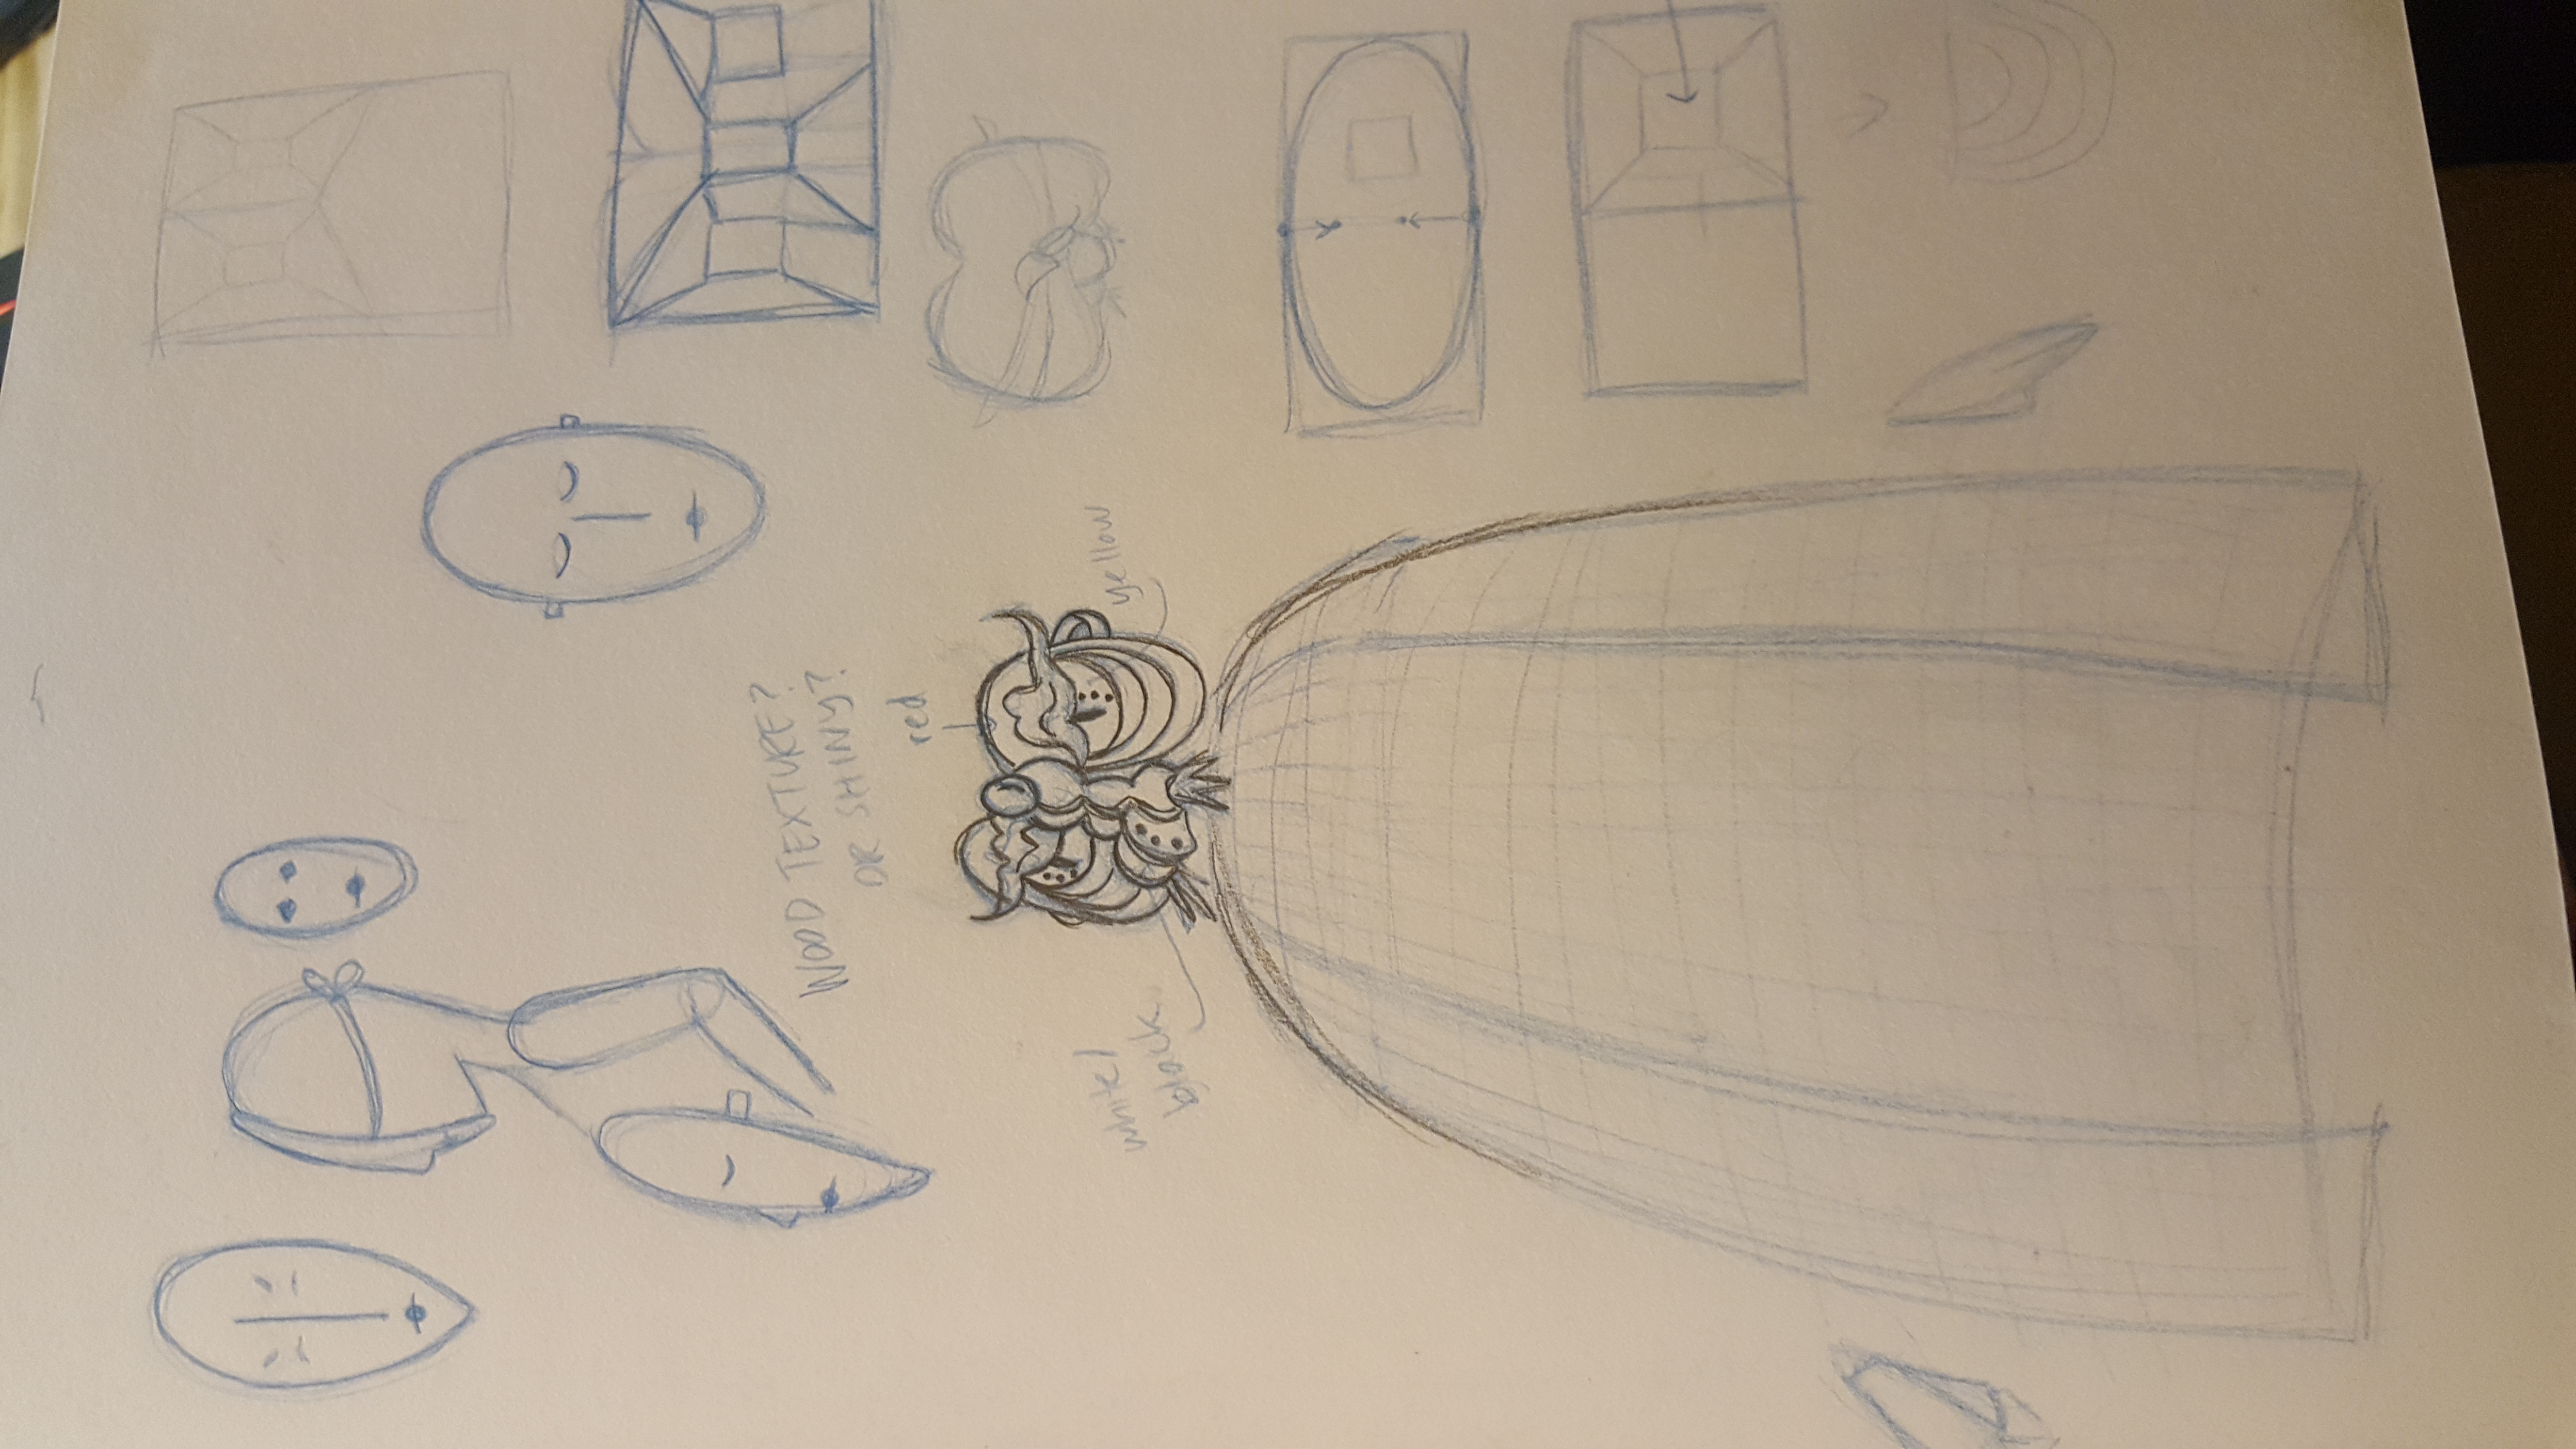
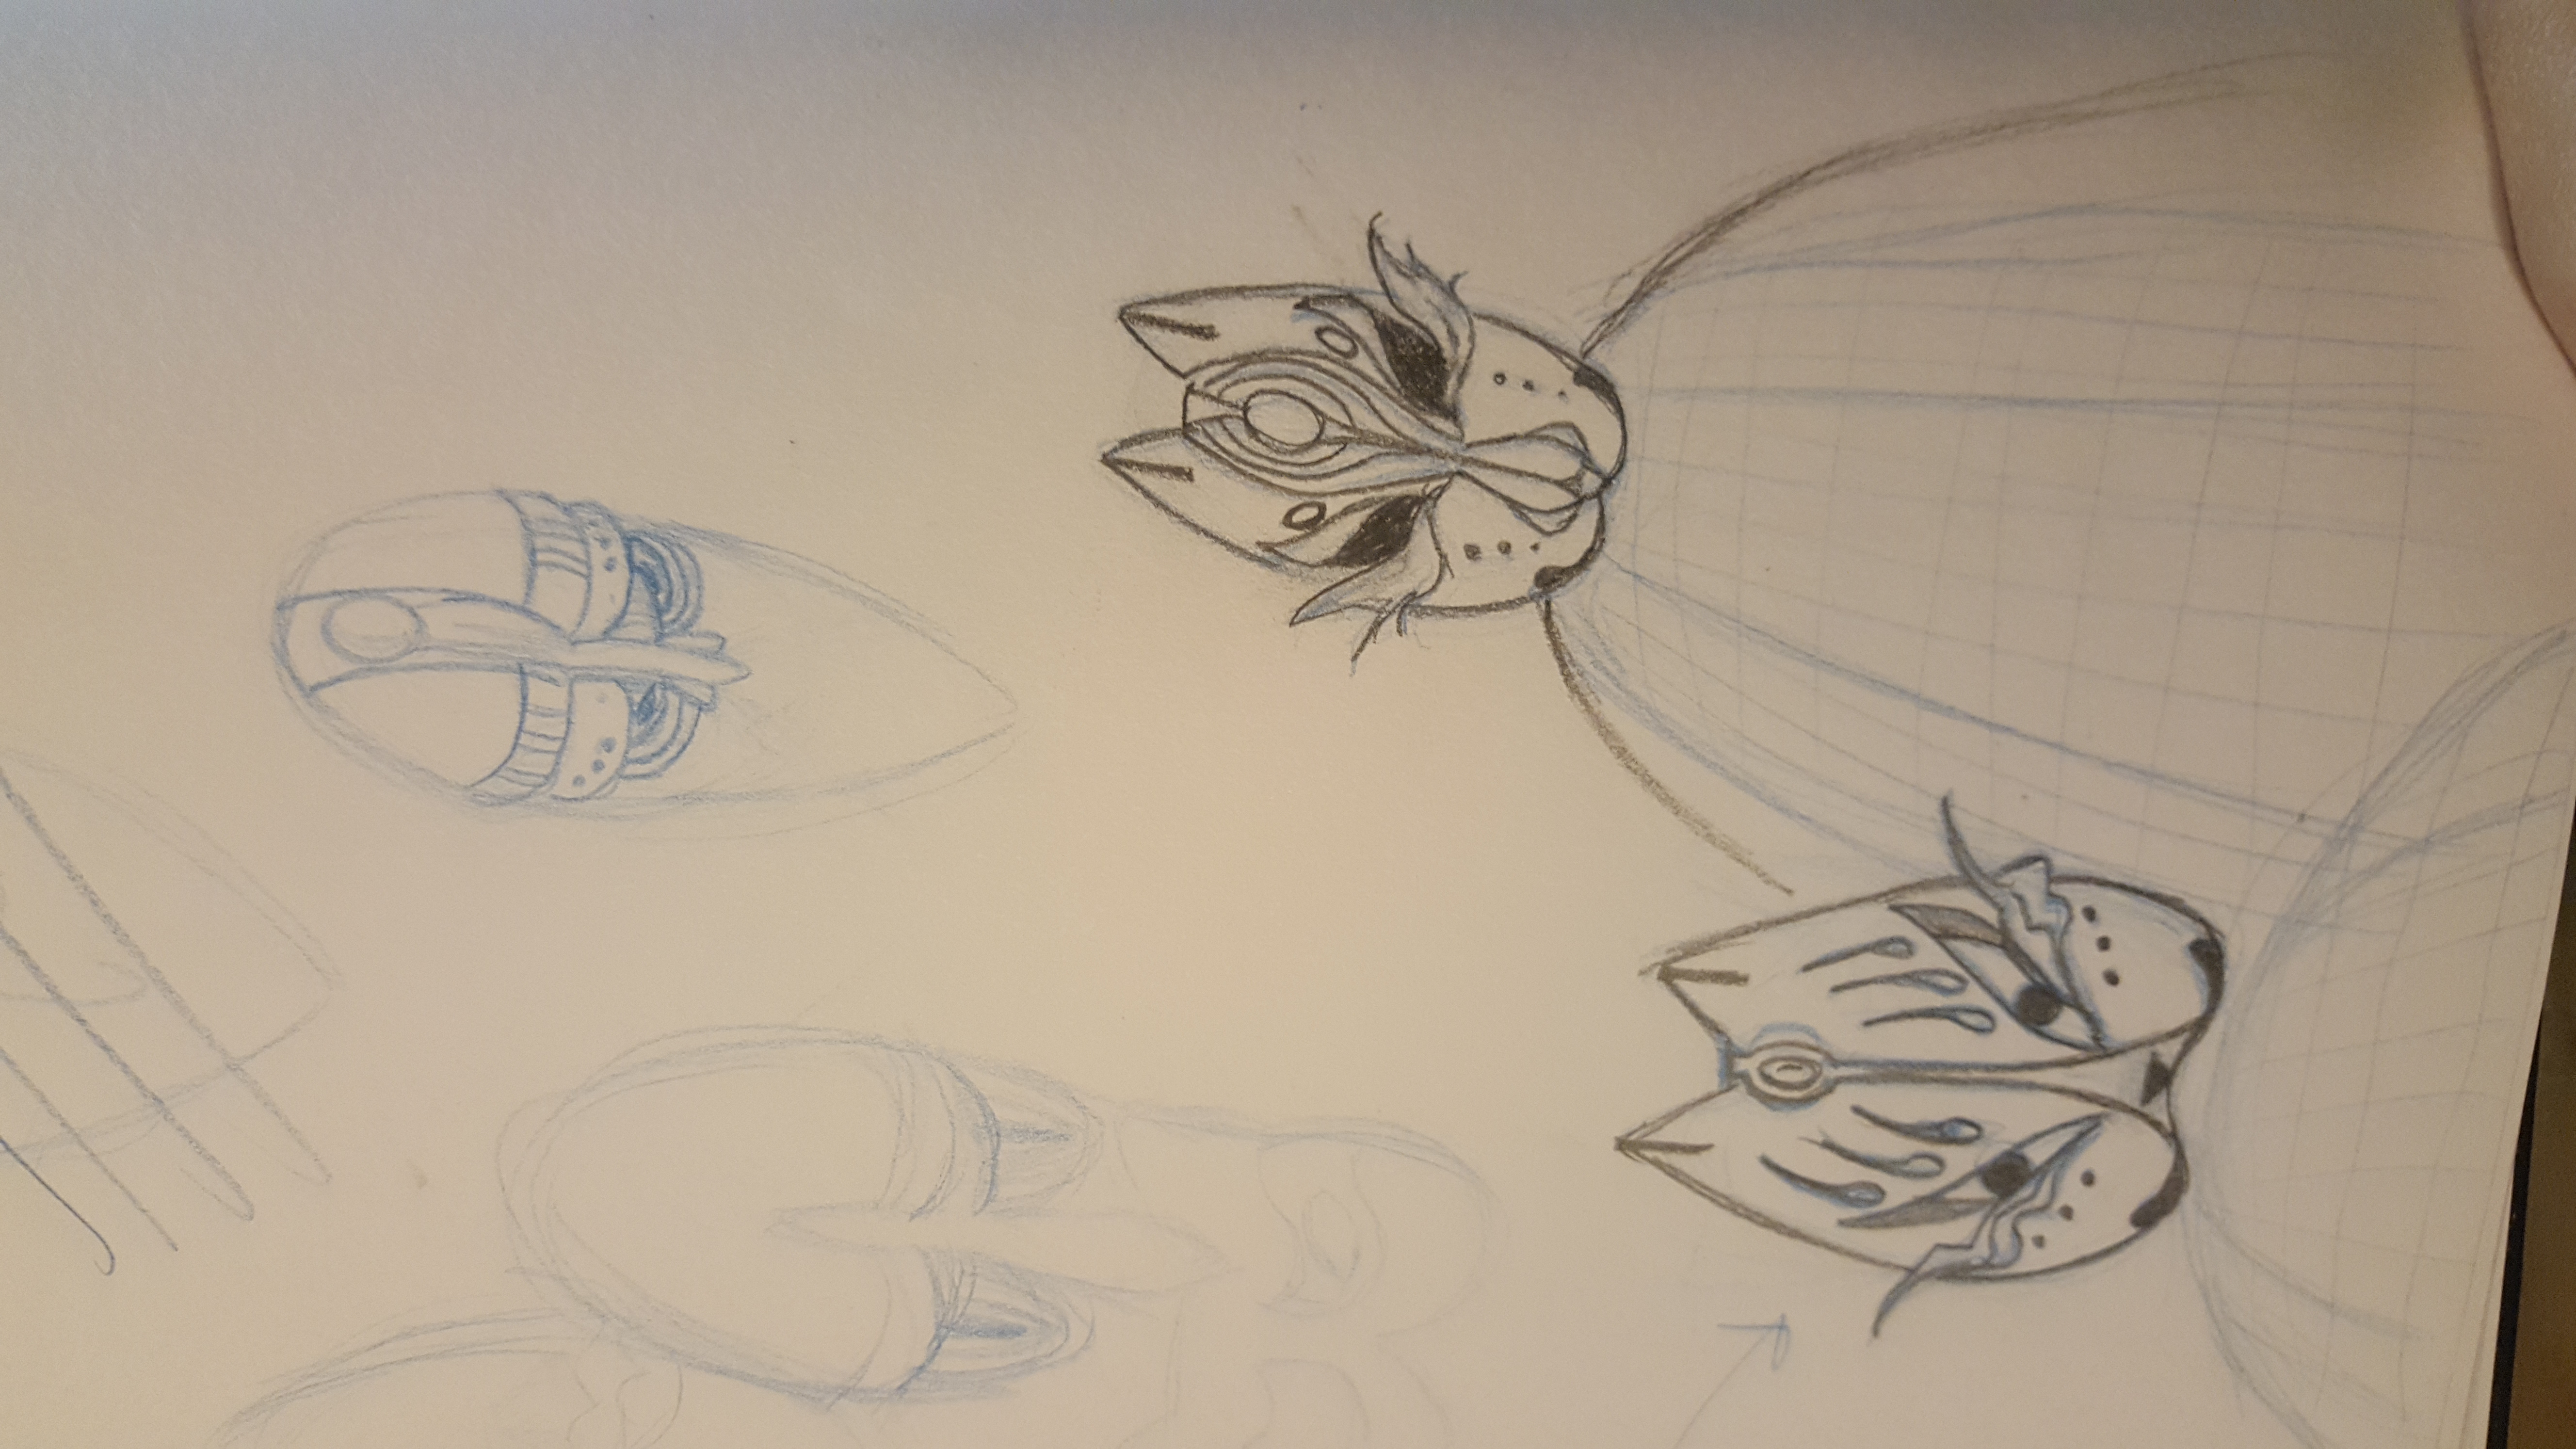
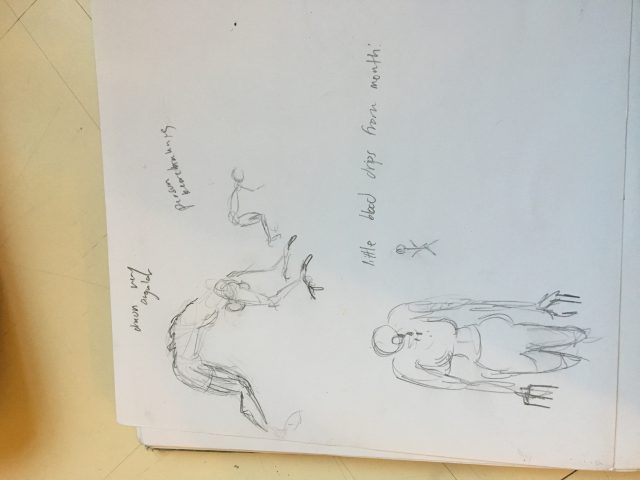
Sketches I did of the characters:
For my project, Golan suggested that instead of using Processing or Three.js, I could learn scripting in Maya because of my interest in animation. I was very excited to start this project, and took to it with a more story-focused mindset with the motion capture than I think most of the class did. I wanted to use the scripting to do things in Maya that I couldn’t do by hand (or at least couldn’t bear to do by hand or in the given time frame) that would supplement a story, no matter how short. The initial idea I had for this was a pair of disgraced/fallen/unfit samurai that circled each other in blame, getting closer and farther together with an audience of masks turning to look always at the two of them and closing in gradually. Eventually, I realized I didn’t have time to model two samurai and settled on modelling the shell (mask, gloves, socks, cape) of a disgraced/fallen/unfit samurai warrior and trying to achieve a feeling of melancholy and nostalgia for a better time. I wanted to use python scripting to generate and randomly place another modelled mask, and make it so that whenever the main mocap samurai moved, the masks would turn their faces to always follow him. Starting this project, I watched video tutorials on how to python script in Maya, following along with them. After figuring out if I could do what I wanted to do, which actually the video tutorials basically covered, I started modelling. Before this project, I had only had a bit of basic modelling experience and a general broad overview of what Maya could do. The modelling ended up taking me more time than I thought. Afterwards, I also learned how to import a BVH file into Maya and how to rig/bind a model to the BVH skeleton. When I got to coding, I came to an unexpected circumstance. Although the masks would turn to face the samurai, after the samurai was binded to the skeleton, this no longer worked. At first I tried to bind the skeleton different ways, but in the end I made a separate object that I gave 100% transparency that I hand animated to follow the samurai around. The masks then followed that object. In the end, I didn’t end up liking the effect of the turning masks because they made the scene more confusing because the masks didn’t turn enough to be horribly noticeable. After finally getting everything set up and moving, I learned how to render. This is the first time I’ve rendered a scene, and I didn’t expect the end number of frames to be around 2000. The 2000 frames took longer to render than I thought they would. I tried to change the frame rate to 24 fps, but doing so significantly slowed down the mocap. The final step was to take my rendered scenes and stitch them together in Premiere. The end product was slower than it looked in Maya so I sped it up, utlimately shortening it by half, and also rendered darker than my test frame renders. I didn’t have time to re-render all the frames, but I think it was good experience going into the next time I try to render something. In the end I think I’m satisfied with the project, but I would definitely like to do more with it given more time to really get things to move, thinking more interactively along with my story-focus and getting more interactivity (leaving enough time for when things I want to work out don’t and so on). I want to utilize code more and dig deeper into what I can do with it, and also learn more the Maya-Python vocabulary.
Once again the WP-Syntax tool still hates me, and so here is the Github link to the code:
Mocap is cool. This project was fun just to get my hands on 3D software and also to actually see a mocap setup for the first time. Being my own model was not so great (my ‘performance’ is not very compelling, though I did try to do one of the dances from my generative book – just the foot pattern without much flourishing). Doing this reminds me I need to expand my network in Pittsburgh of performers, dancers, etc. – which I will do.
I didn’t write code for my final output, but I did get Golan’s example code working in Processing with my BVH. Then I moved onto exploring the 3D animation software, Cinema 4D. I’d learned a little of this program about two years ago, so it was great to get back into it a little. I think I’ll try more things with this software now. I know that scripting in Python is possible in Cinema 4D. I didn’t script in this project, but would try this on the second iteration.
The project was fun. My output isn’t thrilling, but I’m glad to play with 3D (and remember why I love editing animation/video) and learn about cloners, physics tags (rigid body, collider body, force, friction, etc), lighting effects, and using the mocap skeleton.
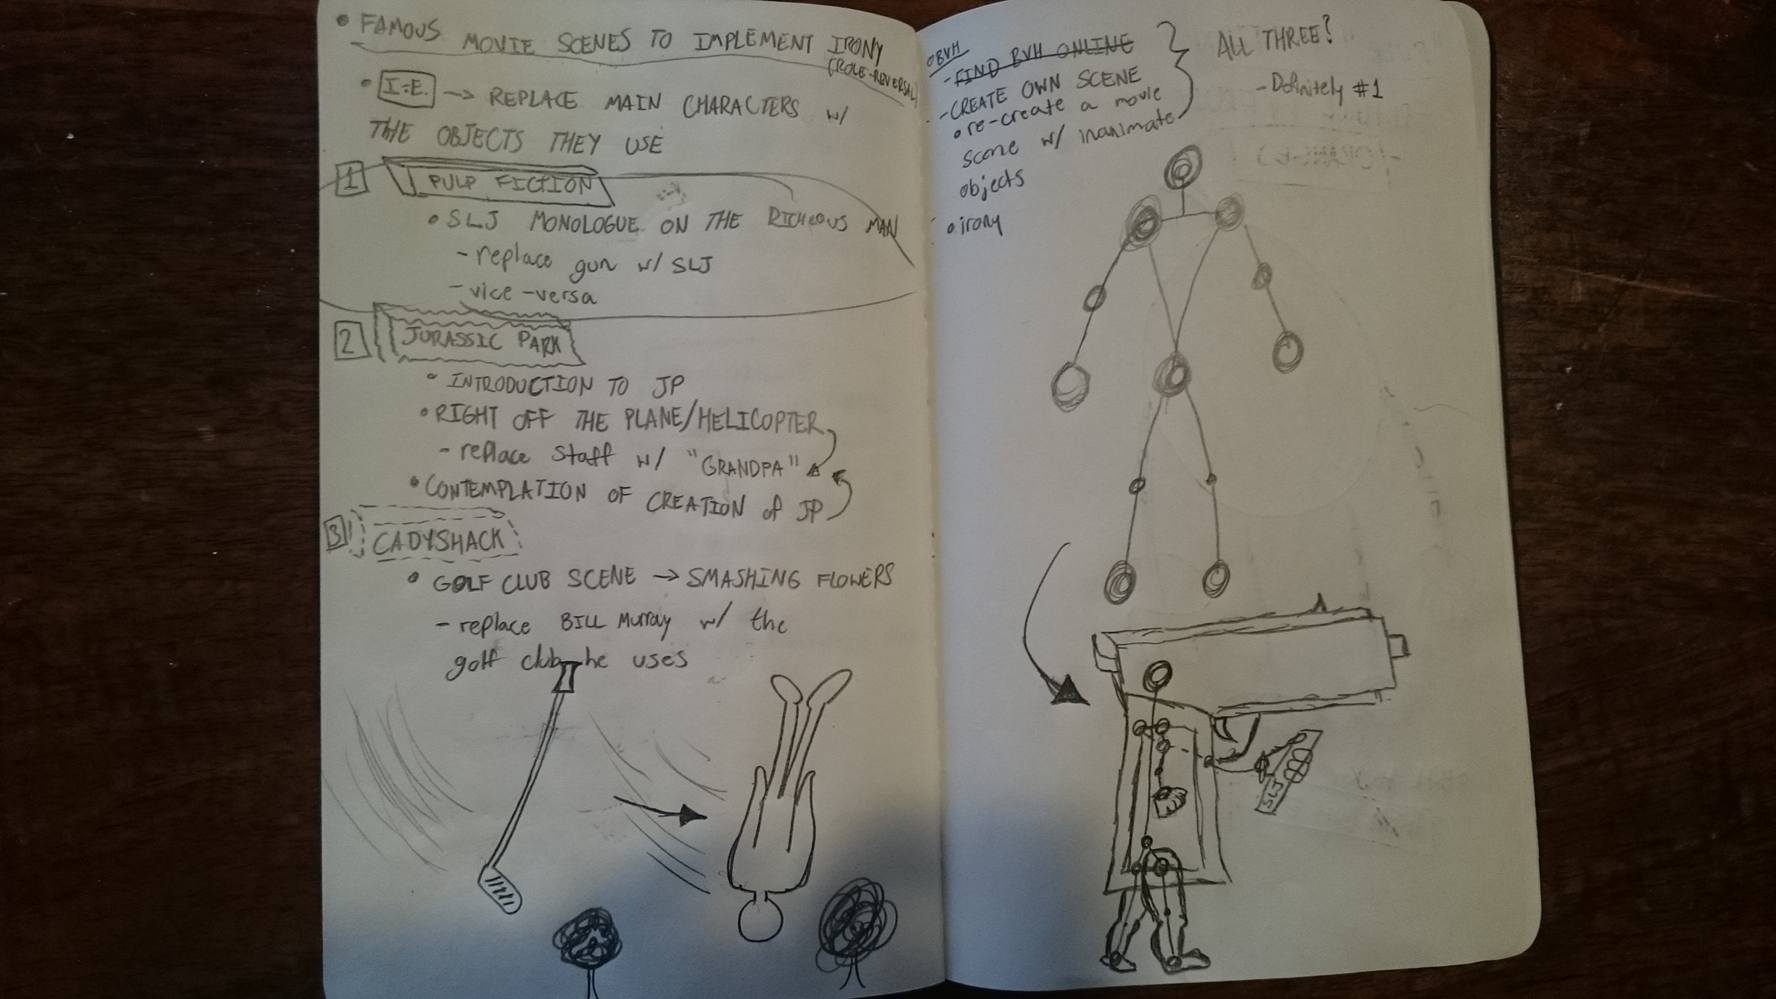
For my mocap project I wanted to do a study of the nCloth feature in Maya used with motion as well as get a basic grasp of the capabilities of scripting. In both aims I think I was quite successful. Each gif below is taken from separate playblasts (screencasts), all of which can be downloaded here--they chronicle the process of getting the result above.
Process
To start I knew I wanted some fairly clean mocap data– capturing it myself would come with its own set of challenges. Mixamo‘s animation library is pretty extensive and set up with Maya takes practically no time (setting up the auto-rig feature is simple, easy and most importantly free), so I set up a simple bellydancing animation and looked at the character’s skeleton. The first script (2nd picture on the left) was basically a test which iterated through the skeleton and parent an object at its x and y coordinates. If one does not want any joints in the chain to have an object parented to them (such as the fingers, which were not very crucial in this particular animation) its easy enough to unparent them Mixamo skeleton and place them in a separate group.
My second script essentially did the same as the first but for a polyPlane instead (pictured bottom left). These would become nCloth once the feature was applied.
The most time-intensive part of the project was experimenting with the nCloth feature, which I knew to be pretty finicky to work with; keeping cloth simulations from glitching and flying in unexpected directions takes time. Tutorials are any Maya-user’s best friend, so I found a quick but helpful tutorial using a transform constraint to keep the cloth moving with the dancing form. My third script produced the gifs shown below, which essentially put into action each step the tutorial instruction but in code form.
Finally, my last script loops third script to create the final product shown below (minus the shading material). I ran the first one to create and parent spheres at every joint except the fingers, then ran the second one to create a plane at each joint as well. The last script iterates through each of those spheres and planes and assigns a collider, nCloth, (respectively) and then applies a transform constraint to the two, so the cloth follows the parented spheres. If one wishes to run the script more than once or on different objects, the iteration number must be updated accordingly, since when Maya creates nCloth it names it “polySurface” and then the next number in the outliner.
Conclusion
From this project, I learned that scripting isn’t that hard! Essentially all you are doing is translating into code every action you would be doing manually. Commands can easily be looked up, and even someone with limited knowledge of Python would be able to pick up on it quickly. There’s also a reference describing every command and its flags. One can even call the maya.mel.eval function which directly calls a MEL shell command. It made a project which would’ve been possible yet painstaking to do manually fairly quick and simple.
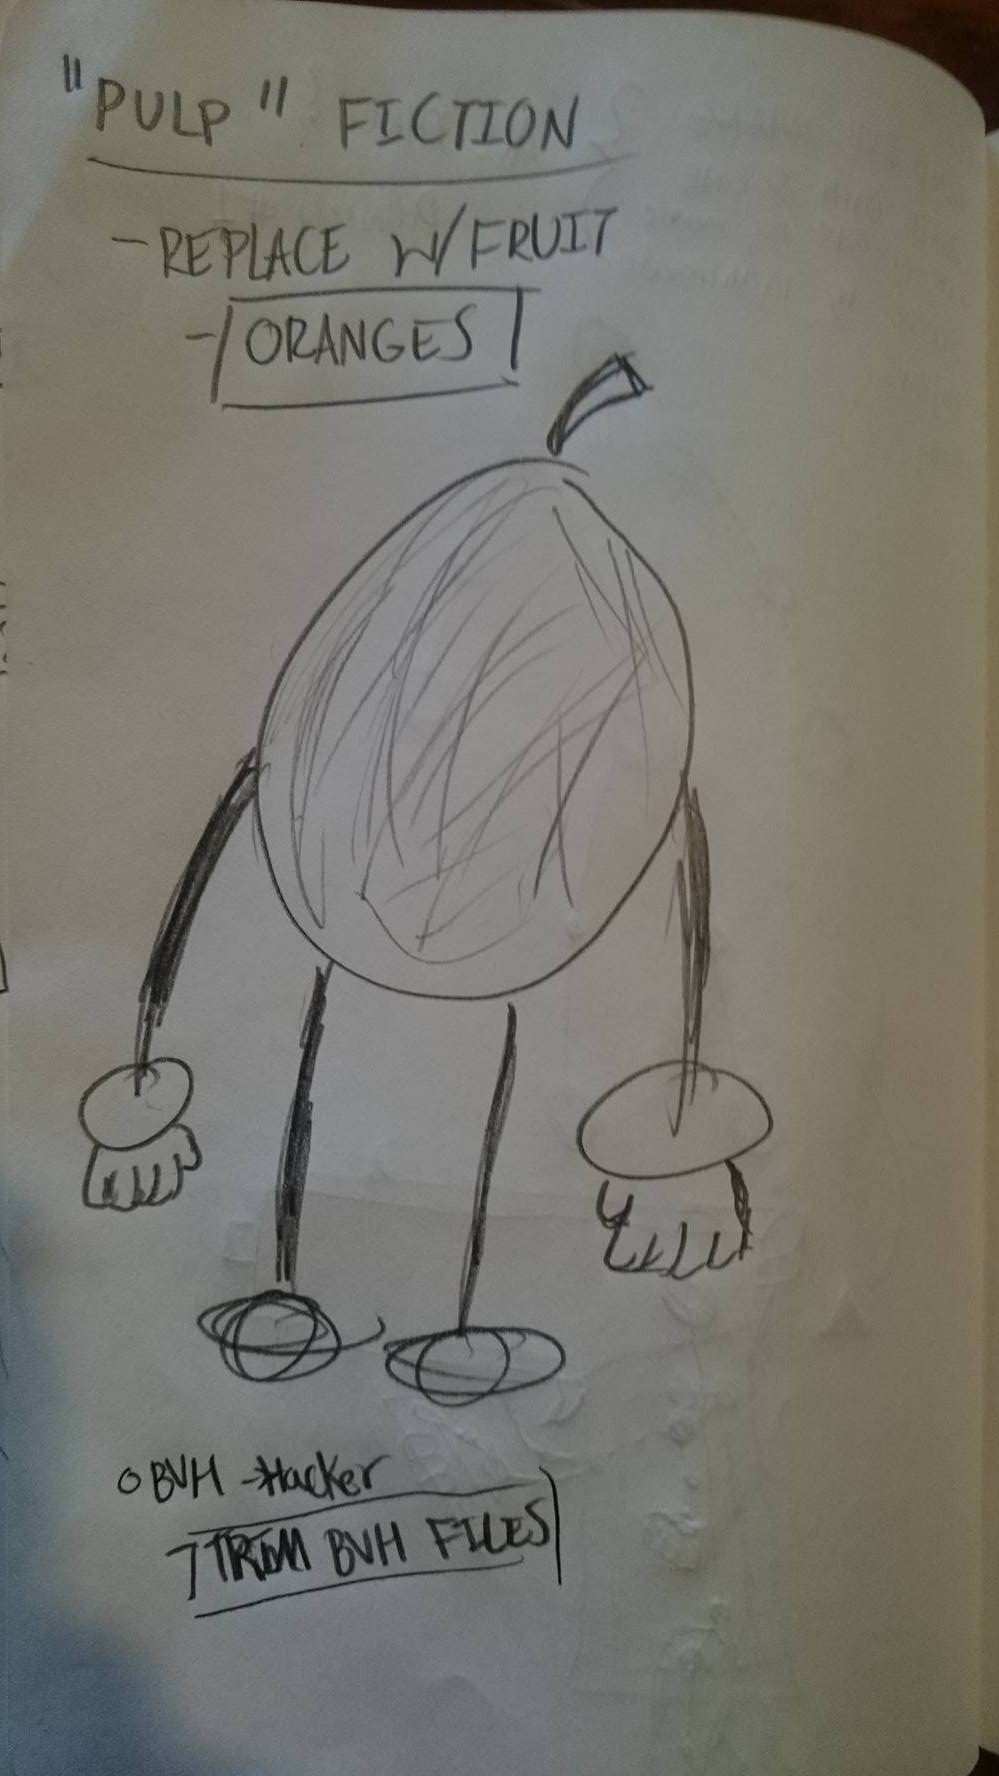
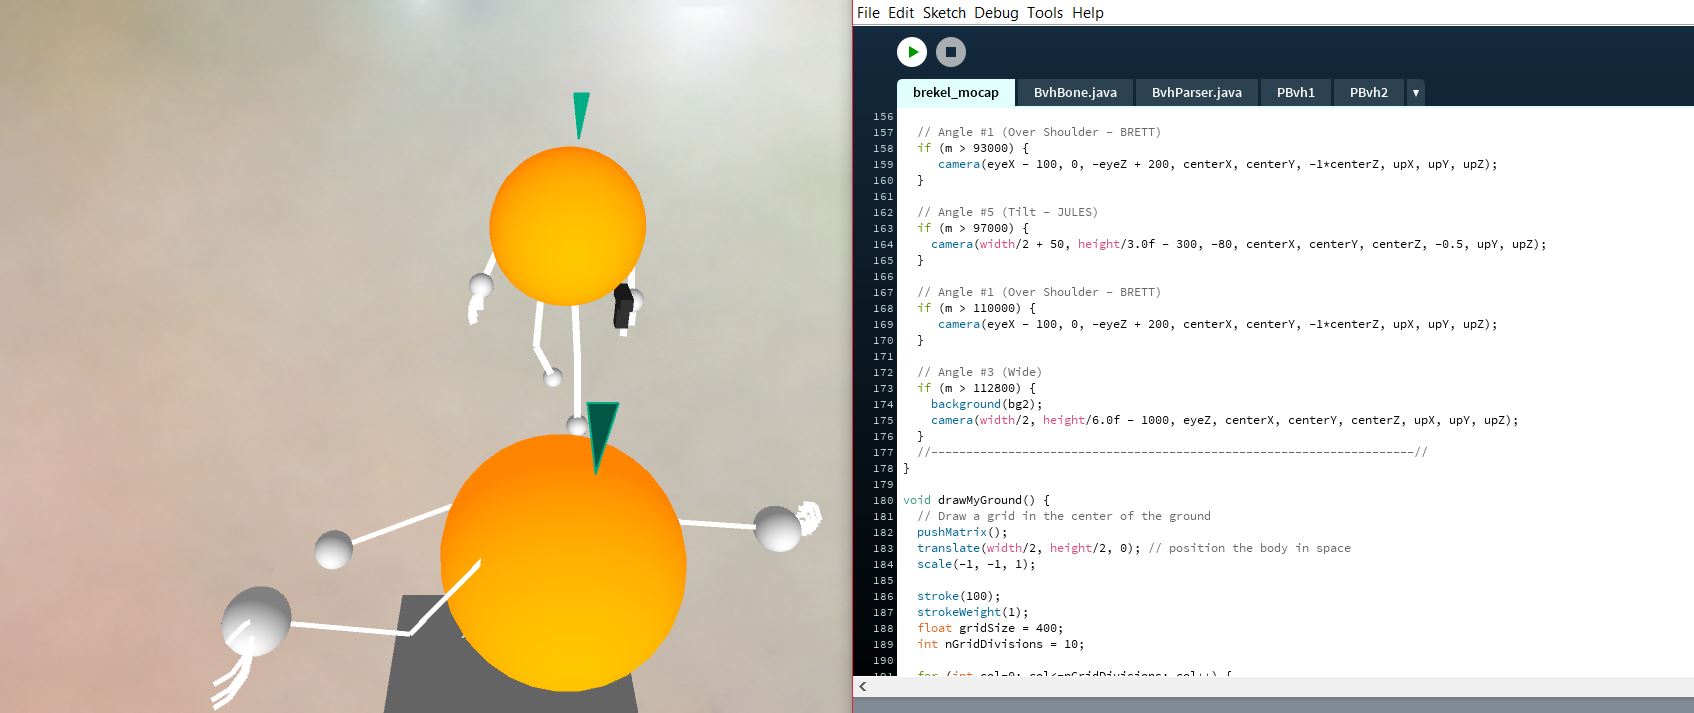
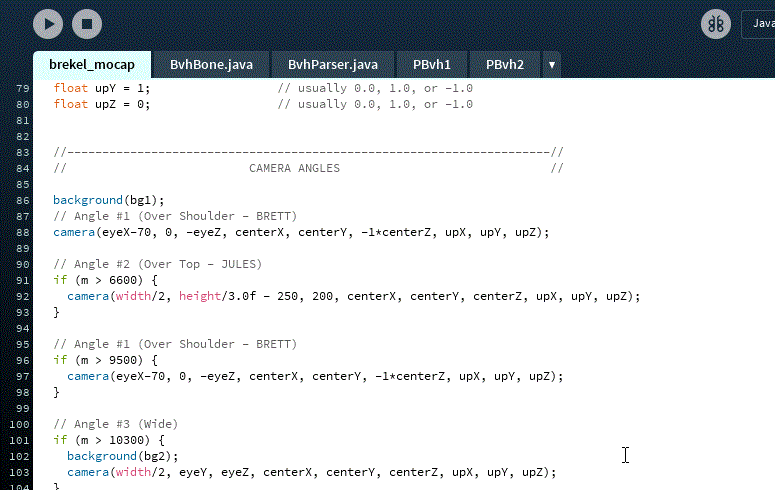
For this project, I really wanted to alter some characteristics of previously created narratives, in hopes of changing their concepts. My initial idea consisted of imitating lead roles in films and switching their living forms with inanimate objects. (i.e. – Replace movie characters with the tools/objects they use.)
PROCESS
When coming up with possible movies to imitate, I regarded the key objects (i.e. – staff, gun, etc.) and how they related to their character’s role in the film (i.e. – police guard, wizard, etc.). The film that I thought would convey this the best was Quinton Tarantino’s Pulp Fiction. More specifically, I aimed to re-create Jules, played by Samuel L. Jackson, and a specific dialogue he has with one of his boss’s “business partners”. After reviewing the scene multiple times, I then decided to change up my concept and replace the main characters with a sort of visual pun (Hint: Pulp Fiction and Oranges).
After finalizing details, I recorded multiple BVH files of Jules and the business partner, Brett. This process was a bit difficult since the camera used (Kinect V2) didn’t particularly like the fast movements I was trying to imitate while standing and sitting. As a result, some of the movements came out a little glitchy and some of the previous “aggressive” movements had to be slowed down.
After recording, I inputted the BVH files and adjusted camera angles similar to those in the actual scene. This took quite a while, as timing was key. After the scenes were lined up, I proceeded to create a set that would fit the new concept I was aiming for (i.e. – kitchen counter). I then rendered out the figures and adjusted certain characteristics at certain points of the film. For example, when the Brett Orange is shot, his color begins to change to a greener, more vile color.
REVIEW
I am particularly happy with the results I created. Although the rendering of the characters is not as high of quality as I would like for it to be, I am happy with the results given a rather chaotic week.
I will definitely continue to make this project better in the future (i.e. – work on developing software to automatically rotor-scope an inputted scene, make adjustments to character rendering for smoother movement, etc.). Once I have a better understanding of the bugs I’m facing and also have created more efficient programs to render out these scenes, I may even continue to recreate the entire film!
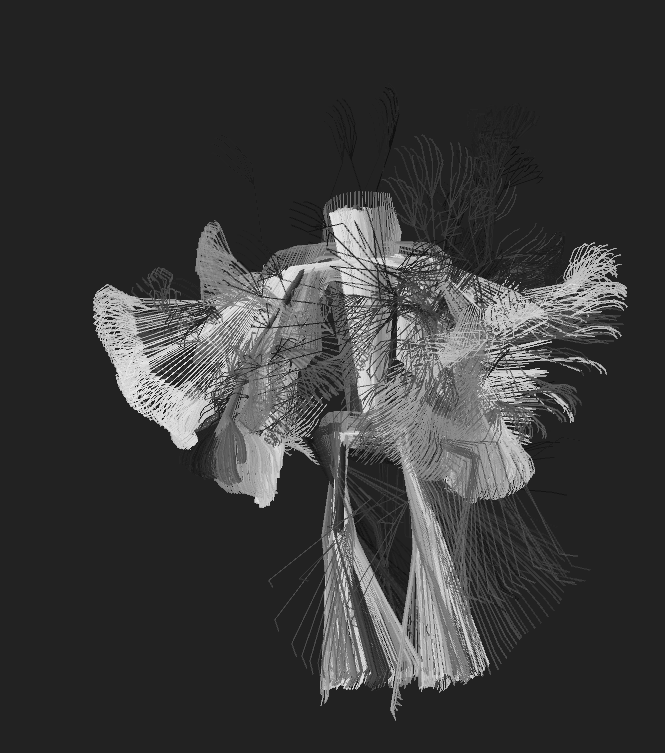
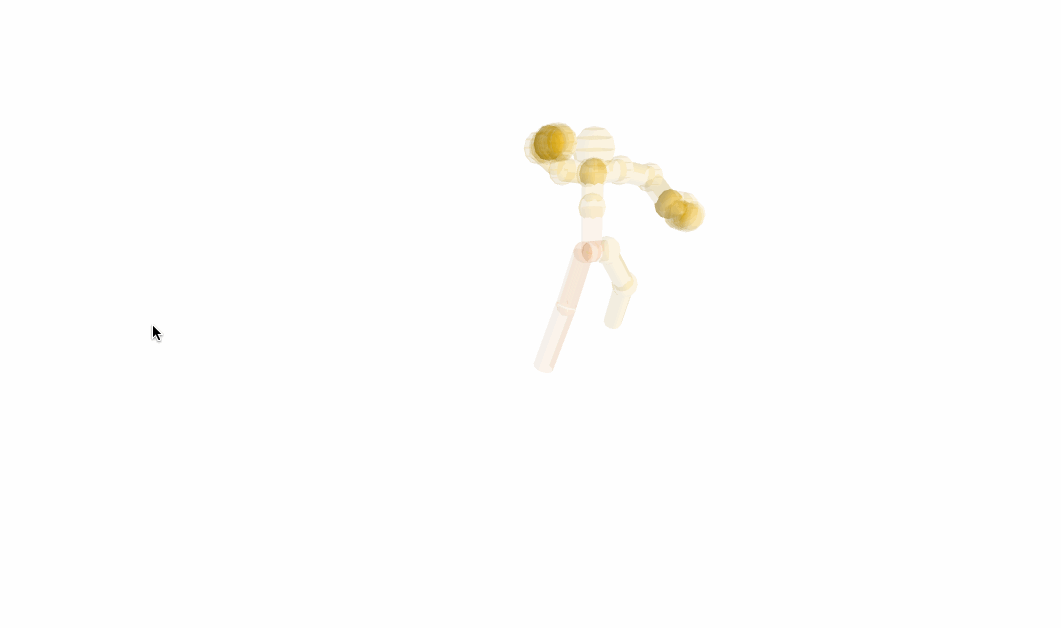
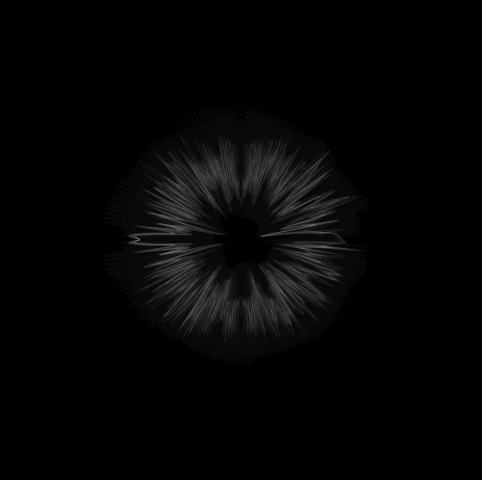
Originally I was collaborating with Keali, but as we worked on separate parts of out projects, our paths diverged. I started off by messing around with the three-dimensional representation of motion capture. I started by using PeasyCam to make the camera view changeable by use of the mouse. Then I experimented with what it would look like to show all the frames of the motion capture by not only drawing the current frame- this was inspired by Etienne-Jules Marey. The result of this was interesting at first, but it became incomprehensible overtime because everything ended up the same color.
Then I decided to cycle the color of the motion capture through all the different shades of gray, and to add opacity. Then I recorded a motion capture (thanks Kander) of someone moving very slowly so that the motion could be better shown as the lines would be closer together. The video and gif are on a smaller screen resolution, but my screenshots below are done on a 3840 x 2160 pixel screen. I also made it so that you can reset the program by pressing ‘x’ – this will redraw the background to whatever the current line color is
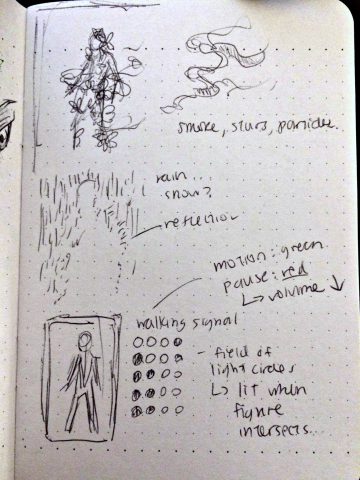
First iteration of ideas: a body as particles–initially I automatically conjured ideas that could be attributed to some sort of radiation or atmospheric effect: a figure of star particles, pixel dust, wisps of smoke–something simple, seamless, but with admirable aesthetics. This desire to represent some aura-based atmosphere also led to indirect models of the form, such as a delicate rain scene, where the body is invisible and the viewer can only see the body from where the rain bounces off. Another exploration regarded the soul butterflies, i.e. butterflies of death, a common trope in anime where glittering butterflies fly near lost souls or people close to death. (So, perhaps some iteration where if the model makes abrupt movements/shaking, he or she could shake the butterflies/death off of them–this shaking and loosening effect could be applied to any of my particle-based ideas).
I originally partnered with Takos to do this assignment and toy with some of these, and her ideas, and as we assigned ourselves parts to develop further, we actually continually drifted apart in our coding approaches and end goals… which eventually led to separate projects haha.
Ironically, my final product was an idea that she gave to me, including the link to the video below (thanks Takos!); once she presented this idea to me, I already thought of all the attributes needed that I thought would make the execution successful, and ended up going with it, while she decided to develop another completely different idea (that, ironically, was more of my usual aesthetic with seamless monochromatic visuals…) But cool thing is, I’m glad I explored something different anyway, and am actually very happy with how well-rounded my results became, in that even though it was a visually simple simulation, I feel like all the details and characteristics were well-considered and complement each other with purpose very much.
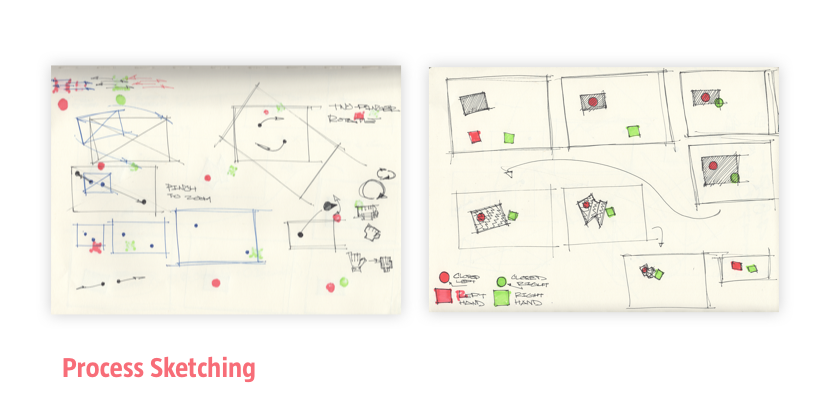
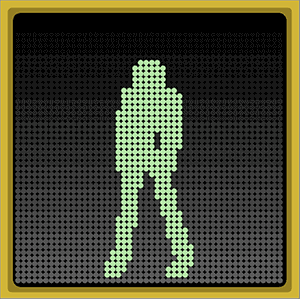
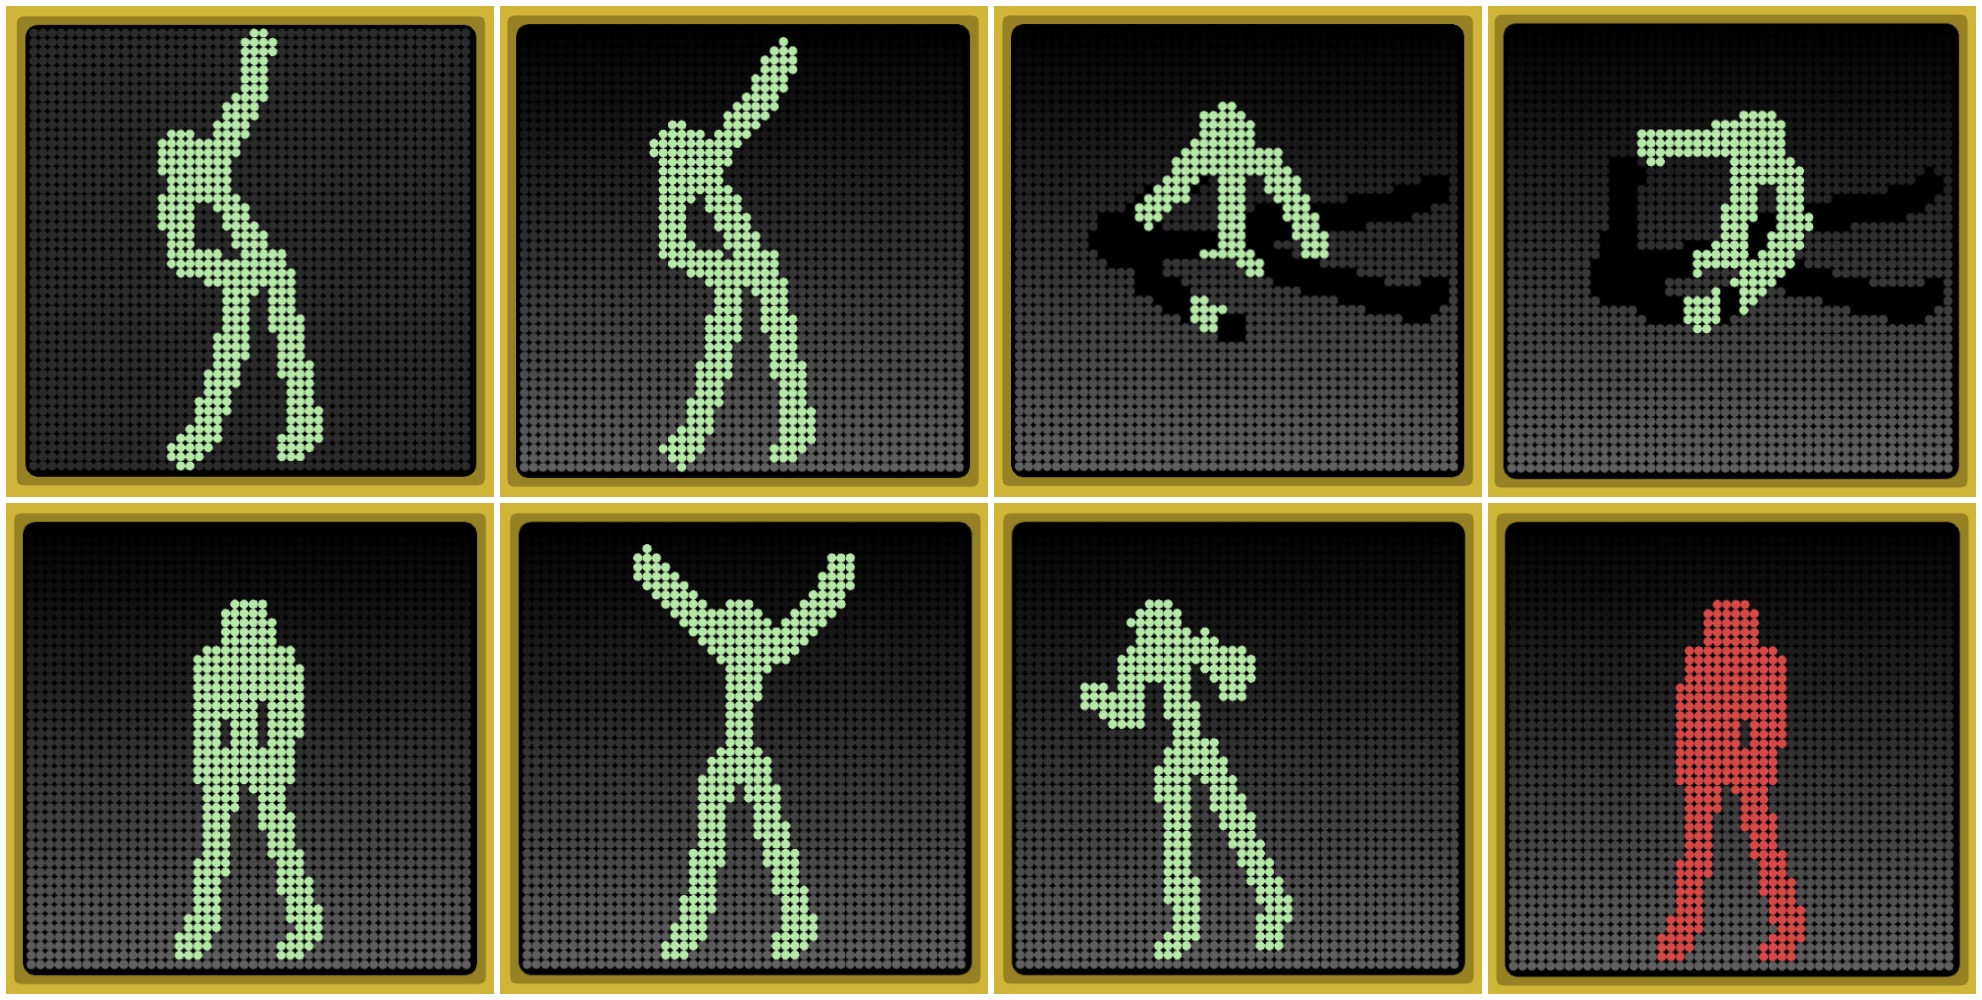
As such is the walking signal simulator, where a plane of circle bulbs light up according to the human figure: if the figure is moving, it is green, and ideally if the figure stops moving, the lights go red. I included audio from the walking signal noise at Morewood and Forbes (commonly nicknamed the “beep boop” by CMU students), and the audio also pauses if the red stop signal is on. The lights are lit according to an isBoneNear function that calculates the theoretical segment between all the Bvh bones and compares it to a point(x,y) that would be the center of all the circles on the light bulb plane, and if the distance is within my hardcoded epsilon, the circle will be green or red instead of the default gradient of grays.
Final: Troubleshooting the head was interesting because I assumed that the head would be the bone without a parent (a conditional I had to include anyway so that there wouldn’t be a null exception error), but when I upped the epsilon I saw no change, so I… guess the head wasn’t it; Golan then taught me about the function that allowed me to directly check for bone names (“Head”) that made the process easier, so raising the epsilon ended up succeeding to make the head little more prominent, although the default Head bone itself was still very close to the torso so the final figure looks like it has a very short neck… (but this is still the best improvement because the figure originally looked headless… also thank you Golan.) I even had an iteration where, because I still couldn’t identify and isolate the head bone yet, where my increase in epsilon accidentally made the model look pregnant (because it turned out that the bone I affected was at the waist I guess…) I could not fathom how to get the stop signal of red to work at random pauses, as I found it difficult to calculate whether the Bvh model moved between the last frame or not, so I ended up coding a method to just make the file pause at the end of every loop for a bit longer than usual before relooping, and at that moment of pause, changed the lit color to red and the audio amp to 0. I also added a two frames to the borders to give it an effect of having the walking signal yellow box frame. Originally I also made the plane flat, but decided to give it a top down gradient of gray rather than the flat grays, to mimic some short of shadow being casted from the top of the walking signal box. The top four pictures of the screencaps below were the initial tinkering stages of making the colors work and align well (as you can see, I had some debugging to do.)
I particularly also found it fitting that the model is stretching, as if taking a break from a jog or pedestrian stroll or walk 🙂 Take care of yourself, exercise, and remember that it’s the little things that count! (I should really take that advice…) Overall, I’m really pleased that, although the result appears uncomplicated, that all its parts combine very well… it made me really happy that the class laughed once they realized exactly what my mocap attempted to mimic in real life. (The beep boop audio helped immensely, I believe… by the way, credits to this CMU remix, which is where I cropped the audio from!)
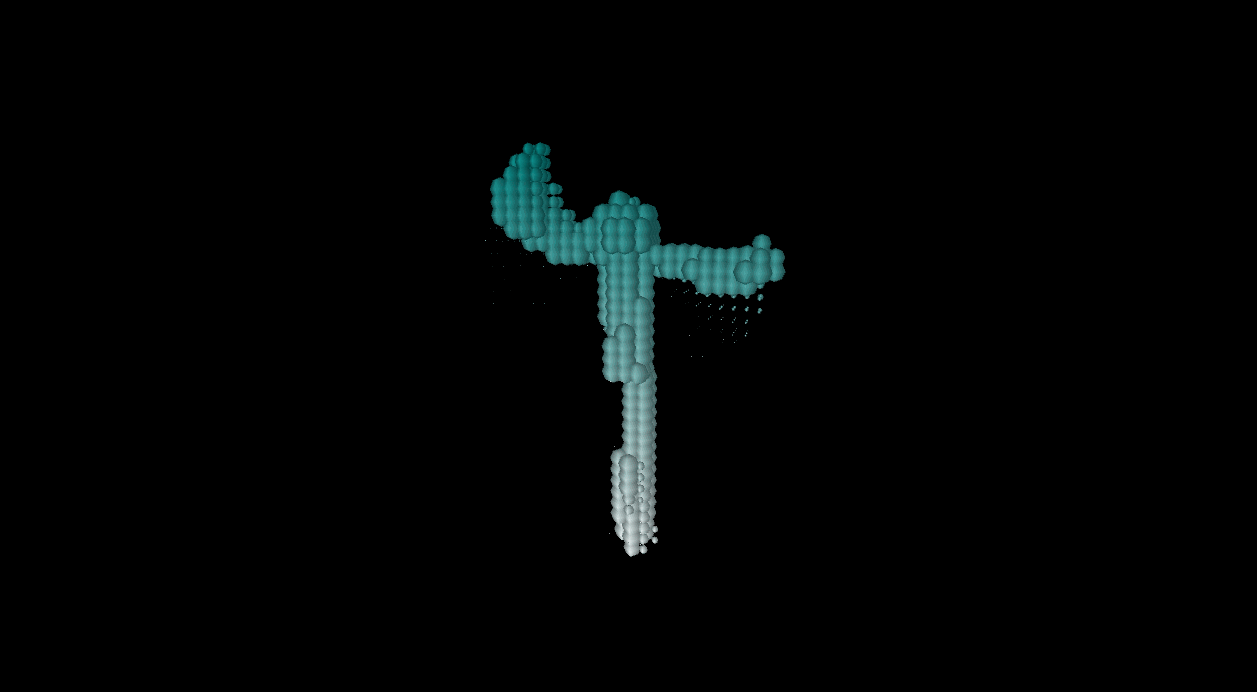
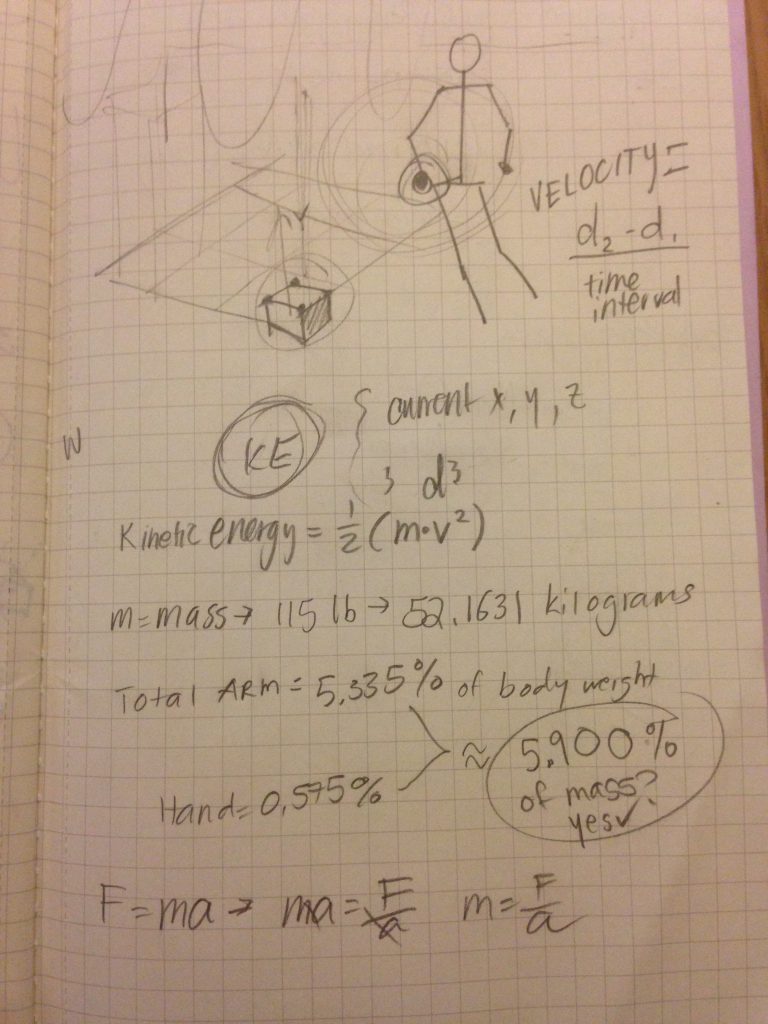
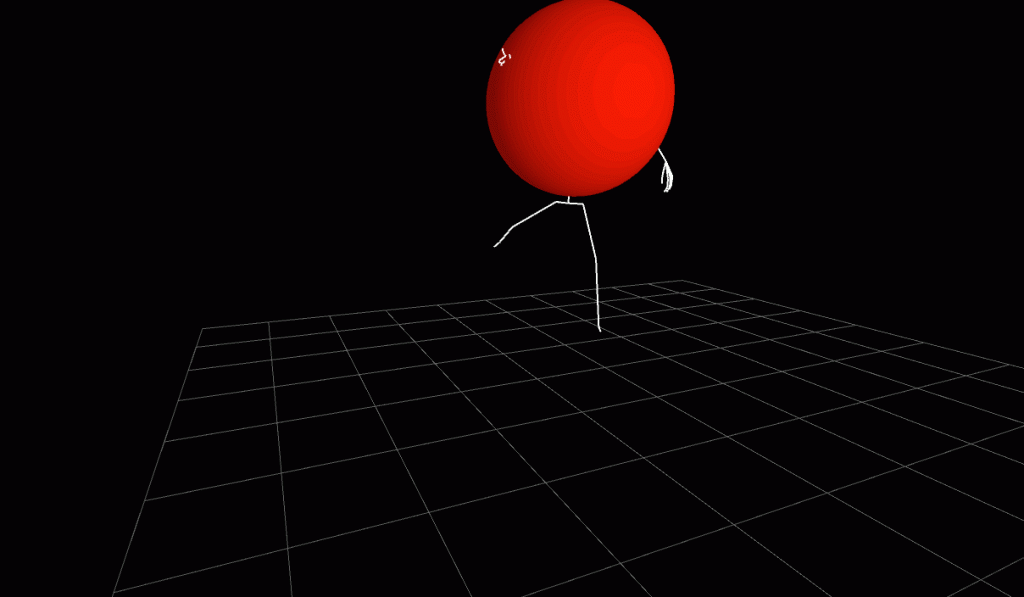
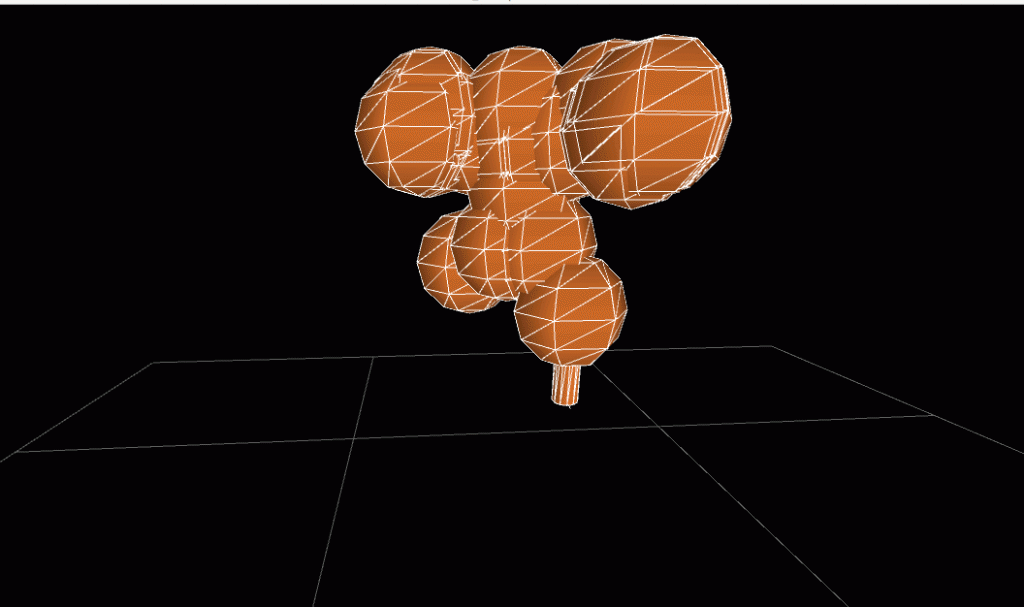
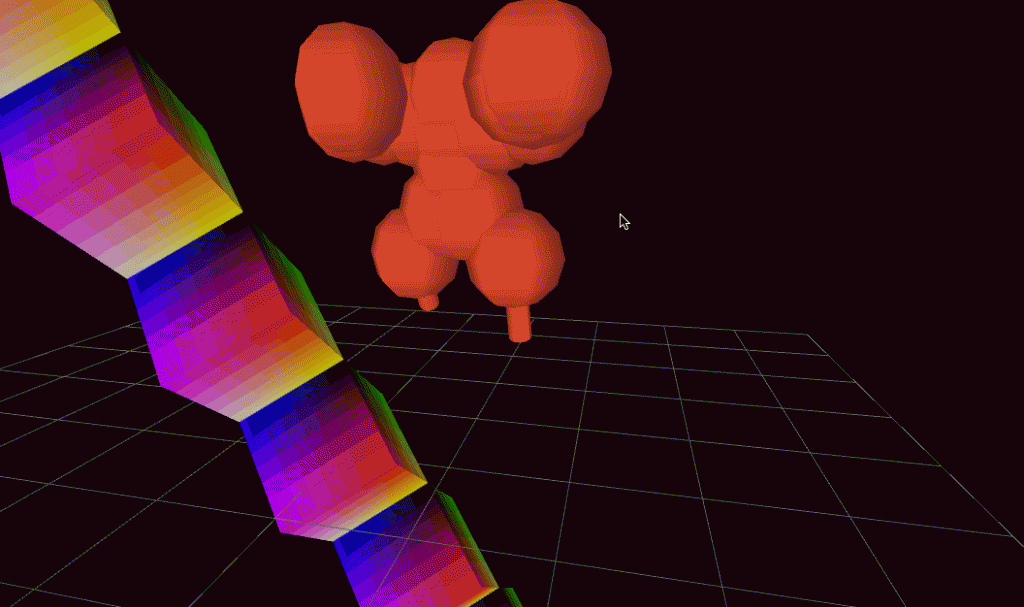
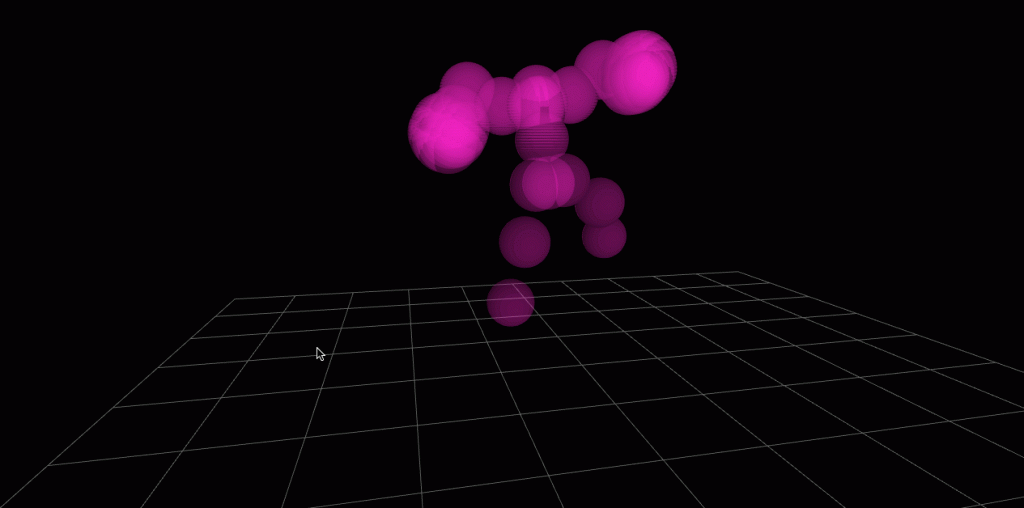
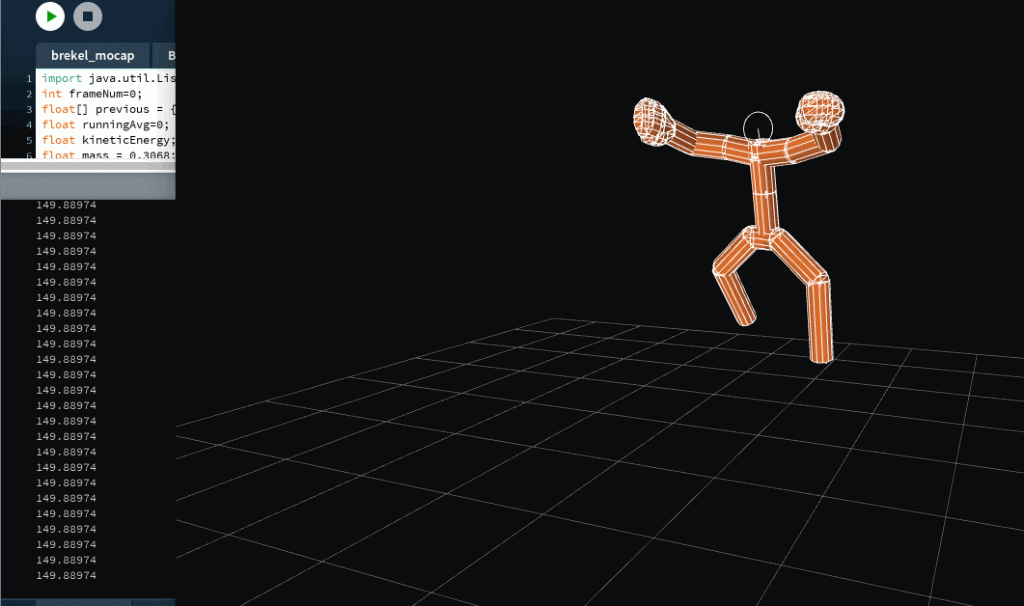
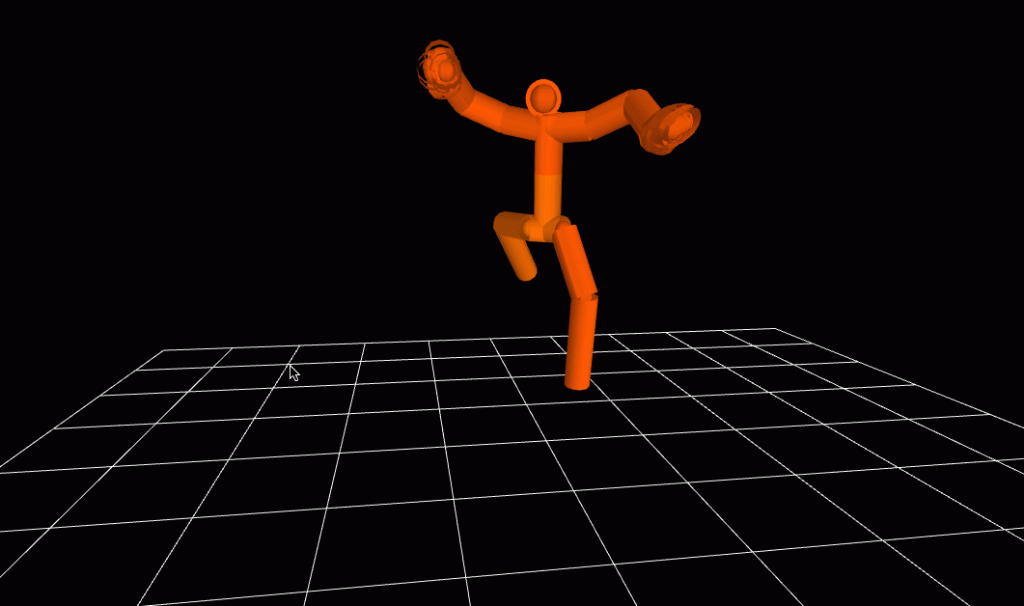
In collaboration with Lumar, we explored displaying the kinetic energy of the body’s movements. The spheres of the body grow and shrink depending on how much kinetic energy there was given the body part we chose.
Fig. 3. Bender, a sentient robot from Futurama, making it rain, presumably in the club.
These gifs (Fig. 1-Fig. 3), while not my own personal sketches, illustrate the concept I was going for very well.
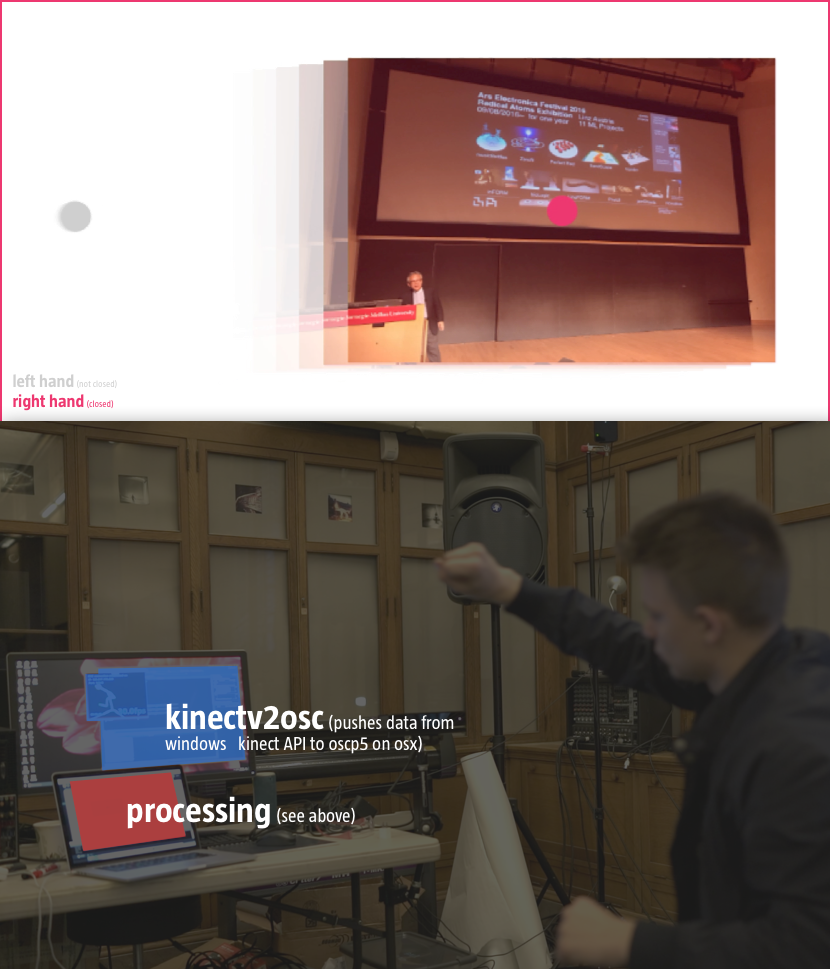
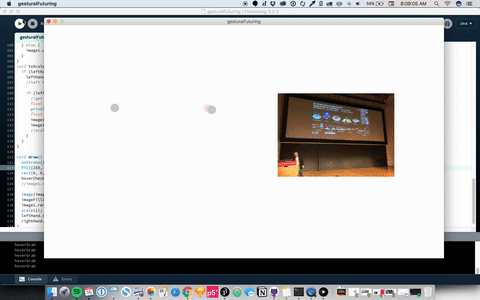
I wrote a sketch in Unity that would receive OSC data from KinectV2OSC. The sketch identifies the hand-position and state (open or closed) and allows users to make it rain. I am pretty pleased with what I accomplished although the video and kinect feeds must be manually synced up. (Ie you have to place the camera/laptop on top of or very near the kinect camera.) I would have also liked to introduce some random movement into the dolla dolla bills as they fall. While I do have a cloth simulator on them, some values need to be tweaked in order for the money-rain feel more realistic.
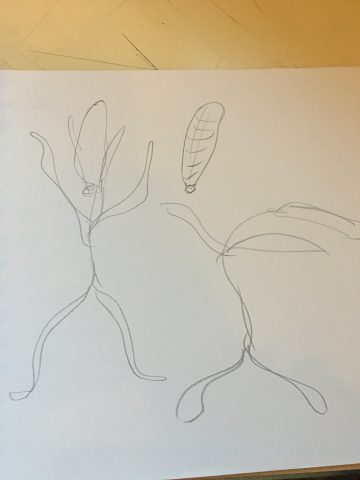
I spent a lot of time thinking about what I wanted to do with this project. My initial idea was to create little monsters (see sketchbook), but the level of detail I wanted was hard to do with the 3D environment in Processing. I then investigated Perlin noise, which had some interesting results (I wanted to have multiple characters, and have the noise of each affect the other), but I wasn’t super into that project either.
the sketching for the monster
Some of my experiments with Perlin noise to generate forms
Some of my experiments with Perlin noise to generate forms
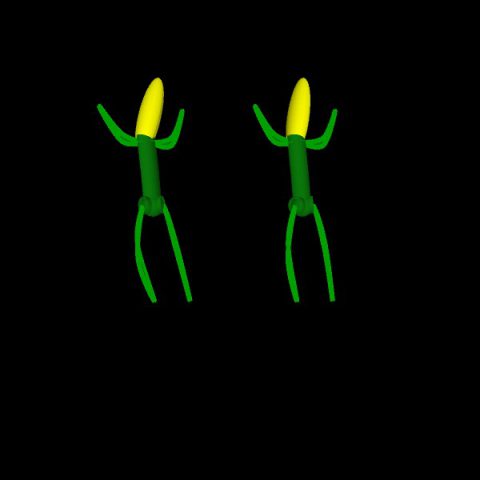
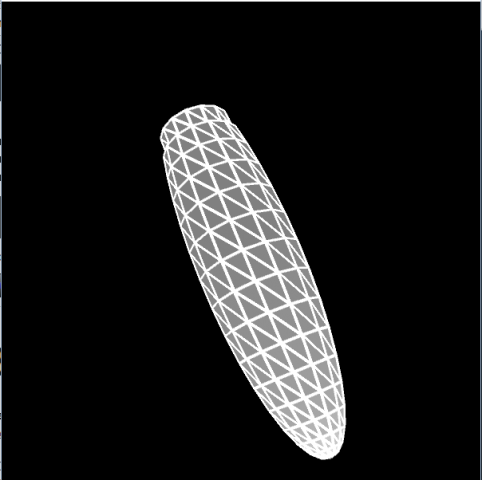
Then, while looking at some of my preliminary code for the monsters idea, I came up with the idea of making “corn people” (perhaps this idea subconsciously stemmed from me missing the Midwest?). I then adapted the Bvh data to make a corn person class, shown below, and my final product is a pair of corn people dancing in sync to techno music (the original data comes from my dancing). An earlier version had different bvh files, and the flailing corn people remind me of awkward dances of my high school days.
sketches of my ideas
the OG ear of corn
While dancing, I had to be cognizant about the leaf-like way in which the arms should move, and I was careful not to hop about, because corn people would be unlikely to move their feet in such a way. Overall, I am quite happy with how this assignment turned out, especially considering the late start I got due to investigation of other topics. I really thought it was crucial to have the leaf-like limbs, and I’m glad I was about to accomplish that. I also think it’s pretty funny.
For this project, I knew from the start I wanted the motion capture data for my project to be my friend Katia dancing ballet. We actually recorded that data before I had coded much of anything for this project. Hopefully I can record some more different types of motion and apply this animation to them in the future.
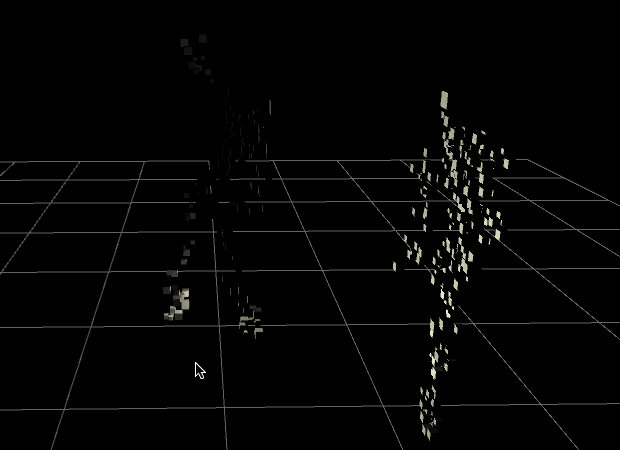
Anyhow, for this project, I wanted something a little more abstract looking than shapes attached to a skeleton. So I decided to make an animation in which nothing actually moves. There is a 3D grid of “pixels” (which can be any shape, color, or size) that choose their size and/or opacity based on whether or not they occupy the space where the dancer is. They appear and disappear, and collectively this creates the figure of a person and the illusion of movement.
I decided to work in Processing, because I had the most experience in it, but 3D was still new to me. Initially, I had my pixels calculate their distance from each joint and decide how big to be based on that. It worked, but was just a series of sphere-ish clumps of pixels moving around, and I wanted it to look less default-y and more like a real person. So, I looked up how to calculate the distance from a point to a line segment, and used that for my distance formula instead (making line segments out of the connections between joints). This resulted in a sort of 3D stick figure that I was pretty happy with.
I played around a lot with different shapes, sizes, and colors for the pixels. I also tried to find the best speed for them to appear and disappear, but this was hard to do. Different people I showed it to had different opinions on how long the pixels should last. Some really liked it when they lasted a long time, because it looked more interesting and abstract, but others liked the pixels to disappear quickly so that the dancer’s figure was not obscured. Deciding how quickly the pixels should appear was less difficult. While I initially wanted them to fade in somewhat slowly, this did not look good at all. The skeleton simply moved too fast for the pixels ever to reach full size/opacity, so it was hard to tell what was going on. As a result, I made the pixels pop into existence, and I think that looks as good as it could. The motion capture data still looks a bit jumpy in places, but I think that’s the data and not the animation.
Since there was such a wide variety in the types of pixels I could use for this project, I decided to make a whole bunch of them. Here are how some of my favorites look.
The original pink cube pixels:
Like the original, but with spheres instead of cubes (and they’re blue!):
Back to cubes, but this time, they fade out instead of shrinking out. I think it looks sort of flame-like:
Back to shrinking out, but the cubes’ colors change. I know rainbows are sort of obnoxious, but I thought it was worth a shot. I also played with some extreme camera angles on this one:
One final example, pretty much the opposite of the last one. Spheres, with a fixed color, that fade out. I think it looks kind of like smoke, especially from a distance. But I like how it looks up close, too:
I didn’t really know how to sketch this concept, so I didn’t (and I’m kind of hoping that all of my variations above can make up for my somewhat lacking documentation of the process). In general, I’m happy with how this turned out, but I wish I had had the time to code this before we recorded any motion, so I could really tailor the movement to the animation. Like I said, I hope to do more with this project in the future, because I am happy with how it turned out. Maybe I can make a little music video…
Created with Processing, project available on GitHub.
Creating this was an interesting process. I’m not sure if there is a real way to access the bone-by-bone data through the API, but I ended up modifying the BVH parser code directly, outside of my main Processing file. I used each bone element as a starting point to randomly draw lines to two other randomly picked bones in the body, and connect them to create a triangle (with a semi-opaque fill). I chose to have the triangles change position every frame rather than retain their assigned bones throughout, because I thought it was more abstract and exciting than a static triangle shape moving with the movement of the bones.
Some issues I ran into: I found it easier to access bone data (again, by modifying the parser library) compared to the three.js library, therefore my final project stayed in Processing. I also found it to be very glitchy with other found BVH/mocap recordings found online. I have a folder full of hundreds of recordings, my favorites being martial-arts based movements. However, even though these all work in three.js demo file, they did not work at all the Processing thing, and I’m unsure why. It was not a normal crash (array index out of bounds or some other error). Instead, it would just look weird, glitchy and move all over the place, with no actual code errors.
I have no planning/sketches as I was creating this project experimentally rather than planned like some of my other projects.
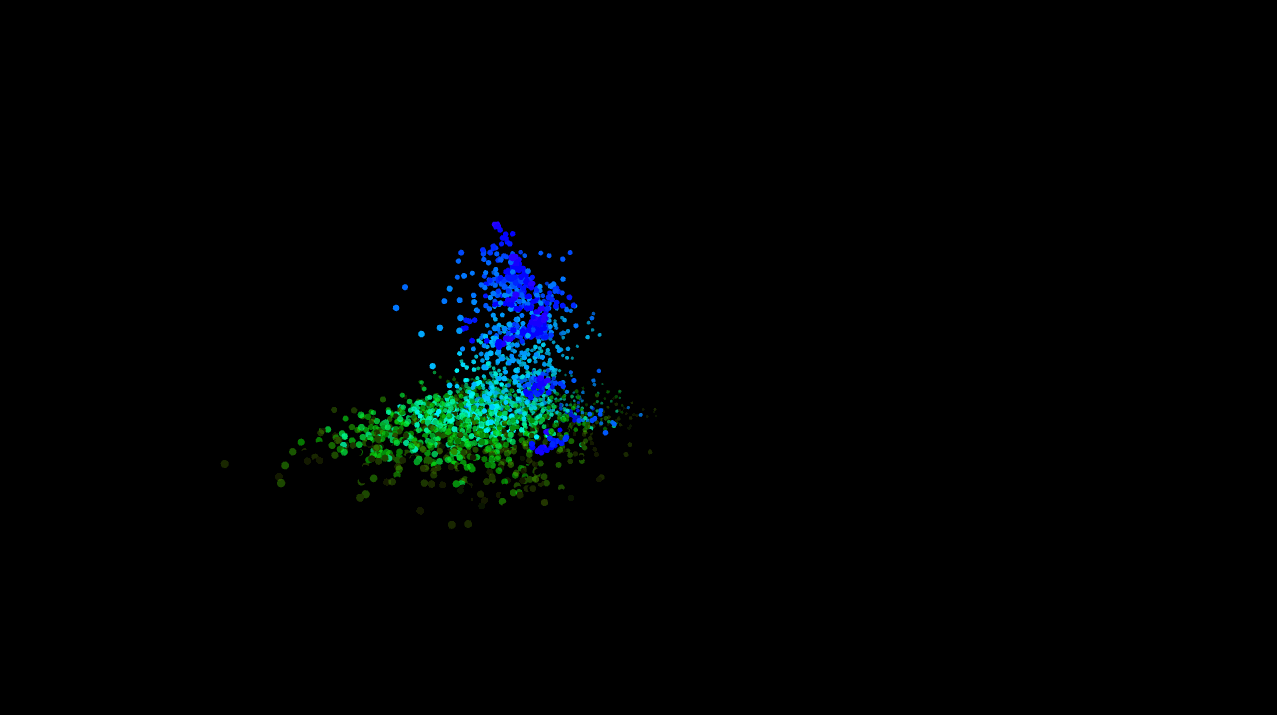
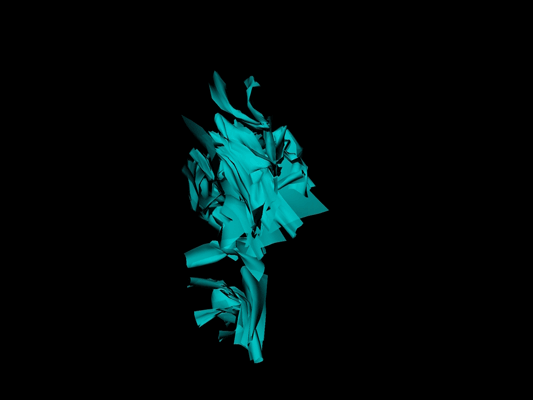
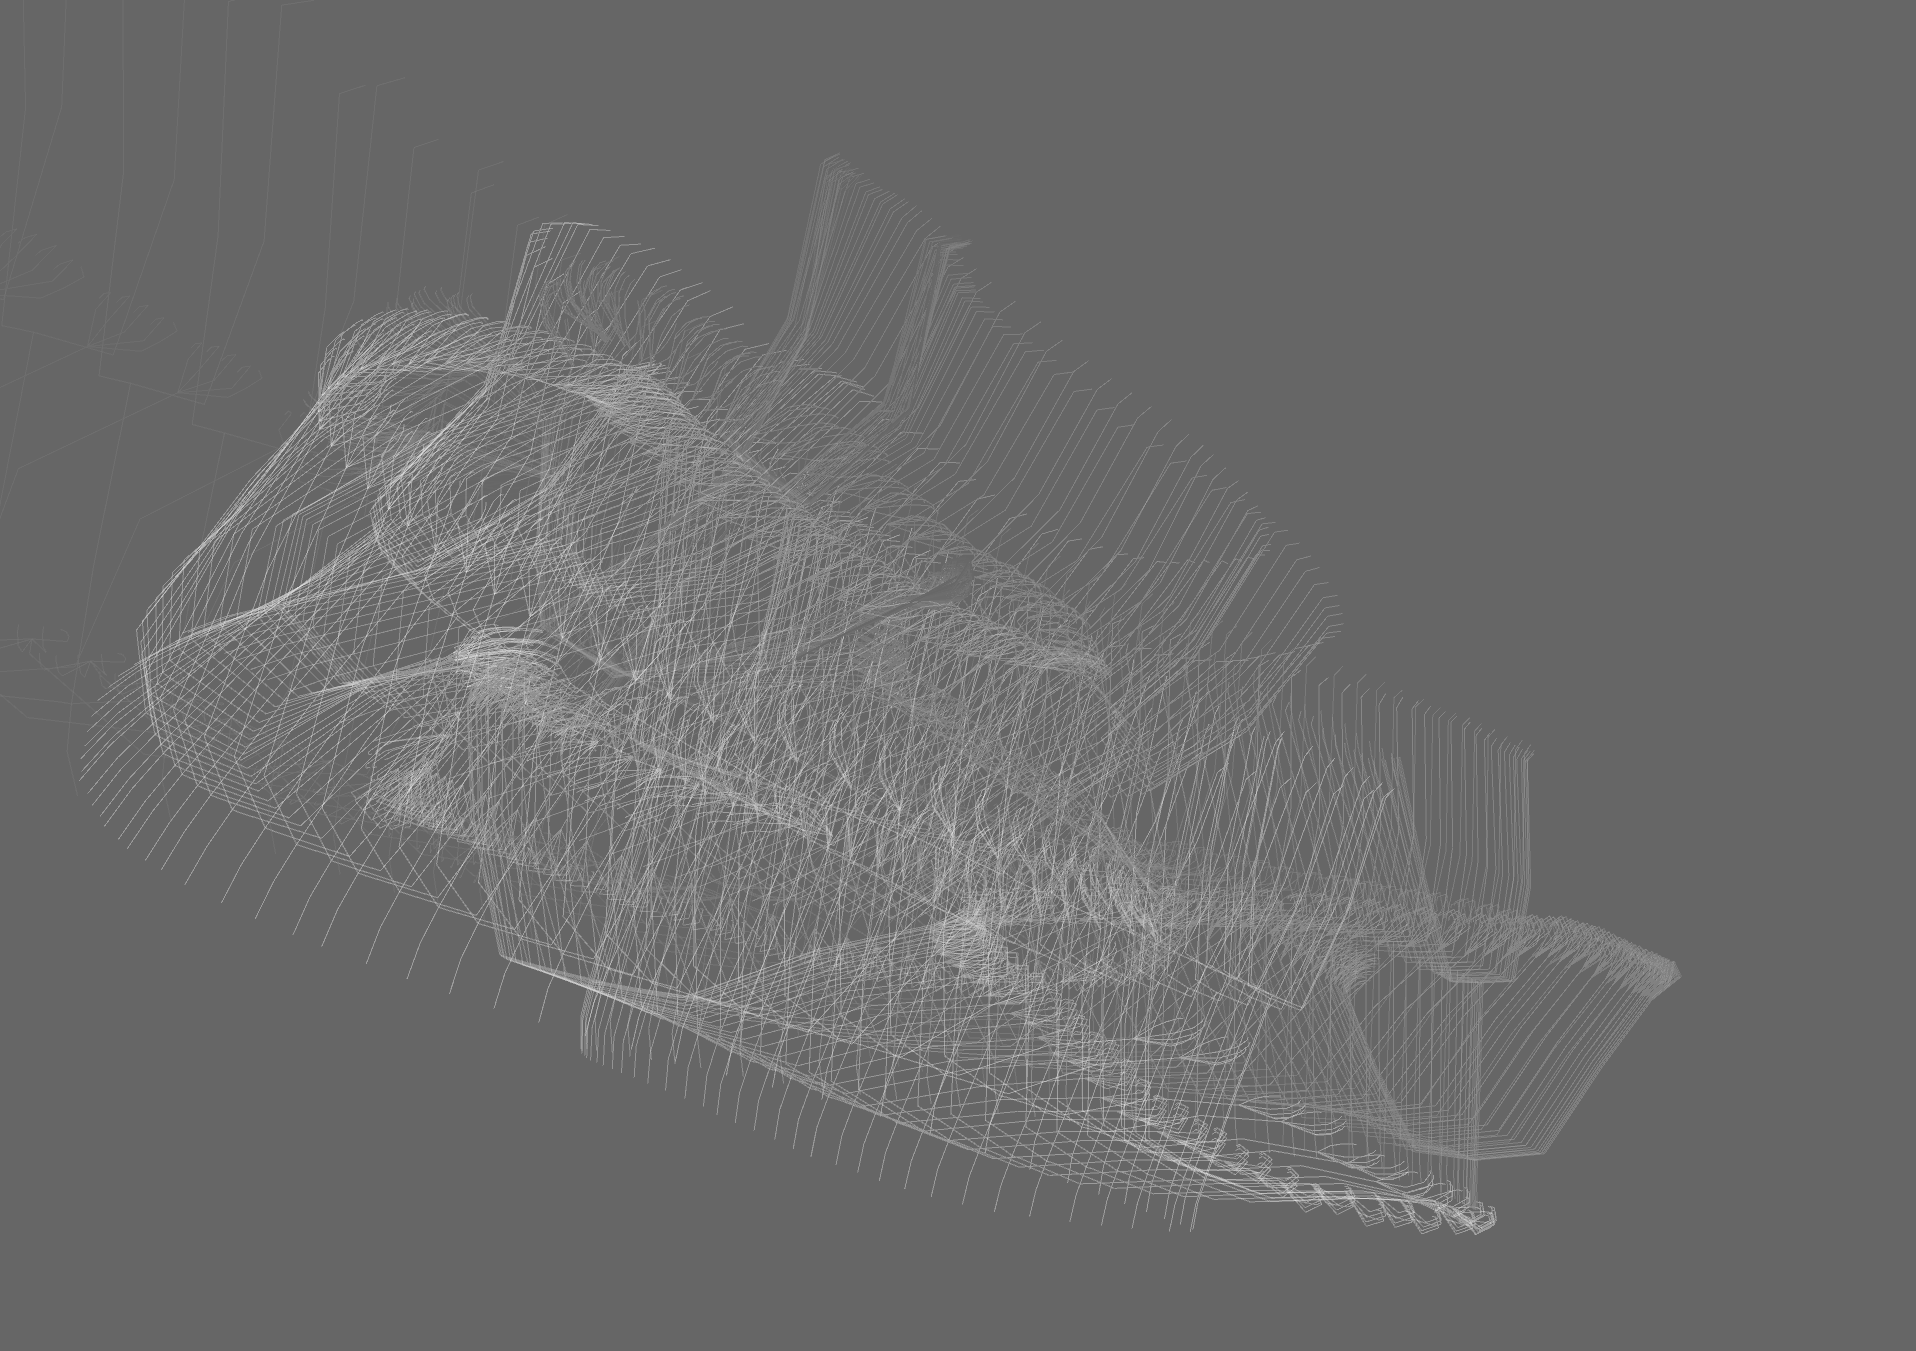
I am most interested in the dynamism of the bodily movements in motion captures, and the idea of abstract human forms composed of objects. I wanted to develop a way to present the abstract impression of humans in energetic motion.
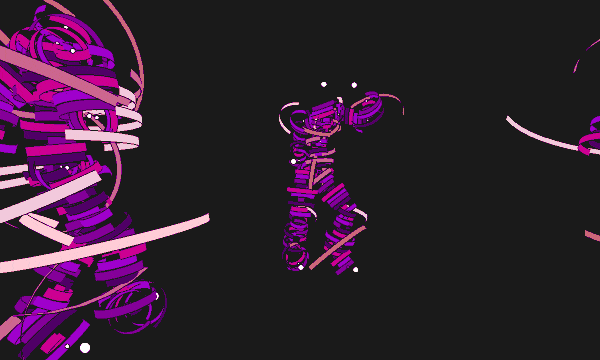
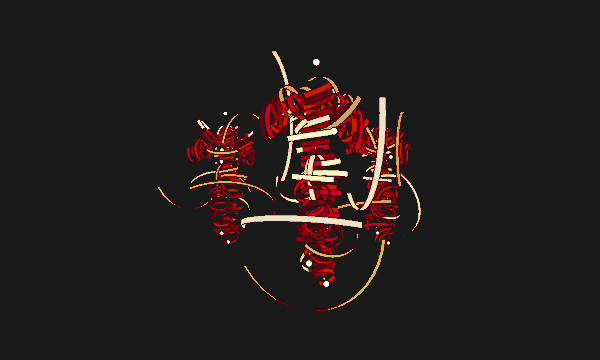
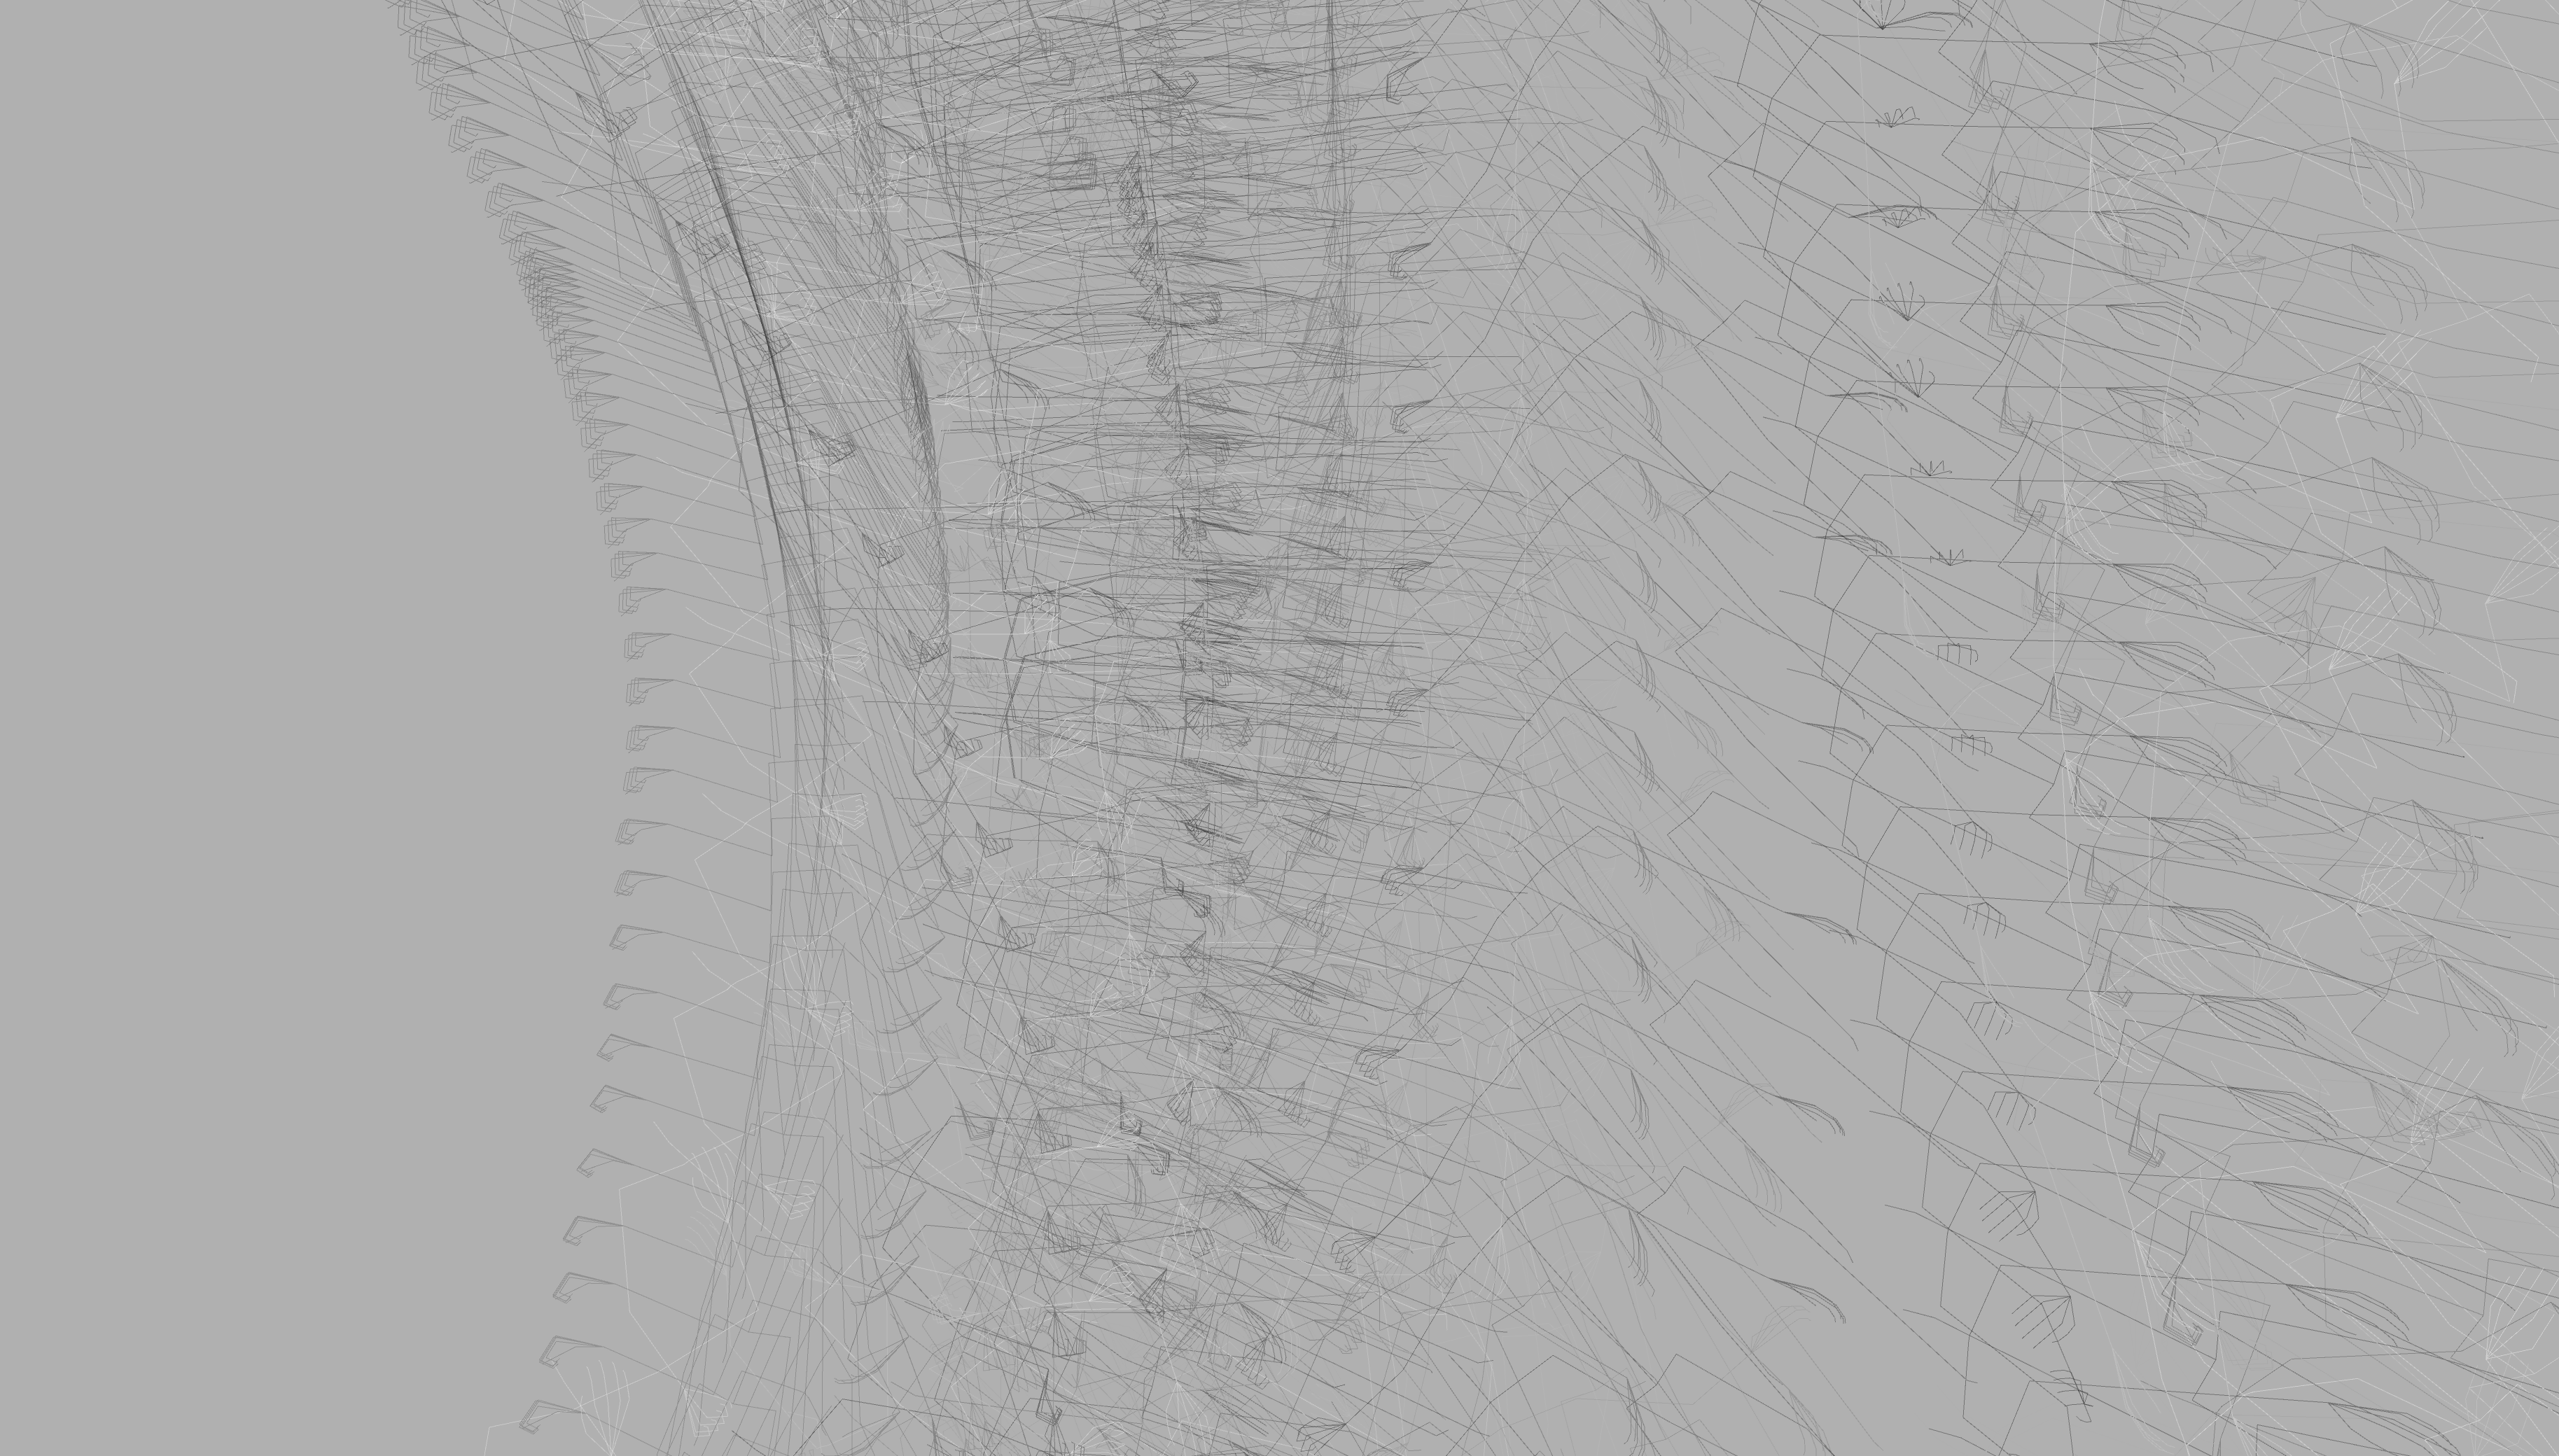
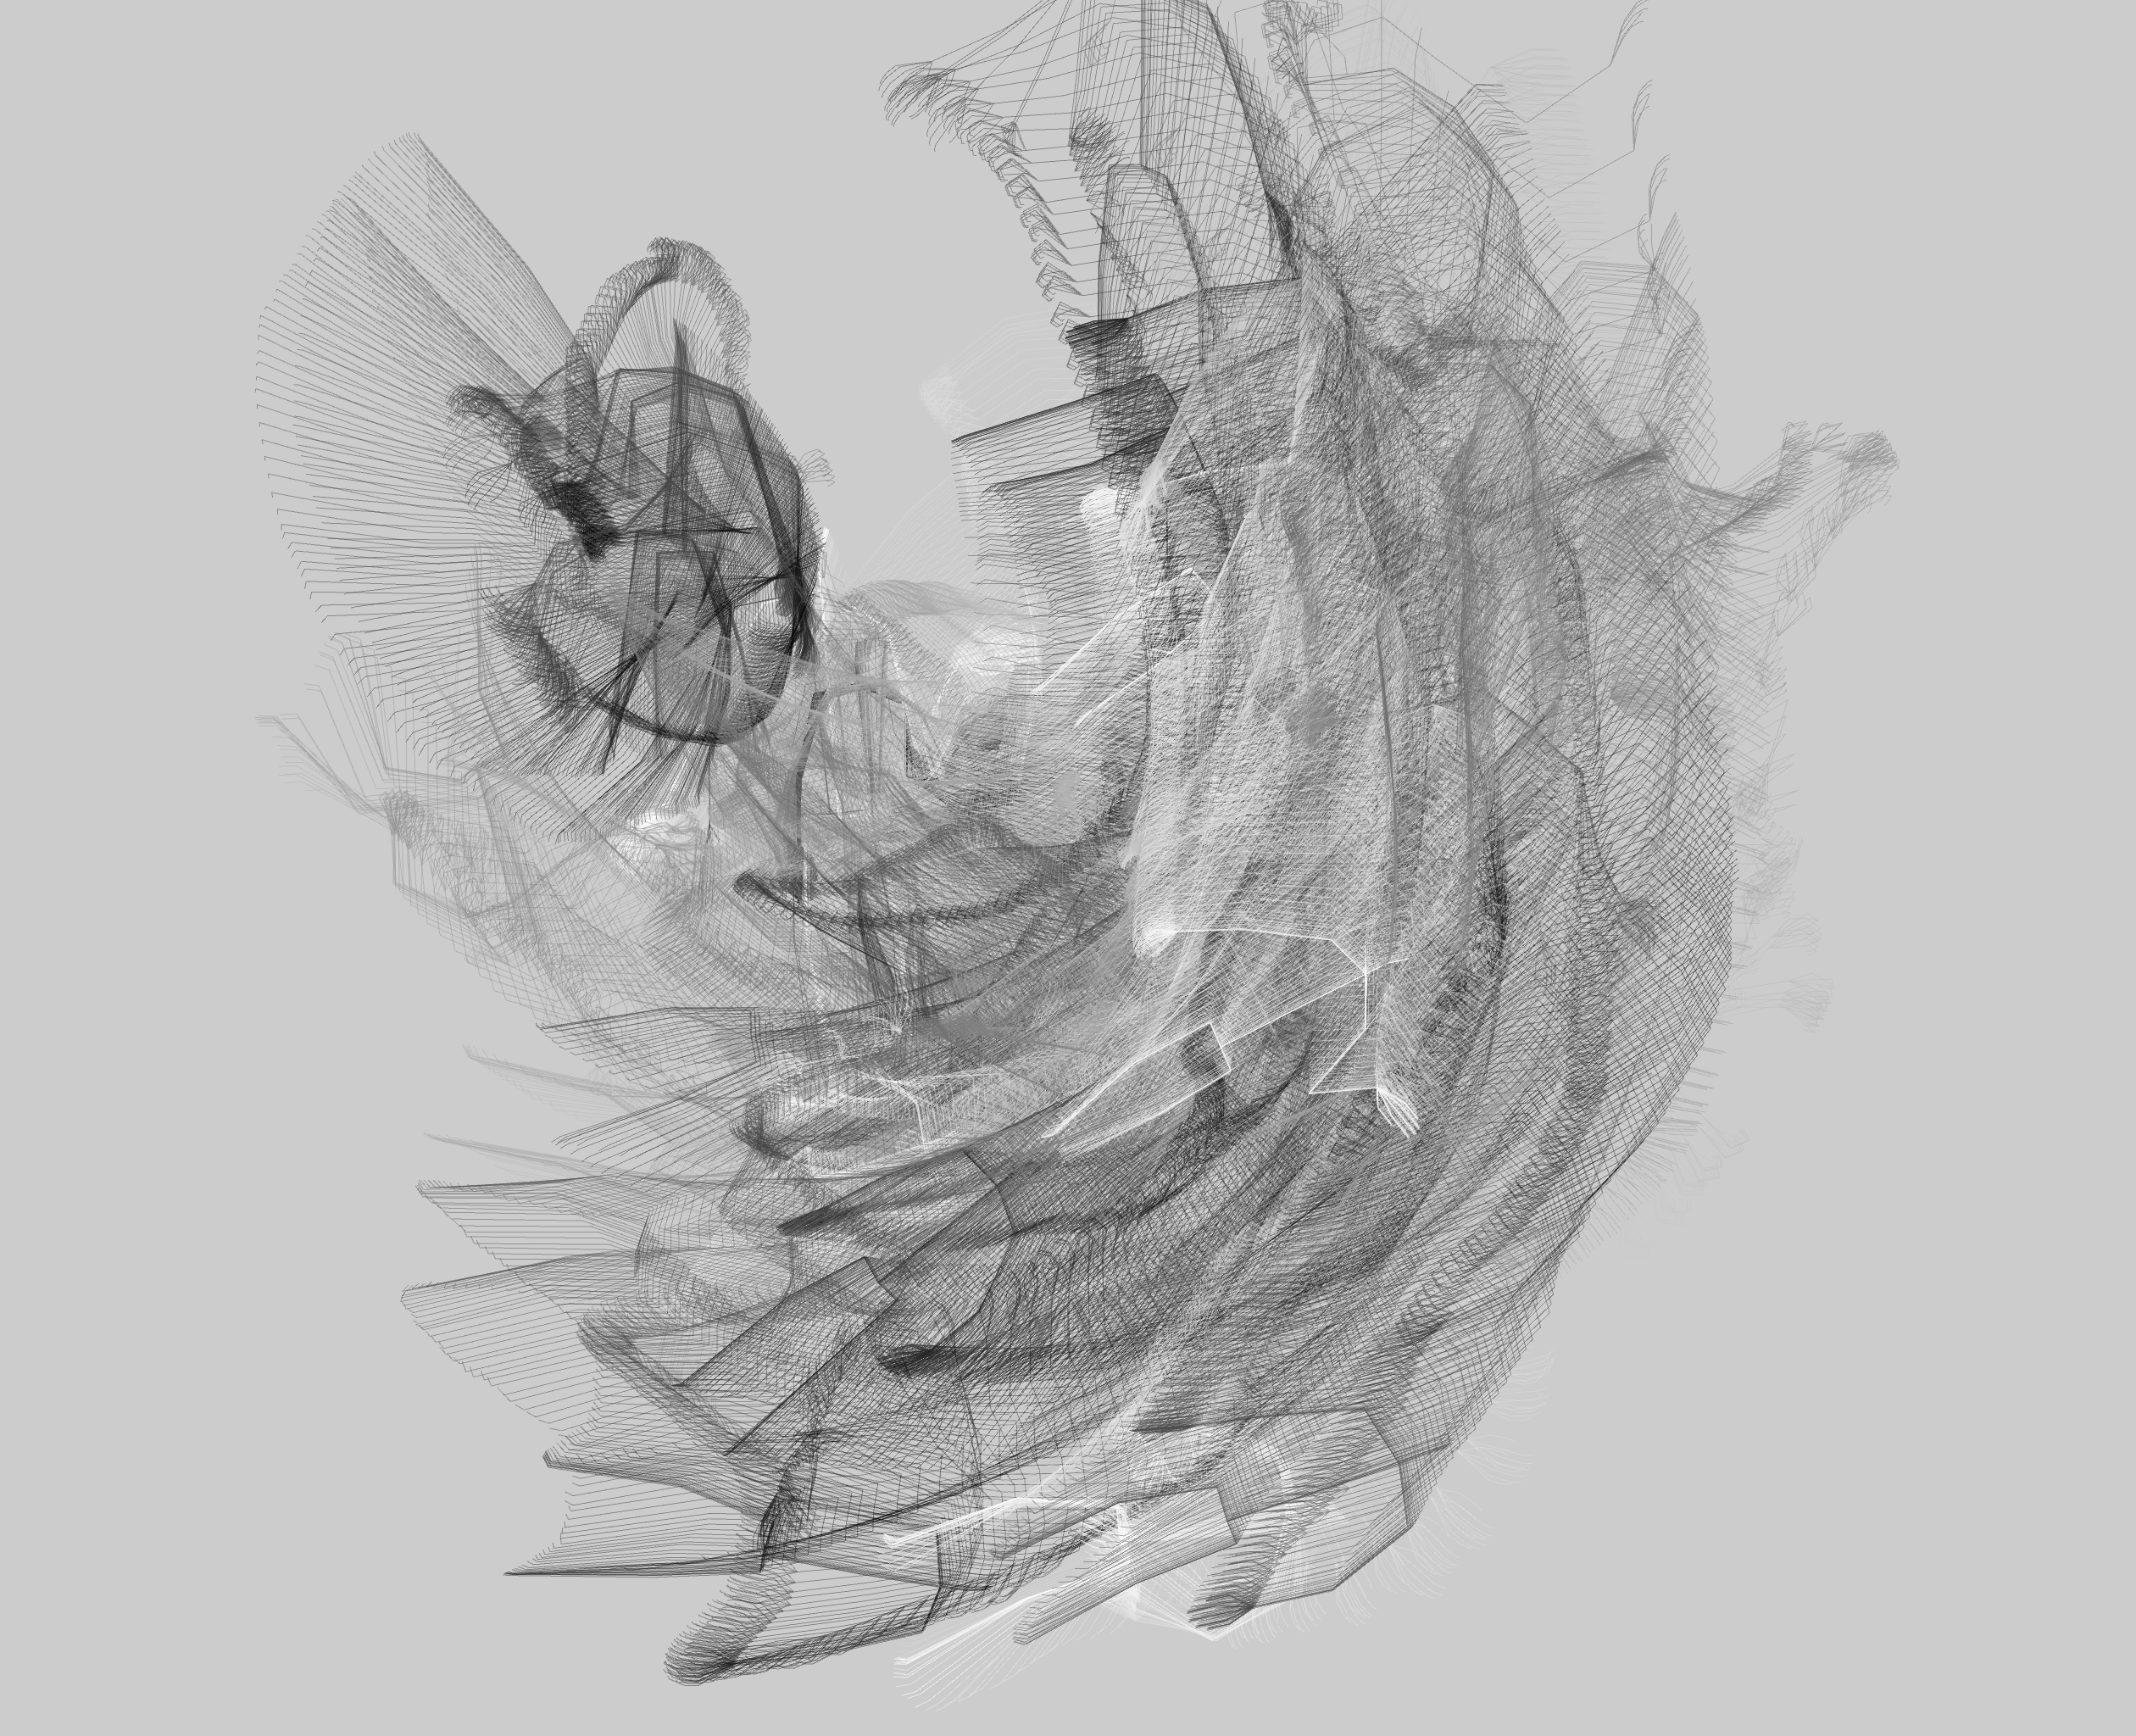
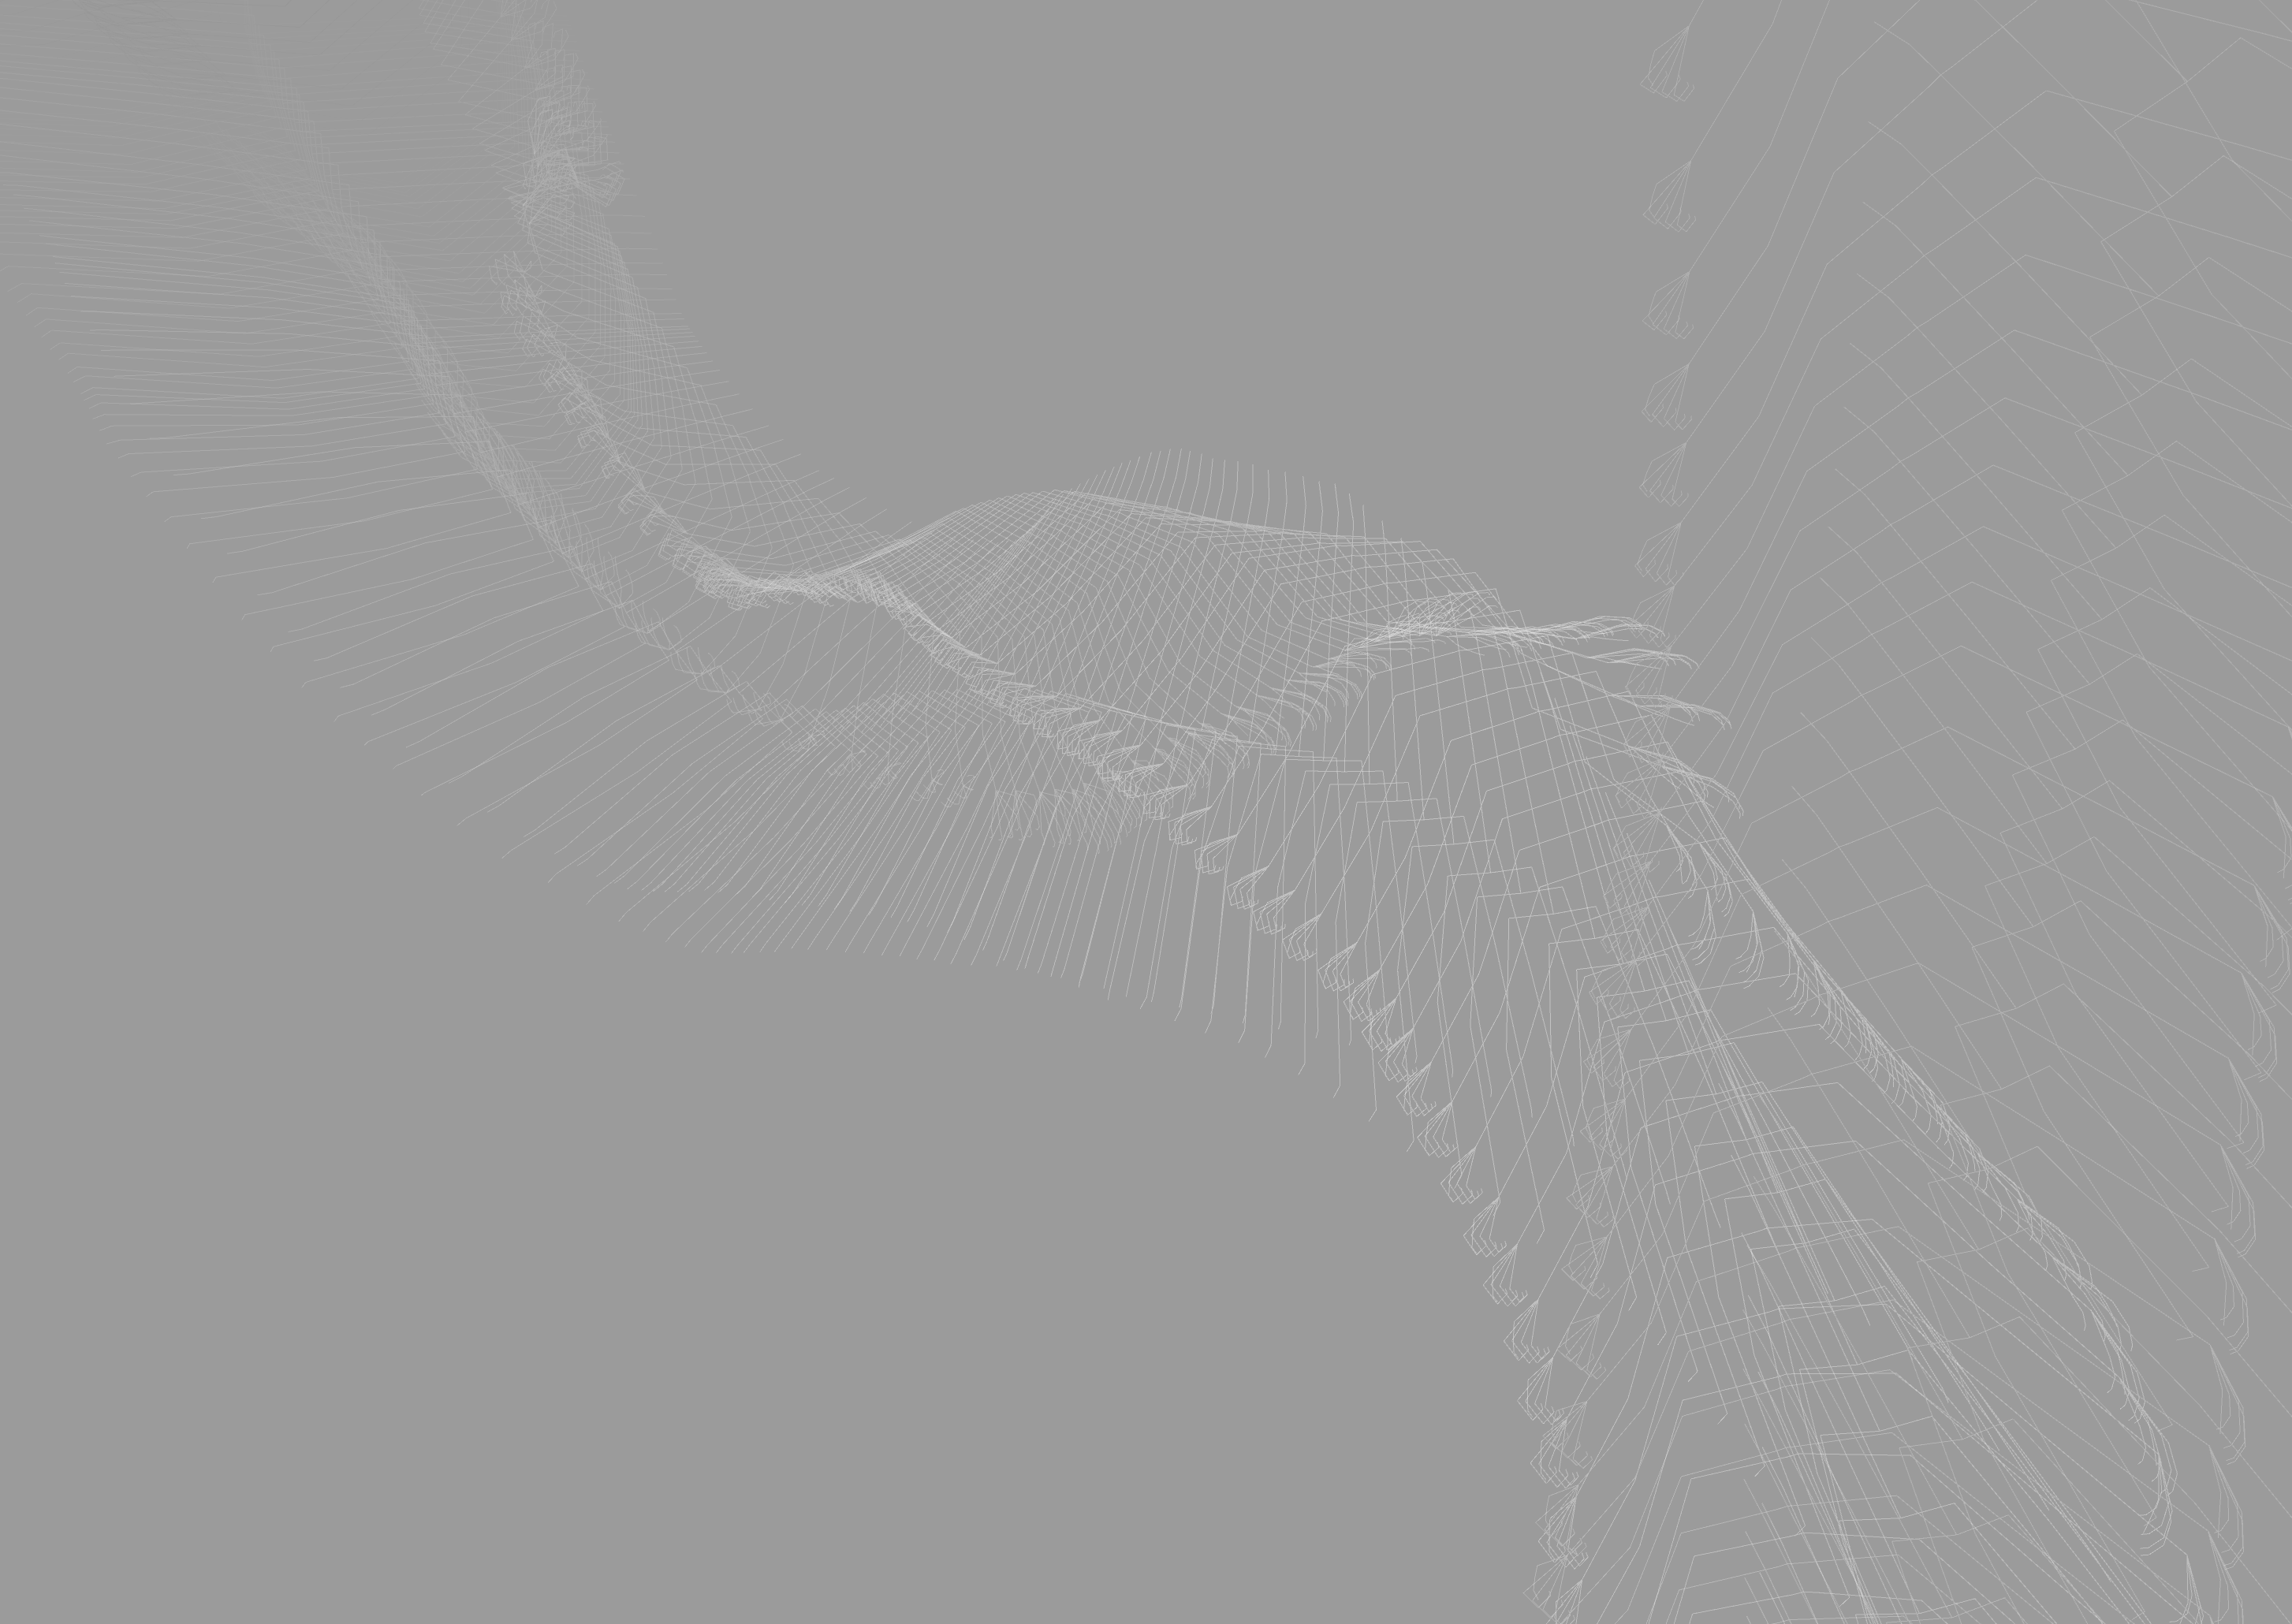
The rotating tapes evolved from the ones in my animated loop assignment. I am fascinated by the way they can depict a form when and only when they’re in motion, and how they’re very flexible and sensitive to movement. So I decided to push on these concepts.
There are two layers of tapes around the bodies. The first, more densely populated, is related more closely to the human form, while the second respond mostly to the human motion. Therefore, when the actors are waving their hands crazily, or kicking and jumping, the second layer of tapes will fly around wildly exaggerating their movements, while the first layer still sticks closely to the bodies outlining their forms.
To achieve this, I first calculate a series of evenly spaced points on the skeleton from the motion capture data. These serves as the centers of rotation for the tapes. Then I figured out the directions of the bones at these points, which will be the normals of the planes of rotation for the tapes. I also had the last information stored, so I can know how much things moved since last frame.
After this, through trigonometry, translation and rotation, I can draw each of the segments which makes up a tape that rotates over time.
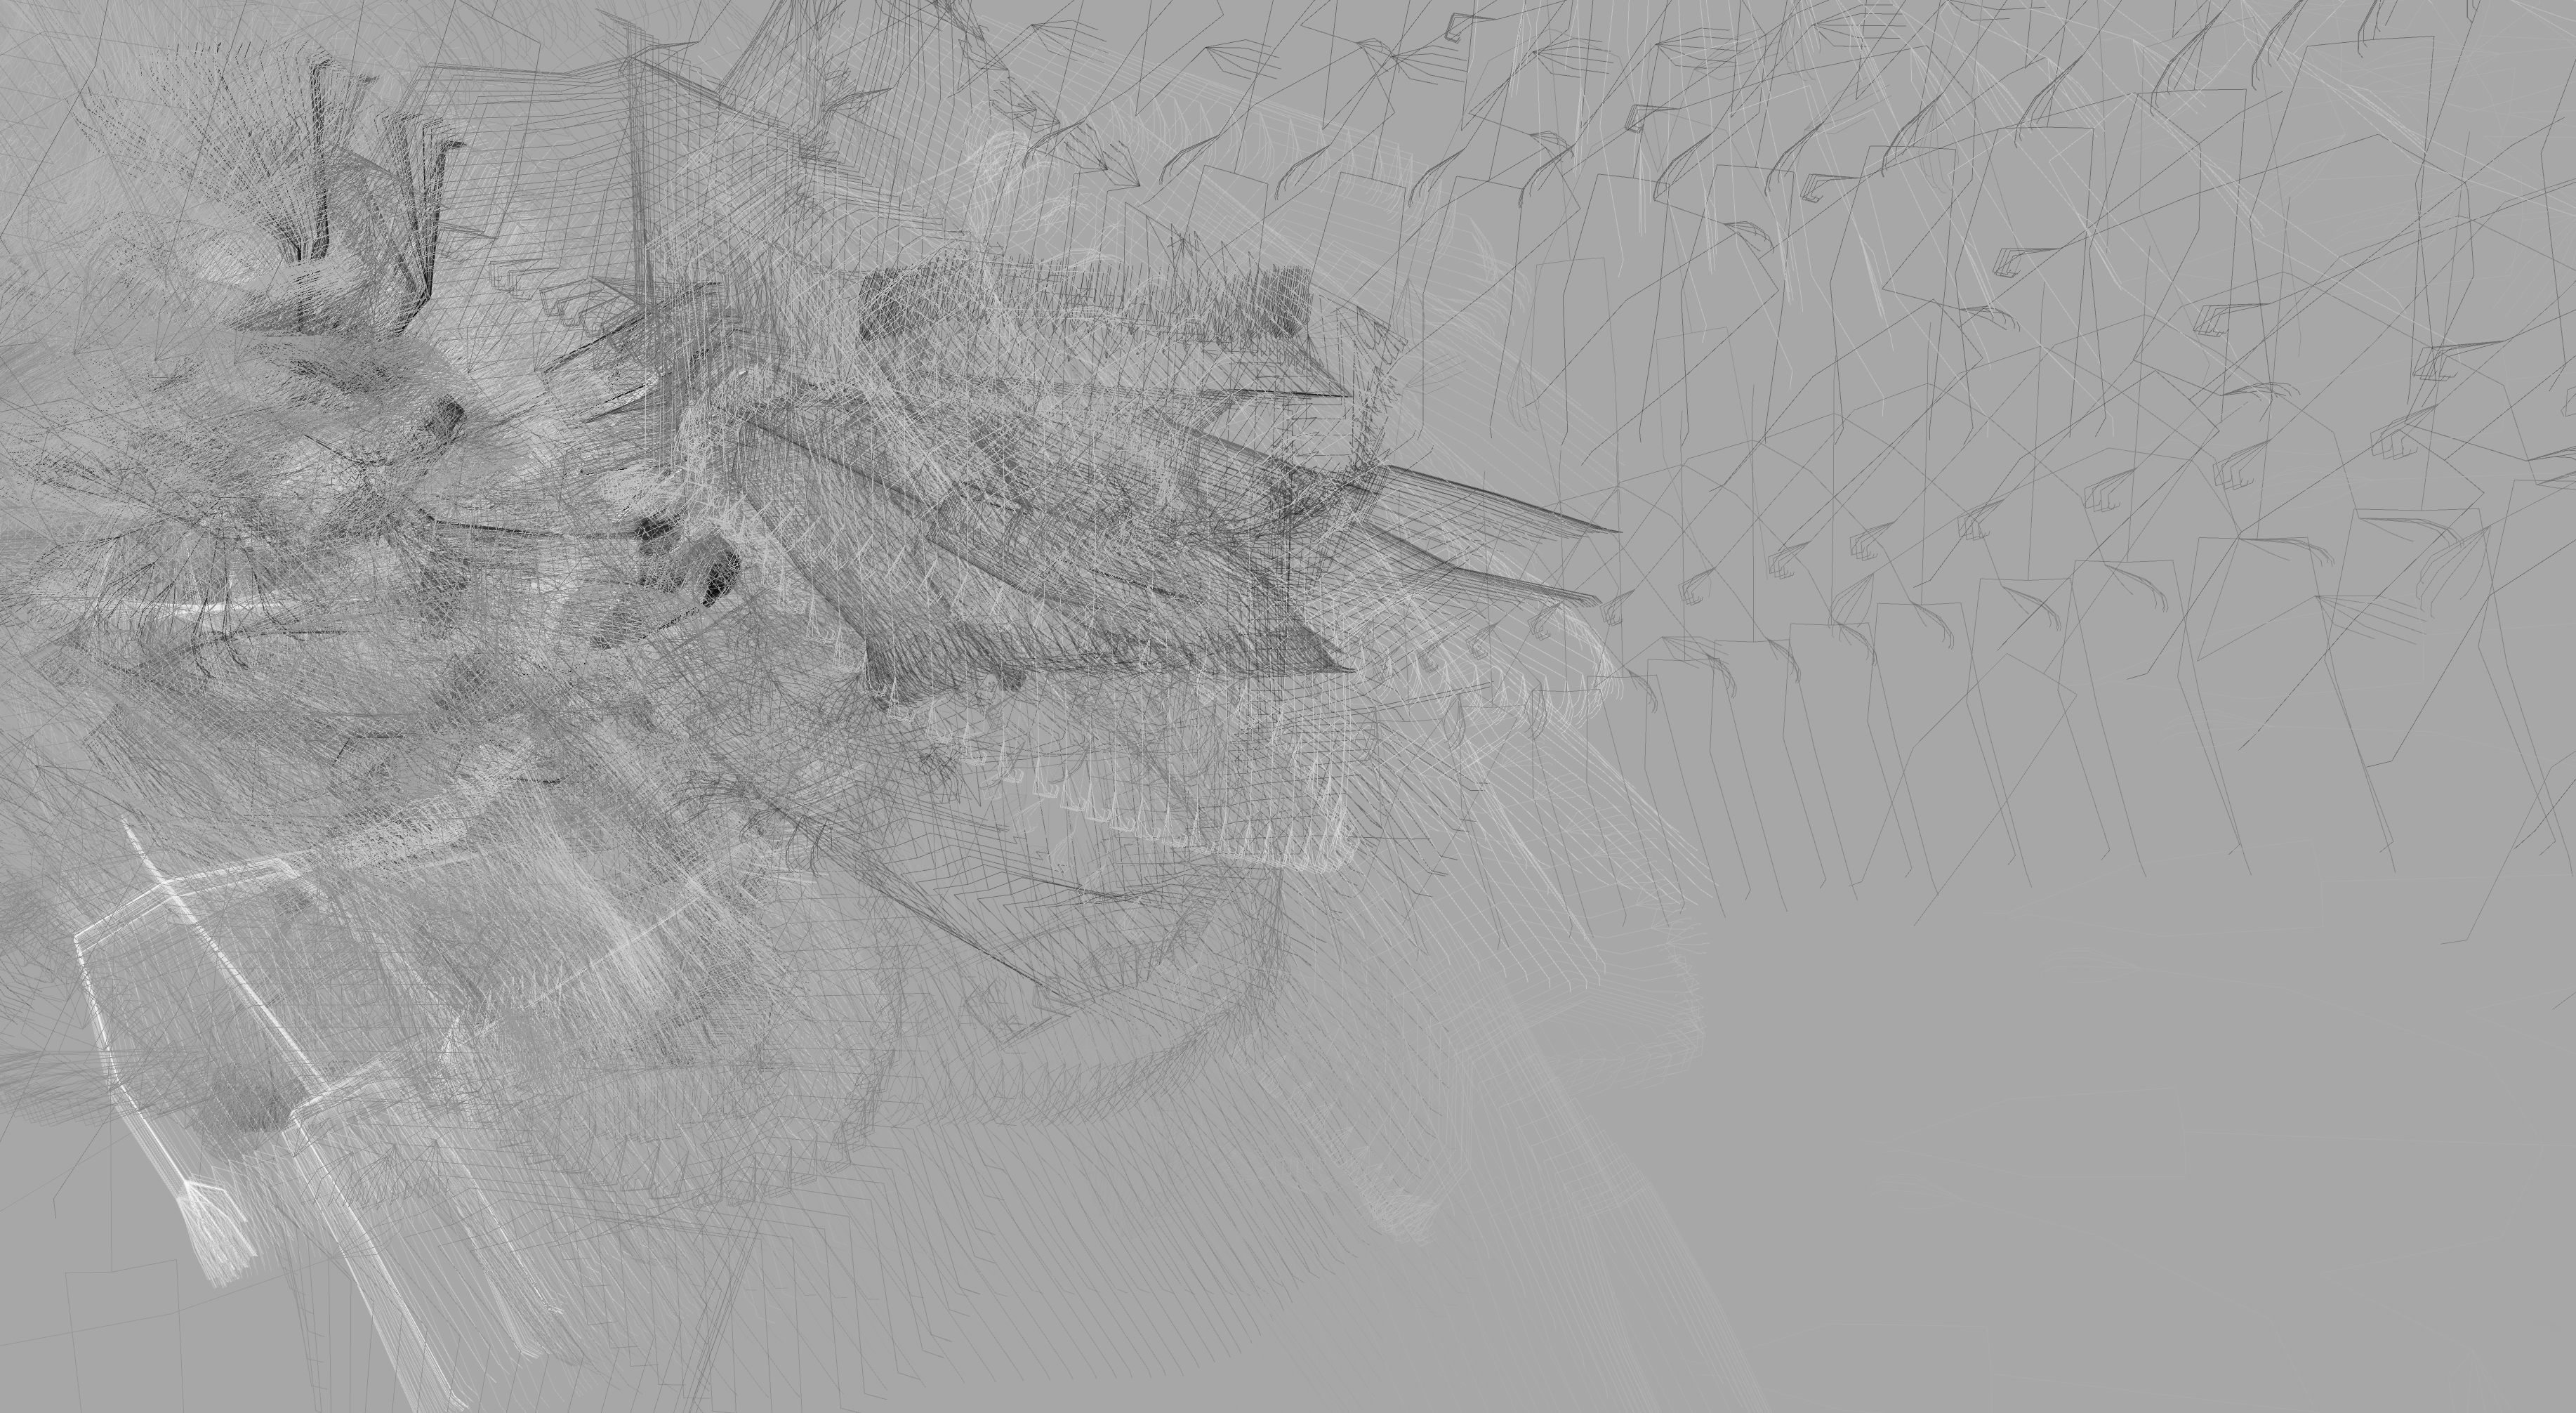
Since I received comments about how the tapes in my animated loop assignment had questionable colors, I decided to develop a better color scheme for this one.
At a single frame, for either of the two layers of tapes, the colors mainly consists of 3 different shades of the same hue, and one accented color. The colors for the second layer neighbor those of the first layer. When in motion, every colors shifts the same direction in hue. I then wrote a function to redistribute the hues on the color wheel, based on my discovery that some hues looks nicer than others on the tapes.
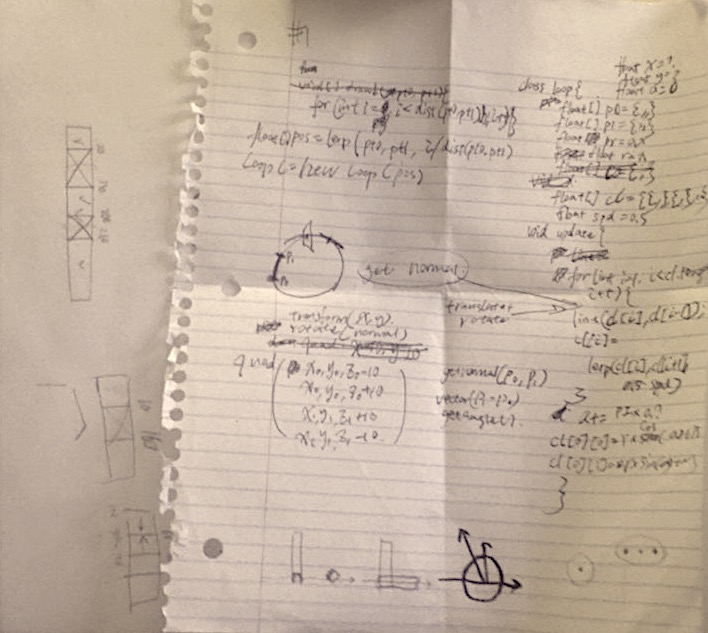
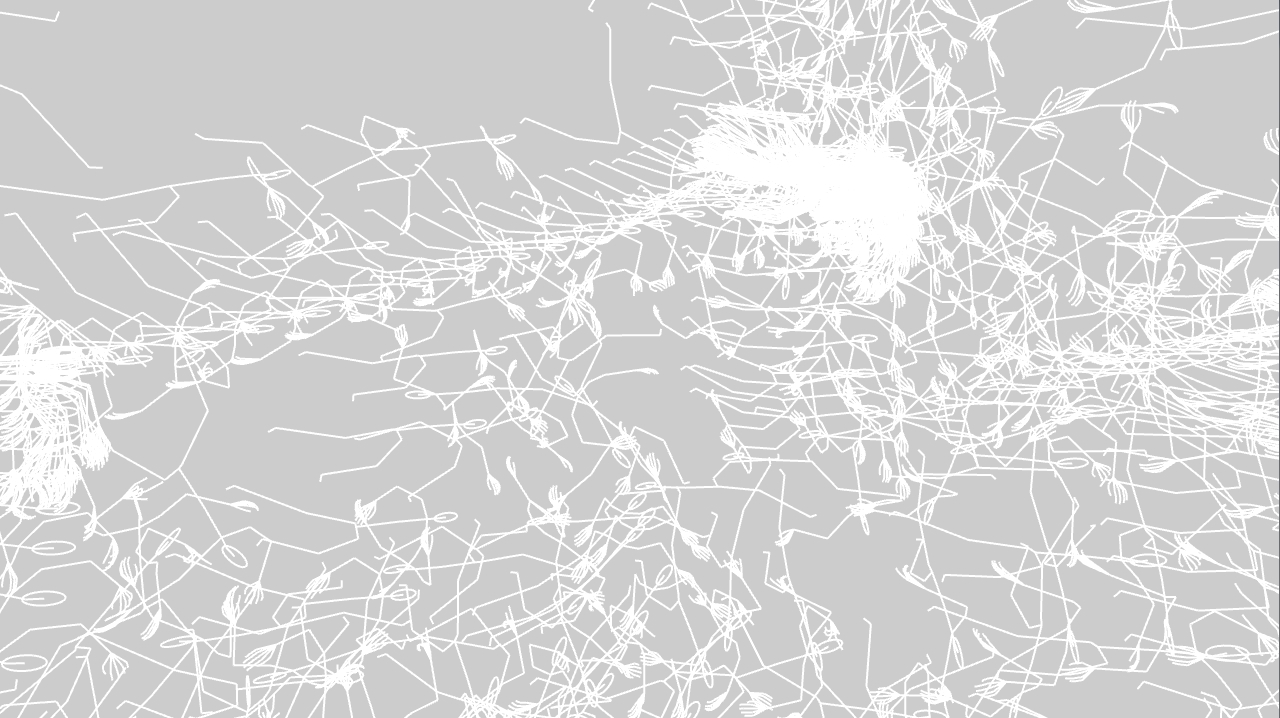
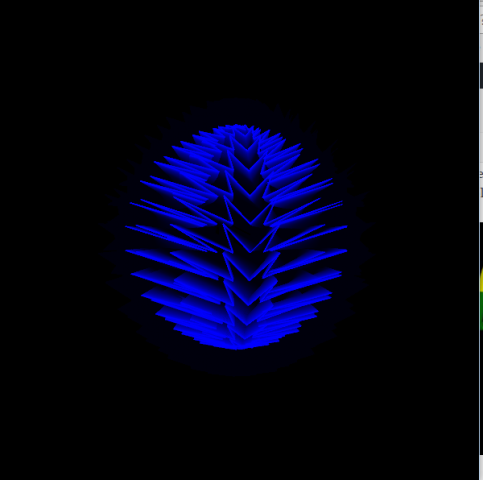
I used the Mocap data from Perfume, since I found that their data has the most decent quality when compared to others I can find on internet. But I really wonder what my program would look like when visualizing in real time.
BvhParser parserA = new BvhParser();
BvhParser parserA = new BvhParser();
PBvh[] bvhs = new PBvh[3];
Loop[] loops = new Loop[512];

int dmode = 0;

int[][] palette1 = new int[][]{{0,100,80},{5,100,60},{0,100,40},{30,100,80}};
int[][] palette2= new int[][]{{45,17,95},{48,50,80},{60,50,80},{60,20,100}};


int bettercolor(int c0){
  if ( c0 < 120){
    return floor(lerp(0,50,c0/120.0));
  }else if (c0 < 170){
    return floor(lerp(50,170,(c0-120.0)/50.0));
  }else if (c0 < 230){
    return floor(lerp(170,200,(c0-170.0)/60.0));
  }else if (c0 < 260){
    return floor(lerp(200,260,(c0-230.0)/30.0));
  }
  return c0;
}


float[] lerpcoord(float[] p0, float[] p1, float r){
  return new float[]{
    lerp(p0[0],p1[0],r),
    lerp(p0[1],p1[1],r),
    lerp(p0[2],p1[2],r)
  };
}
float dist3d(float[] p0, float[] p1){
  return sqrt(
    sq(p0[0]-p1[0])+
    sq(p0[1]-p1[1])+
    sq(p0[2]-p1[2])
  );

}


class Loop{
  float x0;
  float y0;
  float z0;
  float[] lxyz = new float[3];
  float a;
  float w = 4;
  float[] dirv = new float[3];
  float[] dirv2 = new float[3];
  float r;
  float r1;
  float r2;
  float rp1=1;
  float rp2=1;
  float[][] cl = new float[32][4];
  int cll = 16;
  float spd = 0.1;
  int id;
  int[] col = new int[3];
  public Loop(float x,float y,float z){
    this.x0 = x;
    this.y0 = y;
    this.z0 = z;
    id = floor(random(100000));
    a = random(PI*2);
  }
  public void update(){

    r1 = lerp(r1,dist3d(new float[]{x0,y0,z0},lxyz),0.25);
    r2 = noise(id,frameCount*0.1)*10;

    r = r1*rp1+r2*rp2;
    a+=PI*spd;

    dirv2 = new float[]{x0-lxyz[0],y0-lxyz[1],z0-lxyz[2]};

    cl[0][0] = r*cos(a);
    cl[0][1] = r*sin(a);

    for (int i = 1; i < cll; i++){
      pushMatrix();
      translate(x0,y0,z0);
      rotateX(atan2(dirv[2],dirv[1]));
      rotateZ(atan2(dirv[1],dirv[0]));

      //translate(10,0,0);
      //box(20,5,5);


      cl[i][0] = r*cos(a+i*0.05*PI);
      cl[i][1] = r*sin(a+i*0.05*PI);
      //cl[i] = lerpcoord(cl[i],cl[i-1],spd);

      rotateY(PI/2);
      noStroke();
      fill(col[0],col[1],col[2]);
      beginShape();
        vertex(cl[i][0],cl[i][1],-w/2);
        vertex(cl[i][0],cl[i][1],w/2);
        vertex(cl[i-1][0],cl[i-1][1],w/2);
        vertex(cl[i-1][0],cl[i-1][1],-w/2);
      endShape();
      if (dmode == 0){
        stroke(0,0,10);
      }
      line(cl[i][0],cl[i][1],-w/2,cl[i-1][0],cl[i-1][1],-w/2);
      line(cl[i][0],cl[i][1],w/2,cl[i-1][0],cl[i-1][1],w/2);
      //line(cl[i][0],cl[i][1],cl[i][2],cl[i-1][0],cl[i-1][1],cl[i-1][2]);

      popMatrix();
    }

    a += PI*0.1;

  }
}


public void setup()
{
  size( 1200, 720, P3D );
  background( 0 );
  noStroke();
  frameRate( 30 );

  bvhs[0] = new PBvh( loadStrings( "aachan.bvh" ) );
  bvhs[1] = new PBvh( loadStrings( "nocchi.bvh" ) );
  bvhs[2] = new PBvh( loadStrings( "kashiyuka.bvh" ) );
  for (int i = 0; i < loops.length; i++){ loops[i] = new Loop(0.0,0.0,0.0); } if (dmode == 1){ palette1 = new int[][]{{255,255,255}}; palette2 = new int[][]{{100,255,255}}; }else{ colorMode(HSB,360,100,100); } //noLoop(); } public void draw() { background(0,0,10); //camera float rr = 600; float ra = PI/2.75; camera(width/2+rr*cos(ra),height/2,rr*sin(ra),width/2,height/2,0,0,1,0); pushMatrix(); translate( width/2+50, height/2+150, 0); scale(-2, -2, -2); if (dmode > 0){
    background(230);
    directionalLight(160,160,160, 0.5, -1, 0.5);
    //pointLight(255,255,255,0,-300,-200);
    //pointLight(255,255,255,0,-300,0);
    ambientLight(160,160,160);
    //shininess(5.0);
    fill(250);
    pushMatrix();
    //rotateX(frameCount*0.1);
    box(500,10,500);
    popMatrix();

  }
  //model
  int j = 0;
  int e = 0;
  for (int i = 0; i < bvhs.length; i++){
    bvhs[i].update( 2000+frameCount*25 );

    for( BvhBone b : bvhs[i].parser.getBones())
    {


      if (b.getParent()!= null){
        float px = b.getParent().absPos.x;
        float py = b.getParent().absPos.y;
        float pz = b.getParent().absPos.z;

        float[] p1 =  new float[]{b.absPos.x,b.absPos.y,b.absPos.z};
        float[] p0 = new float[]{px,py,pz};
        float d =  dist3d(p0,p1);

        for (float k = 0; k < d; k+= 4){

          float[] c = lerpcoord(p0,p1,k/d);
          loops[j].lxyz = new float[]{loops[j].x0,loops[j].y0,loops[j].z0};
          loops[j].x0 = c[0];
          loops[j].y0 = c[1];
          loops[j].z0 = c[2];

          loops[j].rp1 = 0.5;
          loops[j].rp2 = 1.7;
          loops[j].dirv = new float[]{ px-b.absPos.x, py-b.absPos.y, pz-b.absPos.z};
          int[] col = palette1[j%palette1.length];
          loops[j].col[0] = bettercolor(floor(col[0]+320+frameCount*0.15)%360);
          loops[j].col[1] = col[1]; loops[j].col[2] = col[2];
          loops[j].cll = 24;
          j++;
        }
        for (float k = 0; k < d; k+= 100){

          float[] c = lerpcoord(p0,p1,k/d);
          loops[j].lxyz = new float[]{loops[j].x0,loops[j].y0,loops[j].z0};
          loops[j].x0 = c[0];
          loops[j].y0 = c[1];
          loops[j].z0 = c[2];
          loops[j].dirv = new float[]{ px-b.absPos.x, py-b.absPos.y, pz-b.absPos.z};
          loops[j].rp1 = 10;
          loops[j].rp2 = 2;
          int[] col = palette2[j%palette2.length];
          loops[j].col[0] = floor(col[0]+320+frameCount*0.15)%360;
          loops[j].col[1] = col[1]; loops[j].col[2] = col[2];
          loops[j].cll = 24;
          loops[j].cll = 16;
          loops[j].spd = 0.01;
          j++;
        }

        //line(b.absPos.x,b.absPos.y,b.absPos.z,px,py,pz);
      }

      pushMatrix();
      translate(b.absPos.x, b.absPos.y, b.absPos.z);
      fill(0,0,100);
      if (dmode <= 0){rotateY(PI/2-PI/2.75);ellipse(0, 0, 2, 2);}
      popMatrix();
      if (!b.hasChildren())
      {
        pushMatrix();
        translate( b.absEndPos.x, b.absEndPos.y, b.absEndPos.z);
        if (dmode <= 0){
          rotateY(PI/2-PI/2.75);
          ellipse(0,0,5,5);
        }
        popMatrix();
      }
    }
  }

  for (int i = 0; i < j; i++){
    loops[i].update();
  }

  popMatrix();
  //saveFrame("frames/"+nf(frameCount,6)+".png");

}
Partly inspired by Unnamed SoundSculpture by Daniel Franke & Cedric Kiefer, I made a mo-cap marble-party-man. The bone ends of the motion captured body spews out marbles of assorted colors (size and darkness depending on Z position). I wish I worked with Lumar since Lumar was able to figure out how to calculate the Kinetic Energy of every motion captured point, which could determine how the marbles are spawned (for example, you could stand still but fling marbles with your arm, while other marbles just drop to the floor). I also could not do collision detection (unlike what I saw in Unnamed SoundSculpture) because the process would be incredibly slow to render, however I recognize that that is a route that I could have taken.
This assignment has three parts: Some readings, a Looking Outwards, and a software project. Please note that these deliverables have different due dates:
Part A. Reading-Response #08: Two Readings about Things, due Monday 11/14
Part B. Looking Outwards #08: On Physical Computing, due Monday 11/14
Part A. Reading-Response #08: Two Readings about Things
This is intended as a very brief reading/response assignment, whose purpose is to introduce some vocabulary and perspective on “critical making” and the “internet of things”. You are asked to read two very brief statements. Due Monday, November 14.
Please read the following one-page excerpt from Bruce Sterling’s “Epic Struggle for the Internet of Things”:
Please (also) read the one-page “Critical Engineering Manifesto” (2011) by Julian Oliver, Gordan Savičić, and Danja Vasiliev. Now,
Select one of the tenets of the manifesto that you find interesting.
In a brief blog post of 100-150 words, re-explain it in your own words, and explain what you found interesting about it. If possible, provide an example, real or hypothetical, which illustrates the proposition.
Label your blog post with the Category, ManifestoReading, and title it nickname-manifesto.
Part B. Looking Outwards #08: Physical Computing
This LookingOutwards assignment is concerned with physical computing and tangible interaction design. As part of this Looking Outwards, you are strongly strongly encouraged to attend the public lecture of Hiroshi Ishii on Thursday, November 10 at 5pm in McConomy Auditorium. (Chinese food will be served afterwards in the STUDIO.) Due Monday, November 14.
Here are some links you are welcome to explore for your Looking Outwards assignment:
Please categorize your Looking Outwards with the WordPress Category, LookingOutwards08, and title your blog post nickname-lookingoutwards08.
Part C. Software for a Skeleton
For this project, you are asked to write software which
creatively interprets, or responds to, the actions of the body.
You will develop a computational treatment for motion-capture data. Ideally, both your treatment, and your motion-capture data, will be ‘tightly coupled’ to each other: The treatment will be designed for specific motion-capture data, and the motion-capture data will be intentionally selected or performed for your specific treatment.
Code templates for Processing, three.js and openFrameworks are here. Due Friday, November 11.
It’s important to emphasize that you have a multitude of creative options — well beyond, or alternative to, the initial concept of a “decorated skeleton”. The following ten suggestions, which are by no means comprehensive, are intended to prompt you to appreciate the breadth of the conceptual space you may explore. In all cases, be prepared to justify your decisions.
You may work in real-time (interactive), or off-line (animation). You may choose to develop a piece of interactive real-time software, which treats the mocap file as a proxy for data from a live user (as in Setsuyakurotaki, by Zach Lieberman + Rhizomatiks, shown above in use by live DJs). Or you may choose to develop a piece of custom animation software, which interprets the mocap file as an input to a lengthy rendering process process (as in Universal Everything’s Walking City, or Method Studios’ AICP Sponsor Reel).
You may use more than one body. Your software doesn’t have to be limited to just one body. Instead, it could visualize the relationship (or create a relationship) between two or more bodies (as in Scott Snibbe’s Boundary Functionsor ). It could visualize or respond to a duet, trio or crowd of people.
You may focus on just part of the body. Your software doesn’t need to respond to the entire body; it could focus on interpreting just a single part of the body (as in Theo Watson & Emily Gobeille’s prototype for Puppet Parade, which responds to a single arm).
You may focus on how an environment is affected by the body. Your software doesn’t have to re-skin or visualize the body. Instead, you can develop an environment that is affected by the movements of the body (as in Theo & Emily’s Weather Worlds).
You may position your ‘camera’ anywhere — including a first-person POV, or with a (user-driven) VR POV. Just because your performance was recorded from a sensor “in front” of you, this does not mean your mocap data must be viewed from the same point of view. Consider displaying your figure in the round, from above, below, or even from the POV of the body itself. (Check out the camera() function in Processing, or the PerspectiveCamera object in three.js, for more ideas. If you’re using three.js, you could also try a WebVR build for Google cardboard.)
You may work in 3D or 2D. Although your mocap data represents three-dimensional coordinates, you don’t have to make a 3D scene; for example, you could use your mocap to control an assemblage of 2D shapes. You could even use your body to control two-dimensional typography. (Helpful Processing commands like screenX() and screenY() , or unprojectVector() in three.js, allow you to easily compute the 2D coordinates of a perspectivally-projected 3D point.)
You may control the behavior of something non-human. Just because your data was captured from a human, doesn’t mean you must control a human. Consider using your mocap data to puppeteer an animal, monster, plant, or even a non-living object (as in this research on “animating non-humanoid characters with human motion data” from Disney Research).
You may record mocap data yourself, or you can use data from an online source. If you’re recording the data yourself, feel free to record a friend who is a performer — perhaps a musician, actor, or athlete. Alternatively, feel free to use data from an online archive or commercial vendor. You may also combine these different sources; for example, you could combine your own awkward performance, with a group of professional backup dancers.
You can make software which is analytic or expressive. You are asked to make a piece of software which interprets the actions of the human body. While some of your peers may choose to develop a character animation or interactive software mirror, you might instead elect to create “information visualization” software that presents an analysis of the body’s joints over time. Your software could present comparisons different people making similar movements, or could track the accelerations of movements by a violinist.
You may use sound. Feel free to play back sound which is synchronized with your motion capture files. This might be the performer’s speech, or music to which they are dancing, etc. (Check out the Processing Sound Library to play simple sounds, or the PositionalAudio class in three.js, which has the ability to play sounds using 3D-spatialization.)
Technical Options & Resources
Code templates for loading and displaying motion capture files in the BVH format have been provided for you in Processing (Java), openFrameworks (C++), and three.js (a JavaScript library for high-quality OpenGL 3D graphics in the browser). You can find these templates here: https://github.com/CreativeInquiry/BVH-Examples.
As an alternative to the above, you are permitted to use Maya (with its internal Python scripting language), or Unity3D for this project. Kindly note, however, that the professor and TA cannot support these alternative environments. If you use them, you should be prepared to work independently. For Python in Maya, please this tutorial, this tutorial, and this video.
For this project, it is assumed that you will record or reuse a motion capture file in the BVH format. (If you are working in Maya or Unity, you may prefer to use the FBX format.) We have purchased a copy of Brekel Pro Body v2 for you to use to record motion capture files, and we have installed it on a PC in the STUDIO; it can record Kinect v2 data into these various mocap formats.
Review some of the treatments of motion-capture data which people have developed, whether for realtime interactions or for offline animations, in our lecture notes from Friday 11/4.
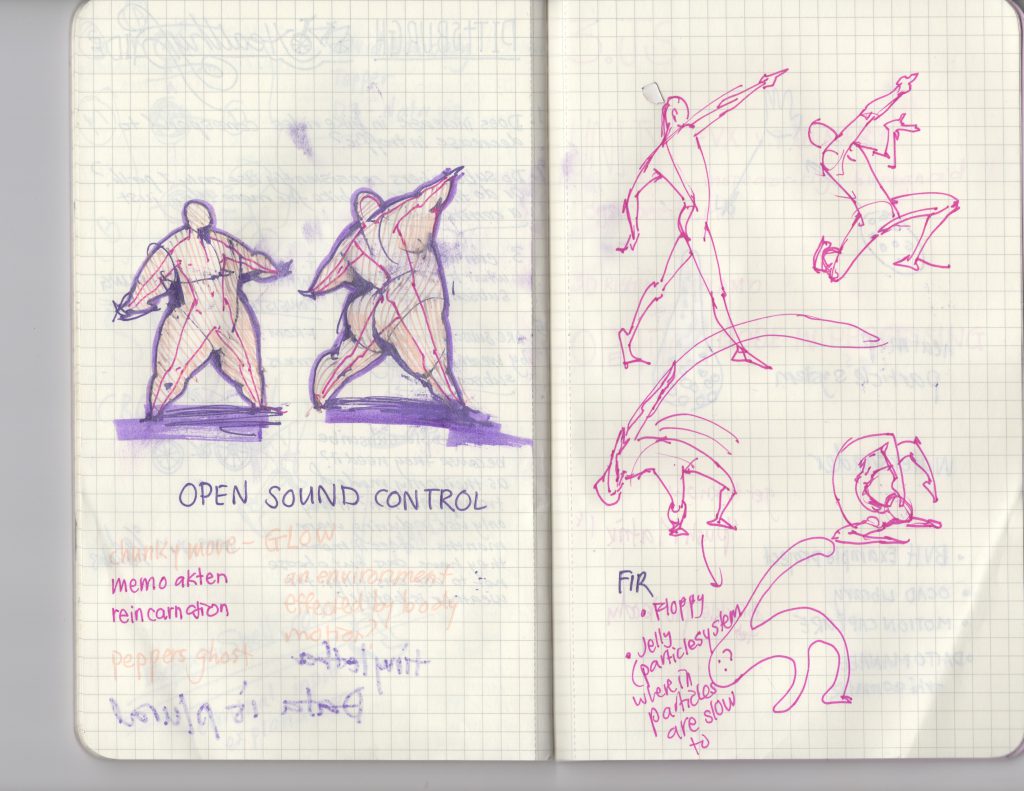
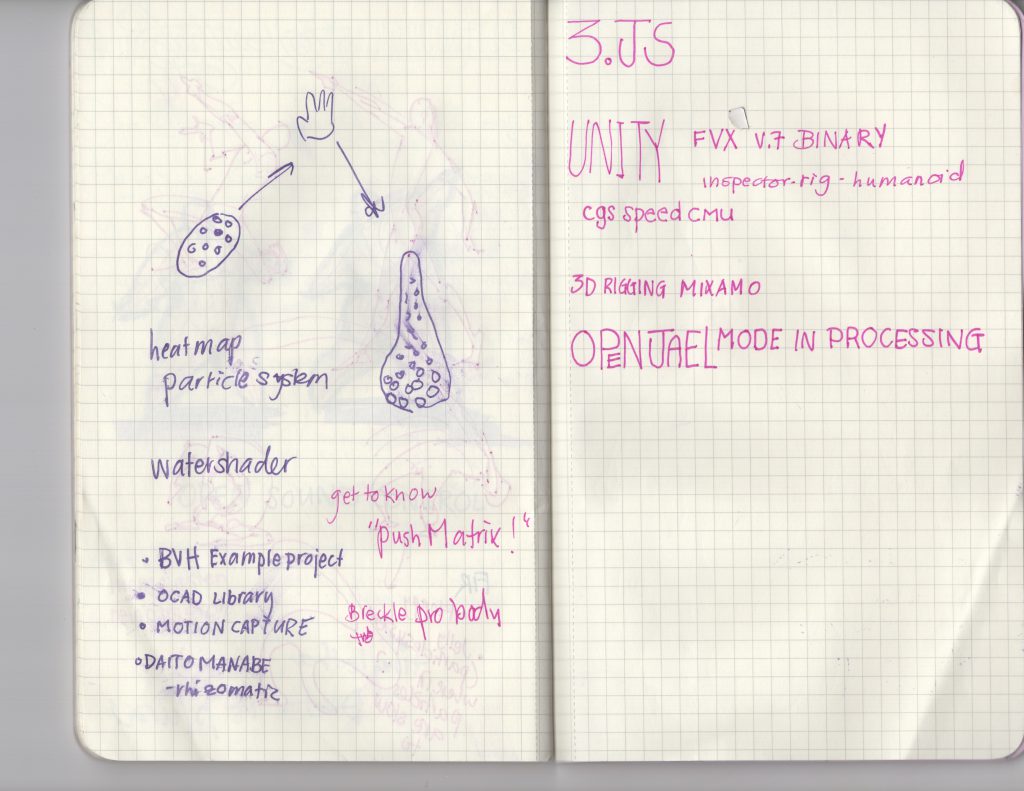
Sketch first! Draw some ideas.
Make or find a motion capture recording. Be sure to record a couple takes. Keep in mind that you may wish to re-record your performance later, once your software is finished.
Develop a program that creatively interprets, or responds to, the changing performance of a body as recorded in your motion-capture data. (If you feel like trying three.js, check out their demos and examples.)
Create a blog post on this site to hold the media below.
Title your blog post, nickname-mocap, and give your blog post the WordPress Category, Mocap.
Write a narrative of 150-200 words describing your development process, and evaluating your results. Include some information about your inspirations, if any.
Embed a screengrabbed video of your software running (if it is designed to run in realtime). If your software runs “offline” (non-realtime), as in an animation, render out a video and embed that.
Upload an animated GIF of your software. It can be brief (3-5 seconds).
Upload a still image of your software.
Upload some photos or scans of your notebook sketches.
Embed your code (using the WP-Syntax WordPress plugin to format your JavaScript and/or other code), and include a link to your code on Github.
Test your blog post to make sure that all of the above embedded media appear correctly. If you’re having a problem, ask for help.
I had wanted to create a program to find out the kinetic energy used at each joint (not to be confused with velocity because kinetic energy depends on acceleration and mass as well). It’s a foundation that is incredibly scalable. I had spent the good chunk of the week trying to work out 3.js and brainstorming ideas….actually I spent a little too much time on that. By the time I did give up on getting my 3.js up and running, it was crunch time for crash coursing 3d in processing.
Based off kinetic energy, there could’ve been a particle system that reacted to higher levels, wherein greater motion will generate more. Or rather an environment – tiny particles at each unit of the 3d grid where the gravitational pull of a part of the body is increased according to its change in kinetic energy. I thought that would be the most interesting because the person would be ‘there’ in the environment by…’not’ being there. The negative space within the environment saturated with floating particles would indicate the human form, but would be more dynamic and better understood while in motion because the particles would gravitate towards it.
On a interaction standpoint, with this hooked up to real time data, people with larger mass will comparatively have larger gravitational pulls if they move at the same speed as someone of smaller stature. With multiple people, there is an interesting competition between who’s kinetic energy draws upon more of the floating ‘ star’ particles within the void.
etc, etc, etc, idea after idea, different modes for different ‘planets’ (planetary pull effects weight), comparing motion, calculating joules from kinetic energy and based of weight and mass assumptions – visualize calorie consumption, etc etc
etc, etc
But having lots of ideas is sometimes a detriment – there is too much to know where to focus on. So I started off with just calculating KE.
In impromptu collaboration with the fabulous Guodu:
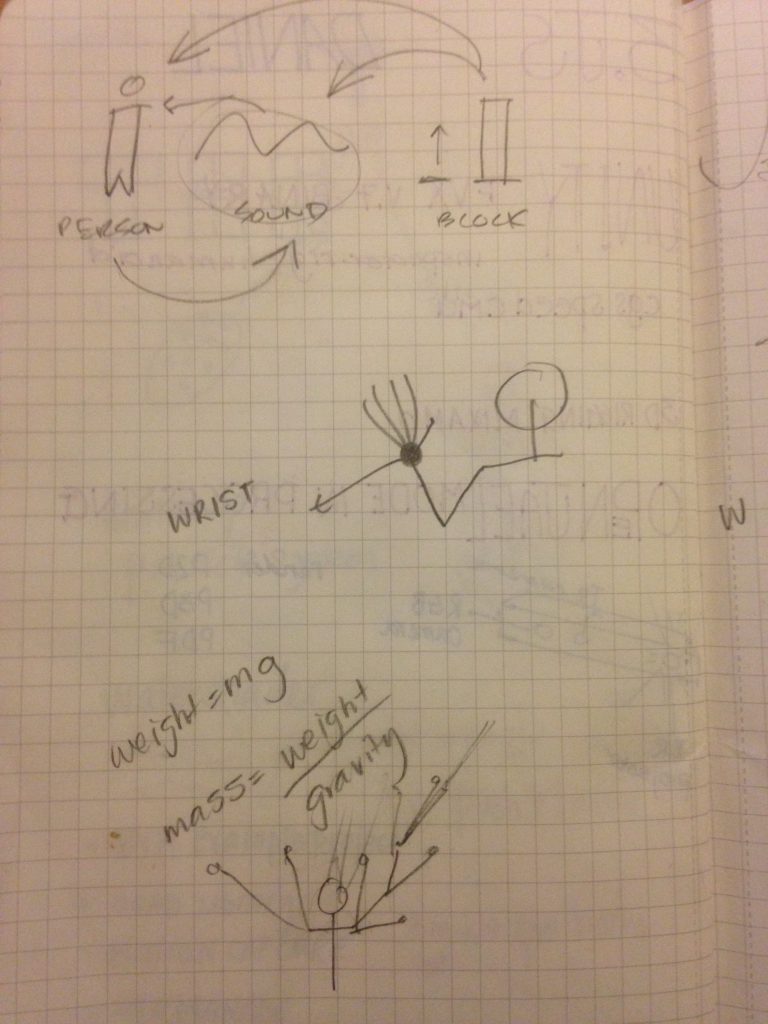
The idea we came up with had a focus on the interaction design. We built the foundation first on being able to calculate the kinetic energy each
Originally, we wanted the kinetic energy of each limb to be expressed by an iridescent bar chart. The individual bars would represent different parts of the body, and change colors and height according to the limb’s kinetic energy (the limb would as well, so there would be some sense of what represents what).
The bars going up and down would look like the wave formations of audio files. While it wouldn’t have matched specifically, we were really looking forward to manipulating amplitude and frequency of sound waves in processing according to kinetic energy. This way, anyone could dance ‘in sync’ with the music. Never worry about missing a beat when the music is generated according to your dance!
We had some trouble with transformations (translation/orientation) in 3d space. Great learning experience together! Neither of us have ever touched 3d programming/3d in general before this assignment so I’m happy that we have had the chance to crash course through it.
Here we put BVH files of ourselves dancing:
THE BLOG STOPPED TAKING MEDIA UPLOADS. ERROR ERROR ERROR – THE REST OF THIS IS AVAILABLE ELSEWHERE –
Did you notice it was smoother? We changed our formula to make the reactions of the balls smoother. Since we were only smoothing distance to a running average, and kinetic energy is velocity squared, the easing had little to no effect. We decided that instead of expressing kinetic energy, we would just visualize velocity instead.
Overall, I can’t say I am too proud of how the end result translated the movement visually. But I am happy to have had this opportunity as my first exposure to 3D programming/animation/anything.
For documentation purposes, I will try to get another BVH file rendered of someone moving their body parts one by one to show how the program works, before recording a live video of someone interacting with it and the computational results in sound and visuals being shown.
I’m excited to use the velocity data to inform the physics of a particle/cloud system.


 with Maya takes practically no time (setting up the
  Mixamo skeleton and place them in a separate group.
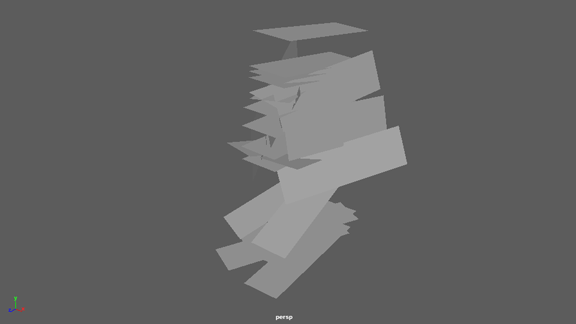 applied.


 the sketching for the monster
 Some of my experiments with Perlin noise to generate forms
 Some of my experiments with Perlin noise to generate forms
 sketches of my ideas
 the OG ear of corn