Circuit 7
This is the first part of the LED working with one button:
This is the second part (under “make it better”) of the LED controlled by two buttons:
Third part (also under “make it better”) of the LED being faded by the two buttons:
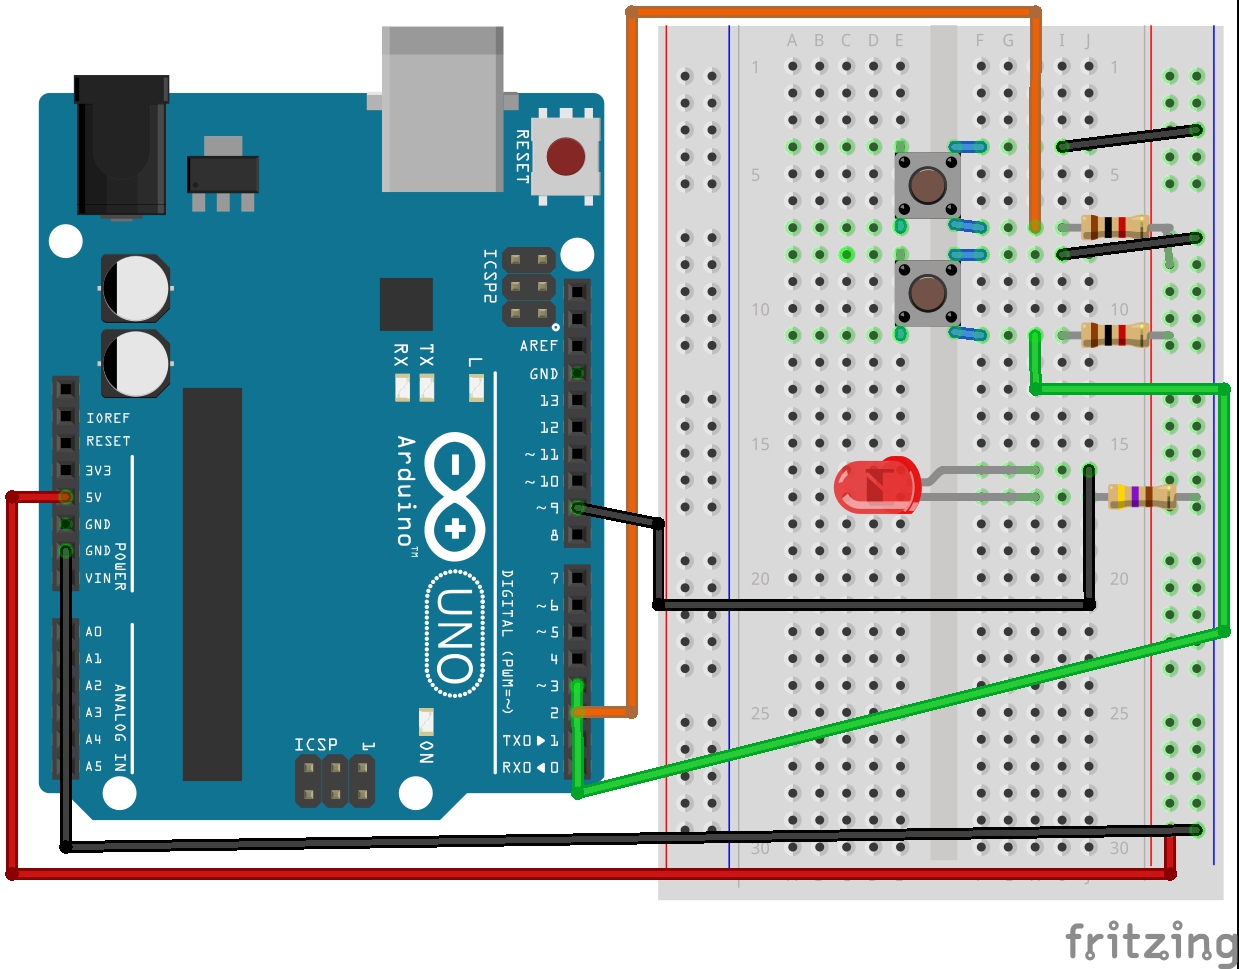
Fritzing diagram:
The Code:
/*
/*
* Button
* by DojoDave <http://www.0j0.org>
*
* Turns on and off a light emitting diode(LED) connected to digital
* pin 13, when pressing a pushbutton attached to pin 7.
* http://www.arduino.cc/en/Tutorial/Button
*/
int ledPin = 13; // choose the pin for the LED
int inputPin = 2; // choose the input pin (for a pushbutton)
int val = 0; // variable for reading the pin status
void setup() {
pinMode(ledPin, OUTPUT); // declare LED as output
pinMode(inputPin, INPUT); // declare pushbutton as input
}
void loop(){
val = digitalRead(inputPin); // read input value
if (val == HIGH) { // check if the input is HIGH
digitalWrite(ledPin, LOW); // turn LED OFF
} else {
digitalWrite(ledPin, HIGH); // turn LED ON
}
}


// //comment out the previous code and uncomment this for the second part

//int ledPin = 13; // choose the pin for the LED
//int inputPin1 = 3; // button 1
//int inputPin2 = 2; // button 2

//void setup() {
//  pinMode(ledPin, OUTPUT); // declare LED as output
//  pinMode(inputPin1, INPUT); // make button 1 an input
// pinMode(inputPin2, INPUT); // make button 2 an input
//}

//void loop(){

// if (digitalRead(inputPin1) == LOW) {
//    digitalWrite(ledPin, LOW); // turn LED OFF
// } else if (digitalRead(inputPin2) == LOW) {
//    digitalWrite(ledPin, HIGH); // turn LED ON /

////for part three comment the entire loop function and uncomment this , and then //change the input pin from 13 to 9

////int value = 0;
////void loop(){
//// if (digitalRead(inputPin1) == LOW) { value--; }
////  else if (digitalRead(inputPin2) == LOW) { value++; }
////  value = constrain(value, 0, 255);
////  analogWrite(ledPin, value);
////  delay(10);
////}

//  }
//}