Here is a little kinematic owl with 2 degrees of freedom, neck and eyelids.
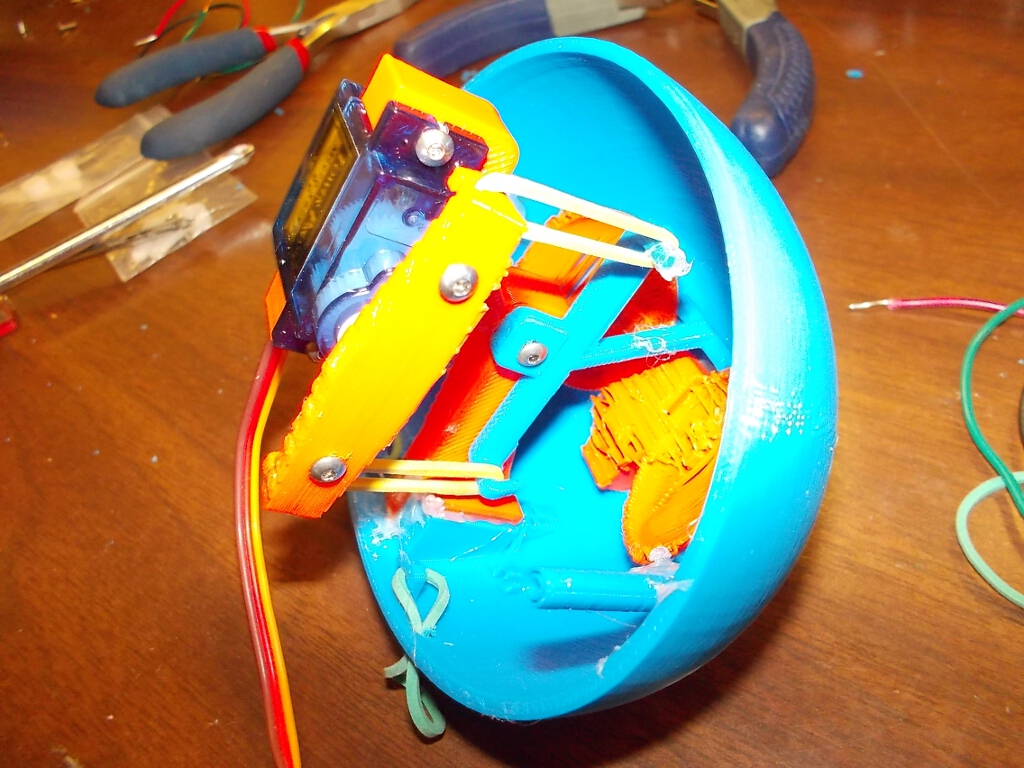
For a good while now, I’ve been wanting to experiment on using rubber bands attached to servomotors as a method of creating soft and compliant actuation systems, and this assignment was a very good opportunity to test this idea.
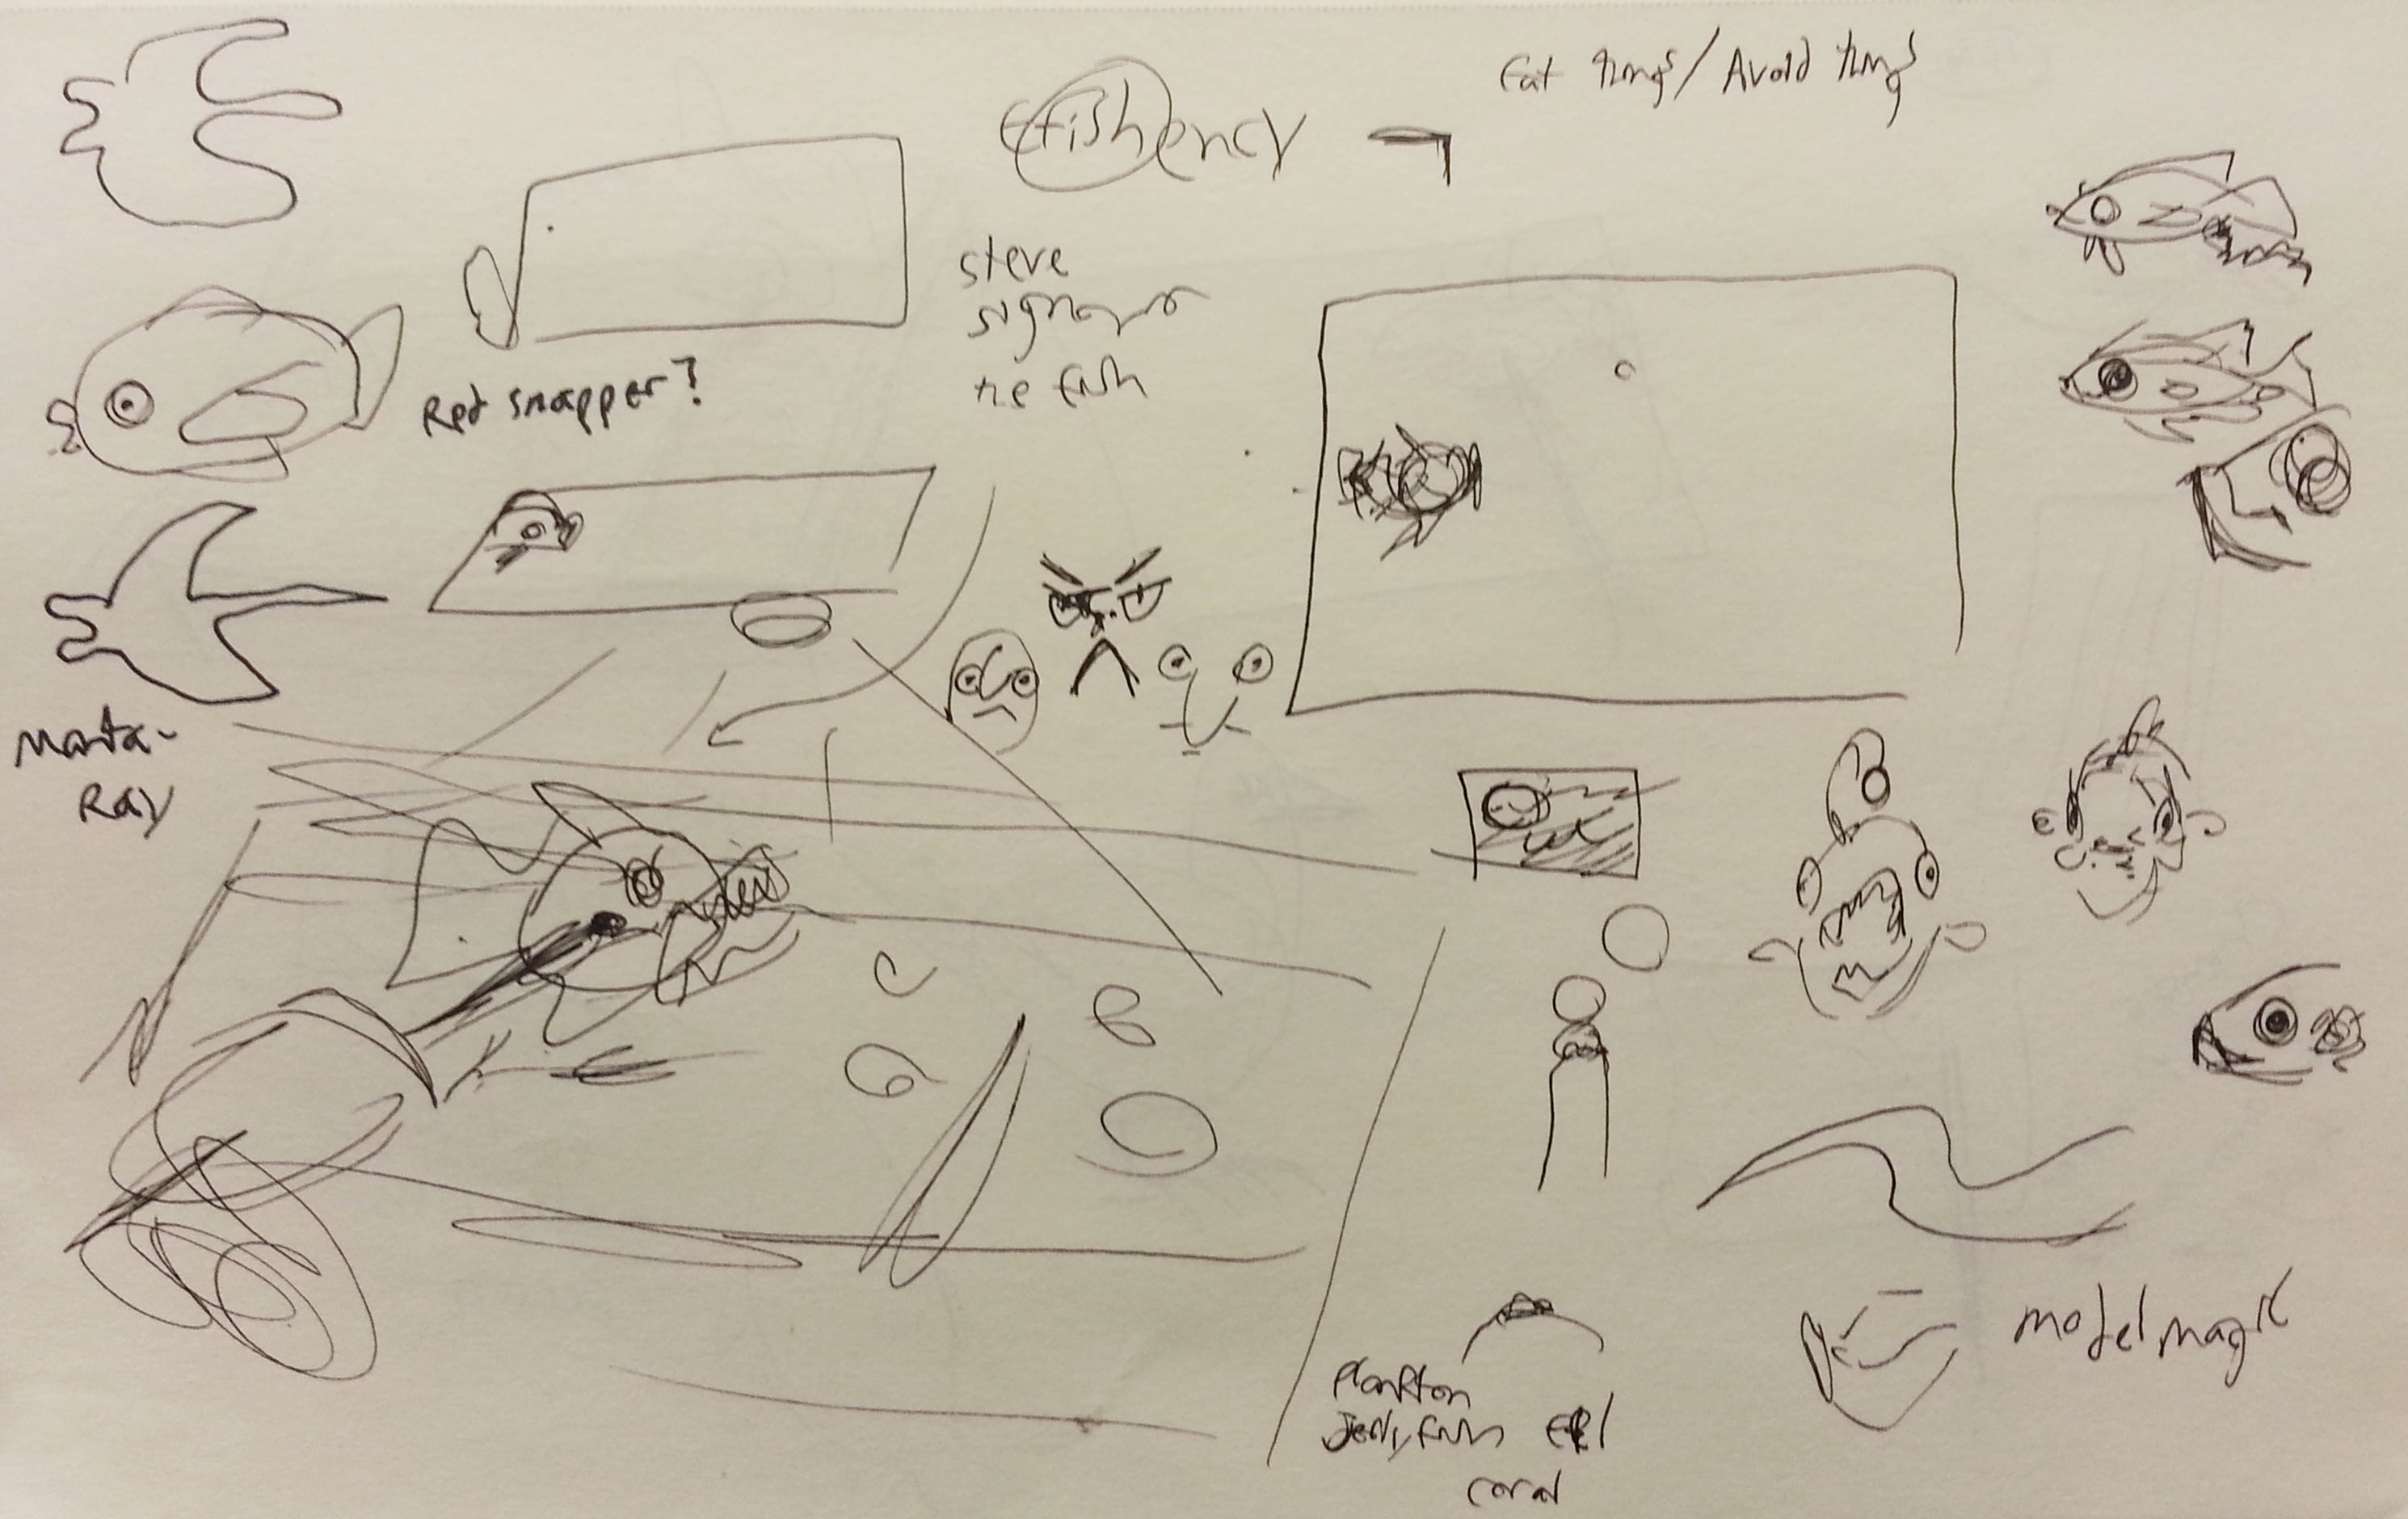
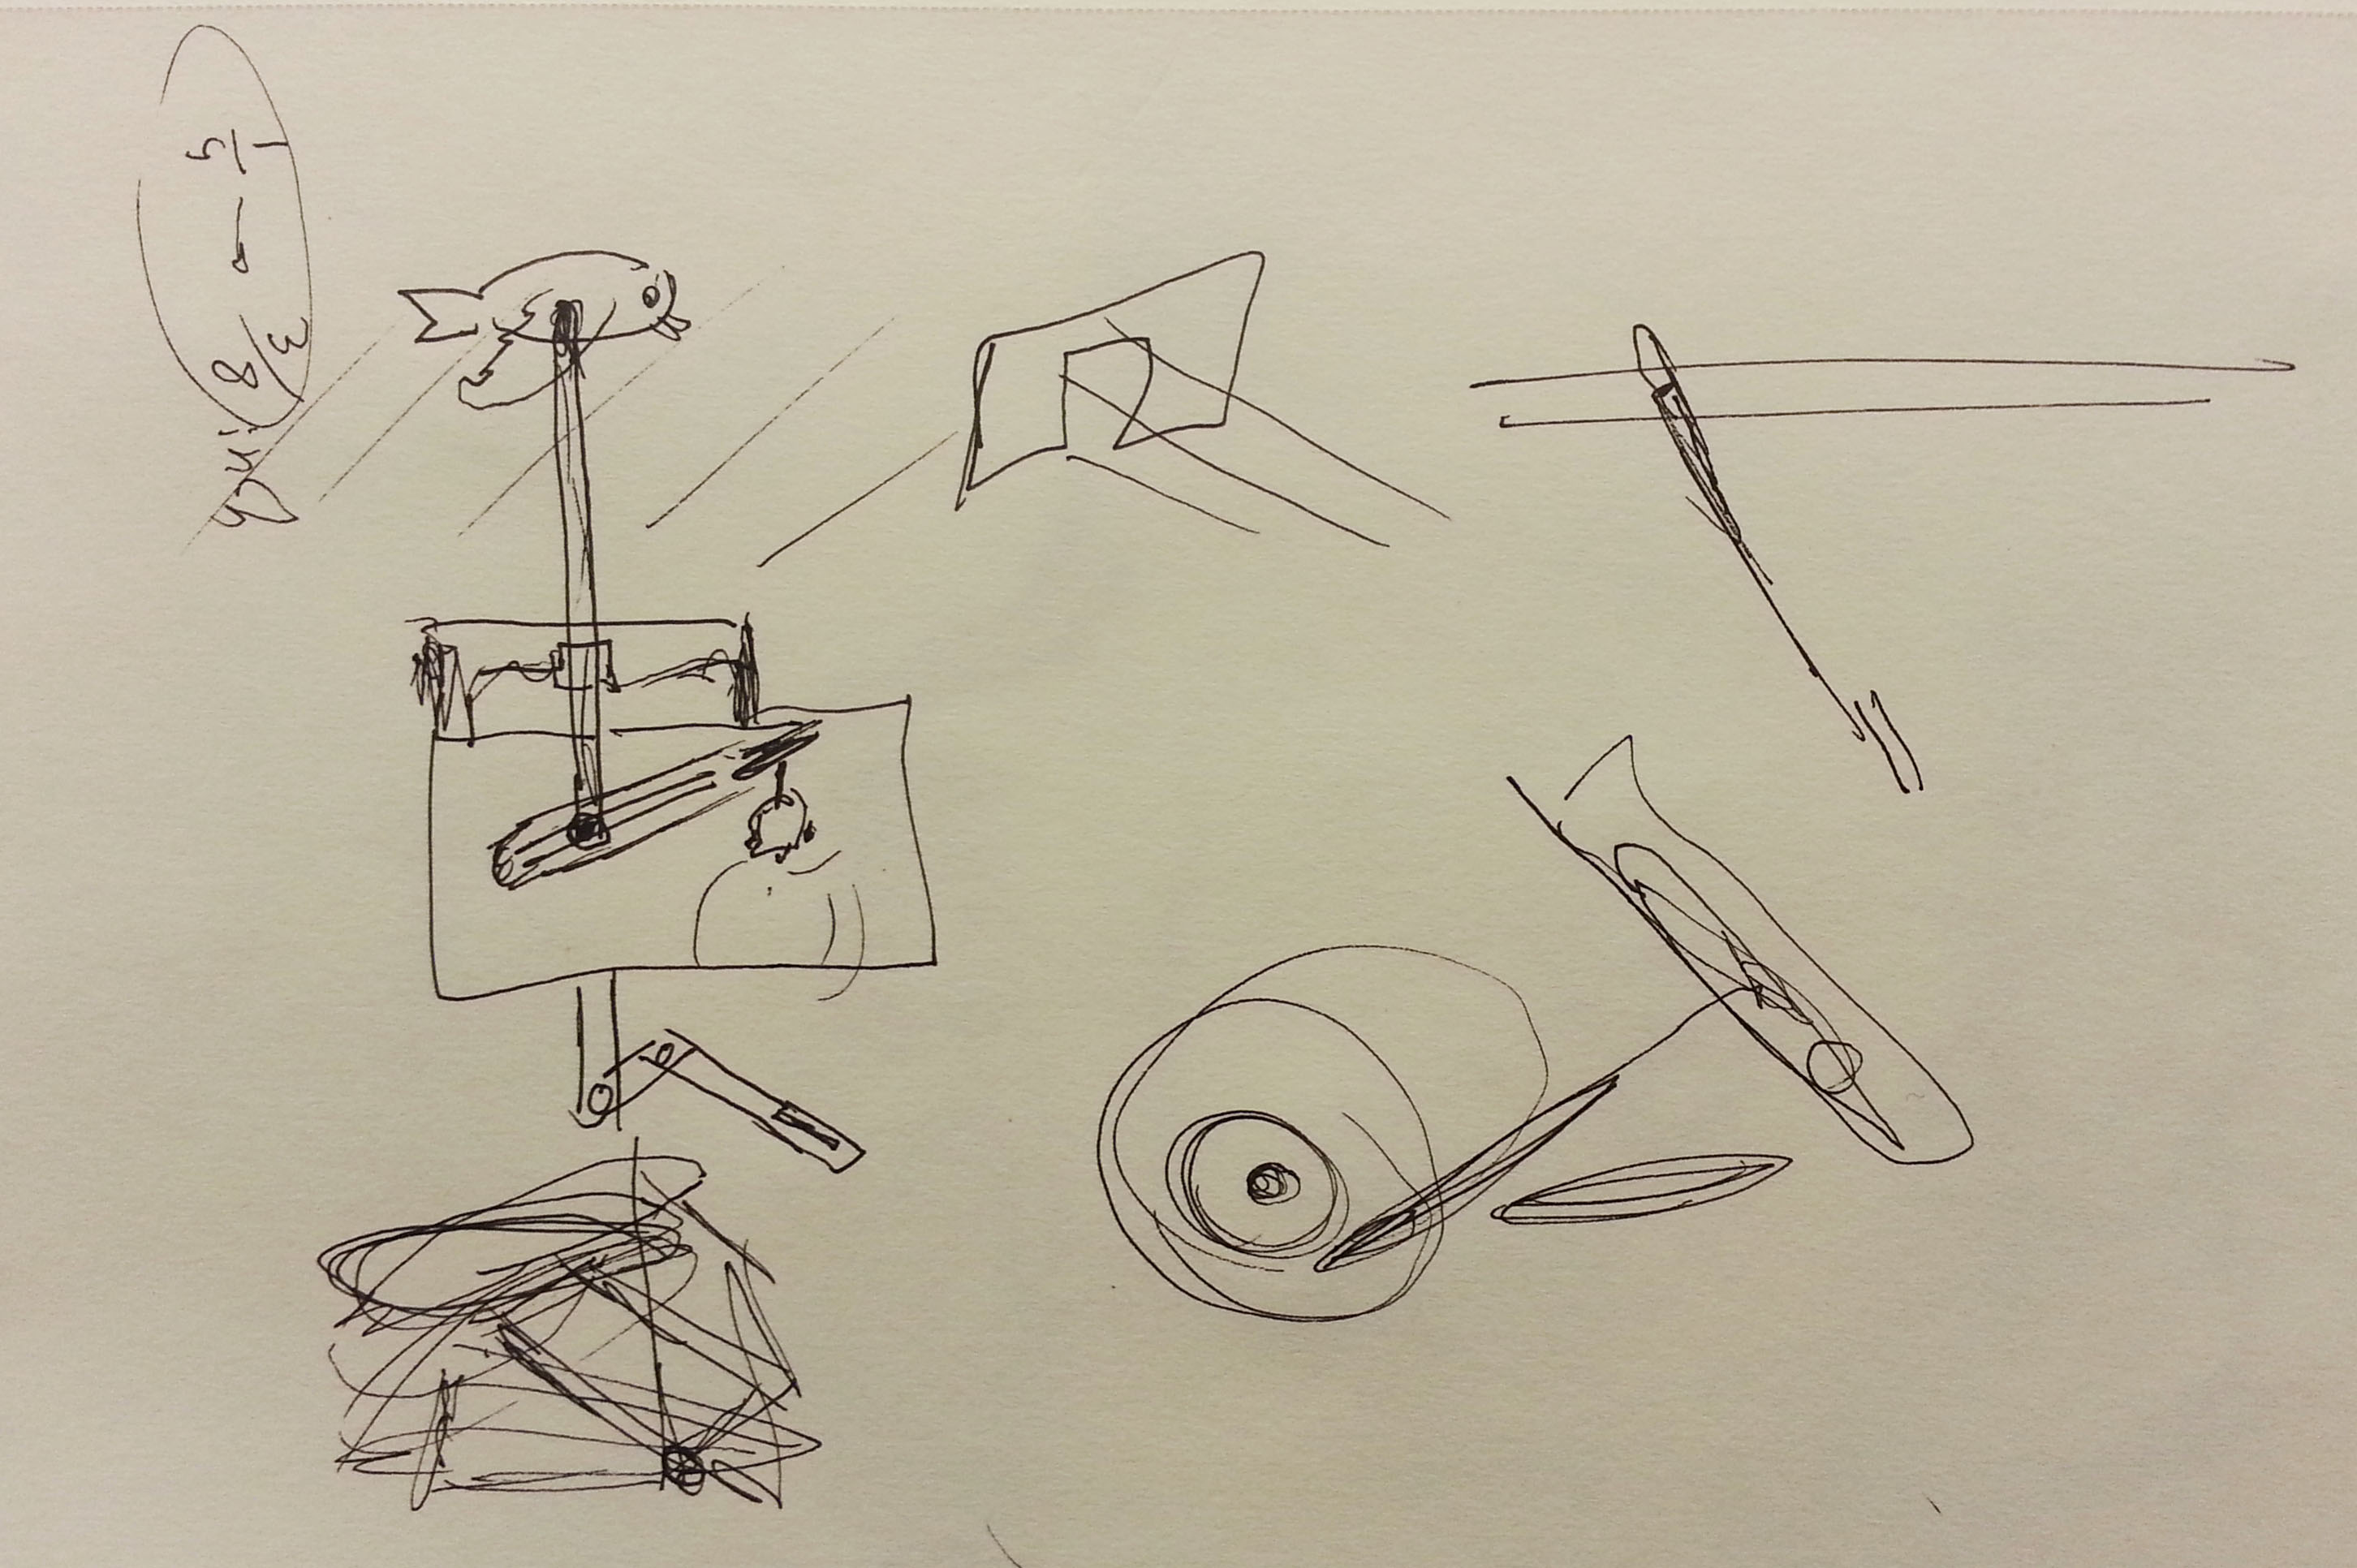
While I did not draw any two dimensional paper sketches, I did create a comprehensive three dimensional sketch in Rhinoceros (its easier for me to think in 3D when building robots.)
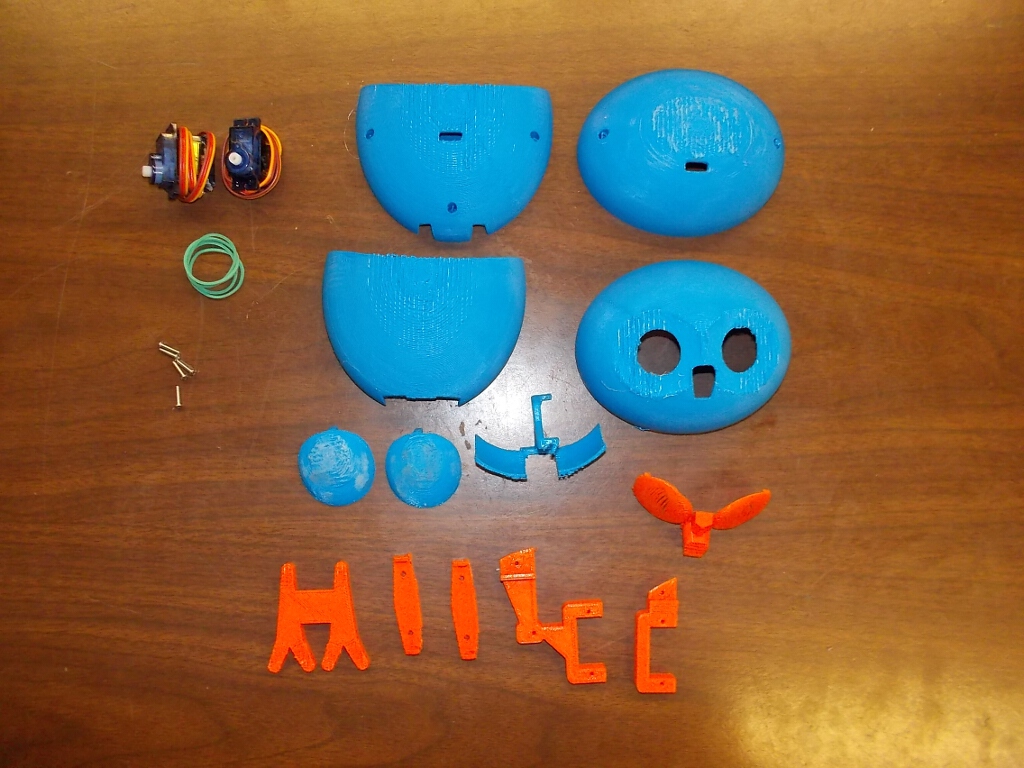
When everything looked good, I then proceeded to 3D print all the parts (9 hours for 13 pieces:)
Assembly took the longest. While the majority of pieces fit nice and snug, I overlooked some screw hole sizes and had to improvise with a hand drill and hot glue:
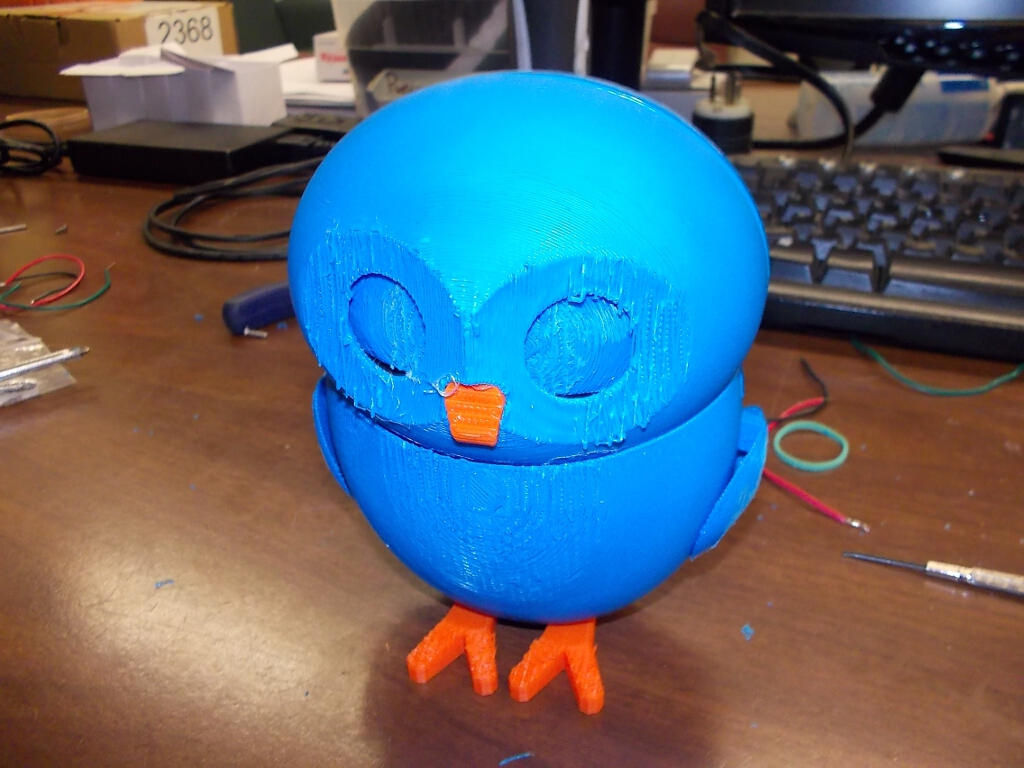
Here is the owl fully assembled:
The eyelids worked very well, and the neck worked fairly well (I had expected a slightly higher range of motion.) Overall, I think this project was a success as I had learned that rubber bands attached to servo motors can indeed be used to generate compliant actuation. This project was also a success because I now have a cute kinematic owl sitting on my desk :)
Here is a Fritzing diagram:
The code is very simple and makes the owl randomly blink and tilt its head. When the code is loaded onto the Arduino, the result is a very energetically tired and sleepy-looking owl that is both curious and oblivious to its surroundings.
/* --- PRE SETUP --- */
#include

Servo eyes;
Servo neck;
int neckAction = 0;
int eyeAction = 0;

/* ----- SETUP ----- */
void setup() {
  eyes.attach(31);
  neck.attach(33);
}

/* --- MAIN LOOP --- */
void loop() {

  //control neck
  neckAction = random(6);
  //neck.write(90);

  switch(neckAction) {
    case 0:
      neck.write(90);
      break;
    case 1:
      neck.write(0);
      break;
    case 2:
      neck.write(180);
      break;
  }

  //control eyes
  eyeAction = random(10);
  //eyes.write(45);

  switch (eyeAction) {
    case 0:
      eyes.write(0);
      break;
    case 1:
      eyes.write(45);
      break;
    case 2:
      eyes.write(22);
      break;
    case 3:
      eyes.write(0);
      delay(100);
      eyes.write(45);
      break;
  }

  delay(1000);

}
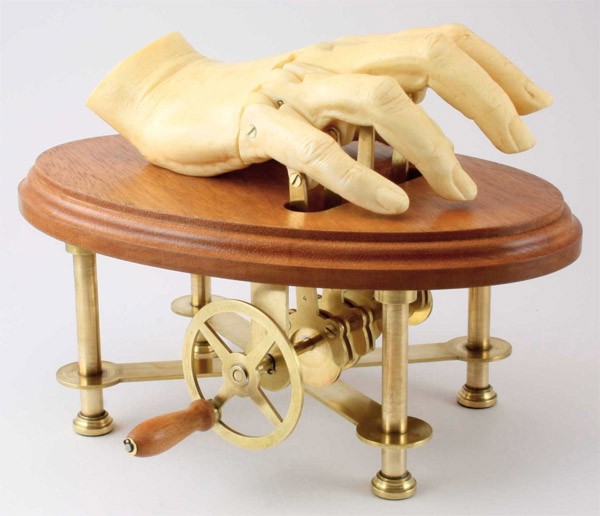
Despite the fact that I have never actually seen any of these in person or their internal mechanisms, I thought about how they worked and built everything myself from scratch.
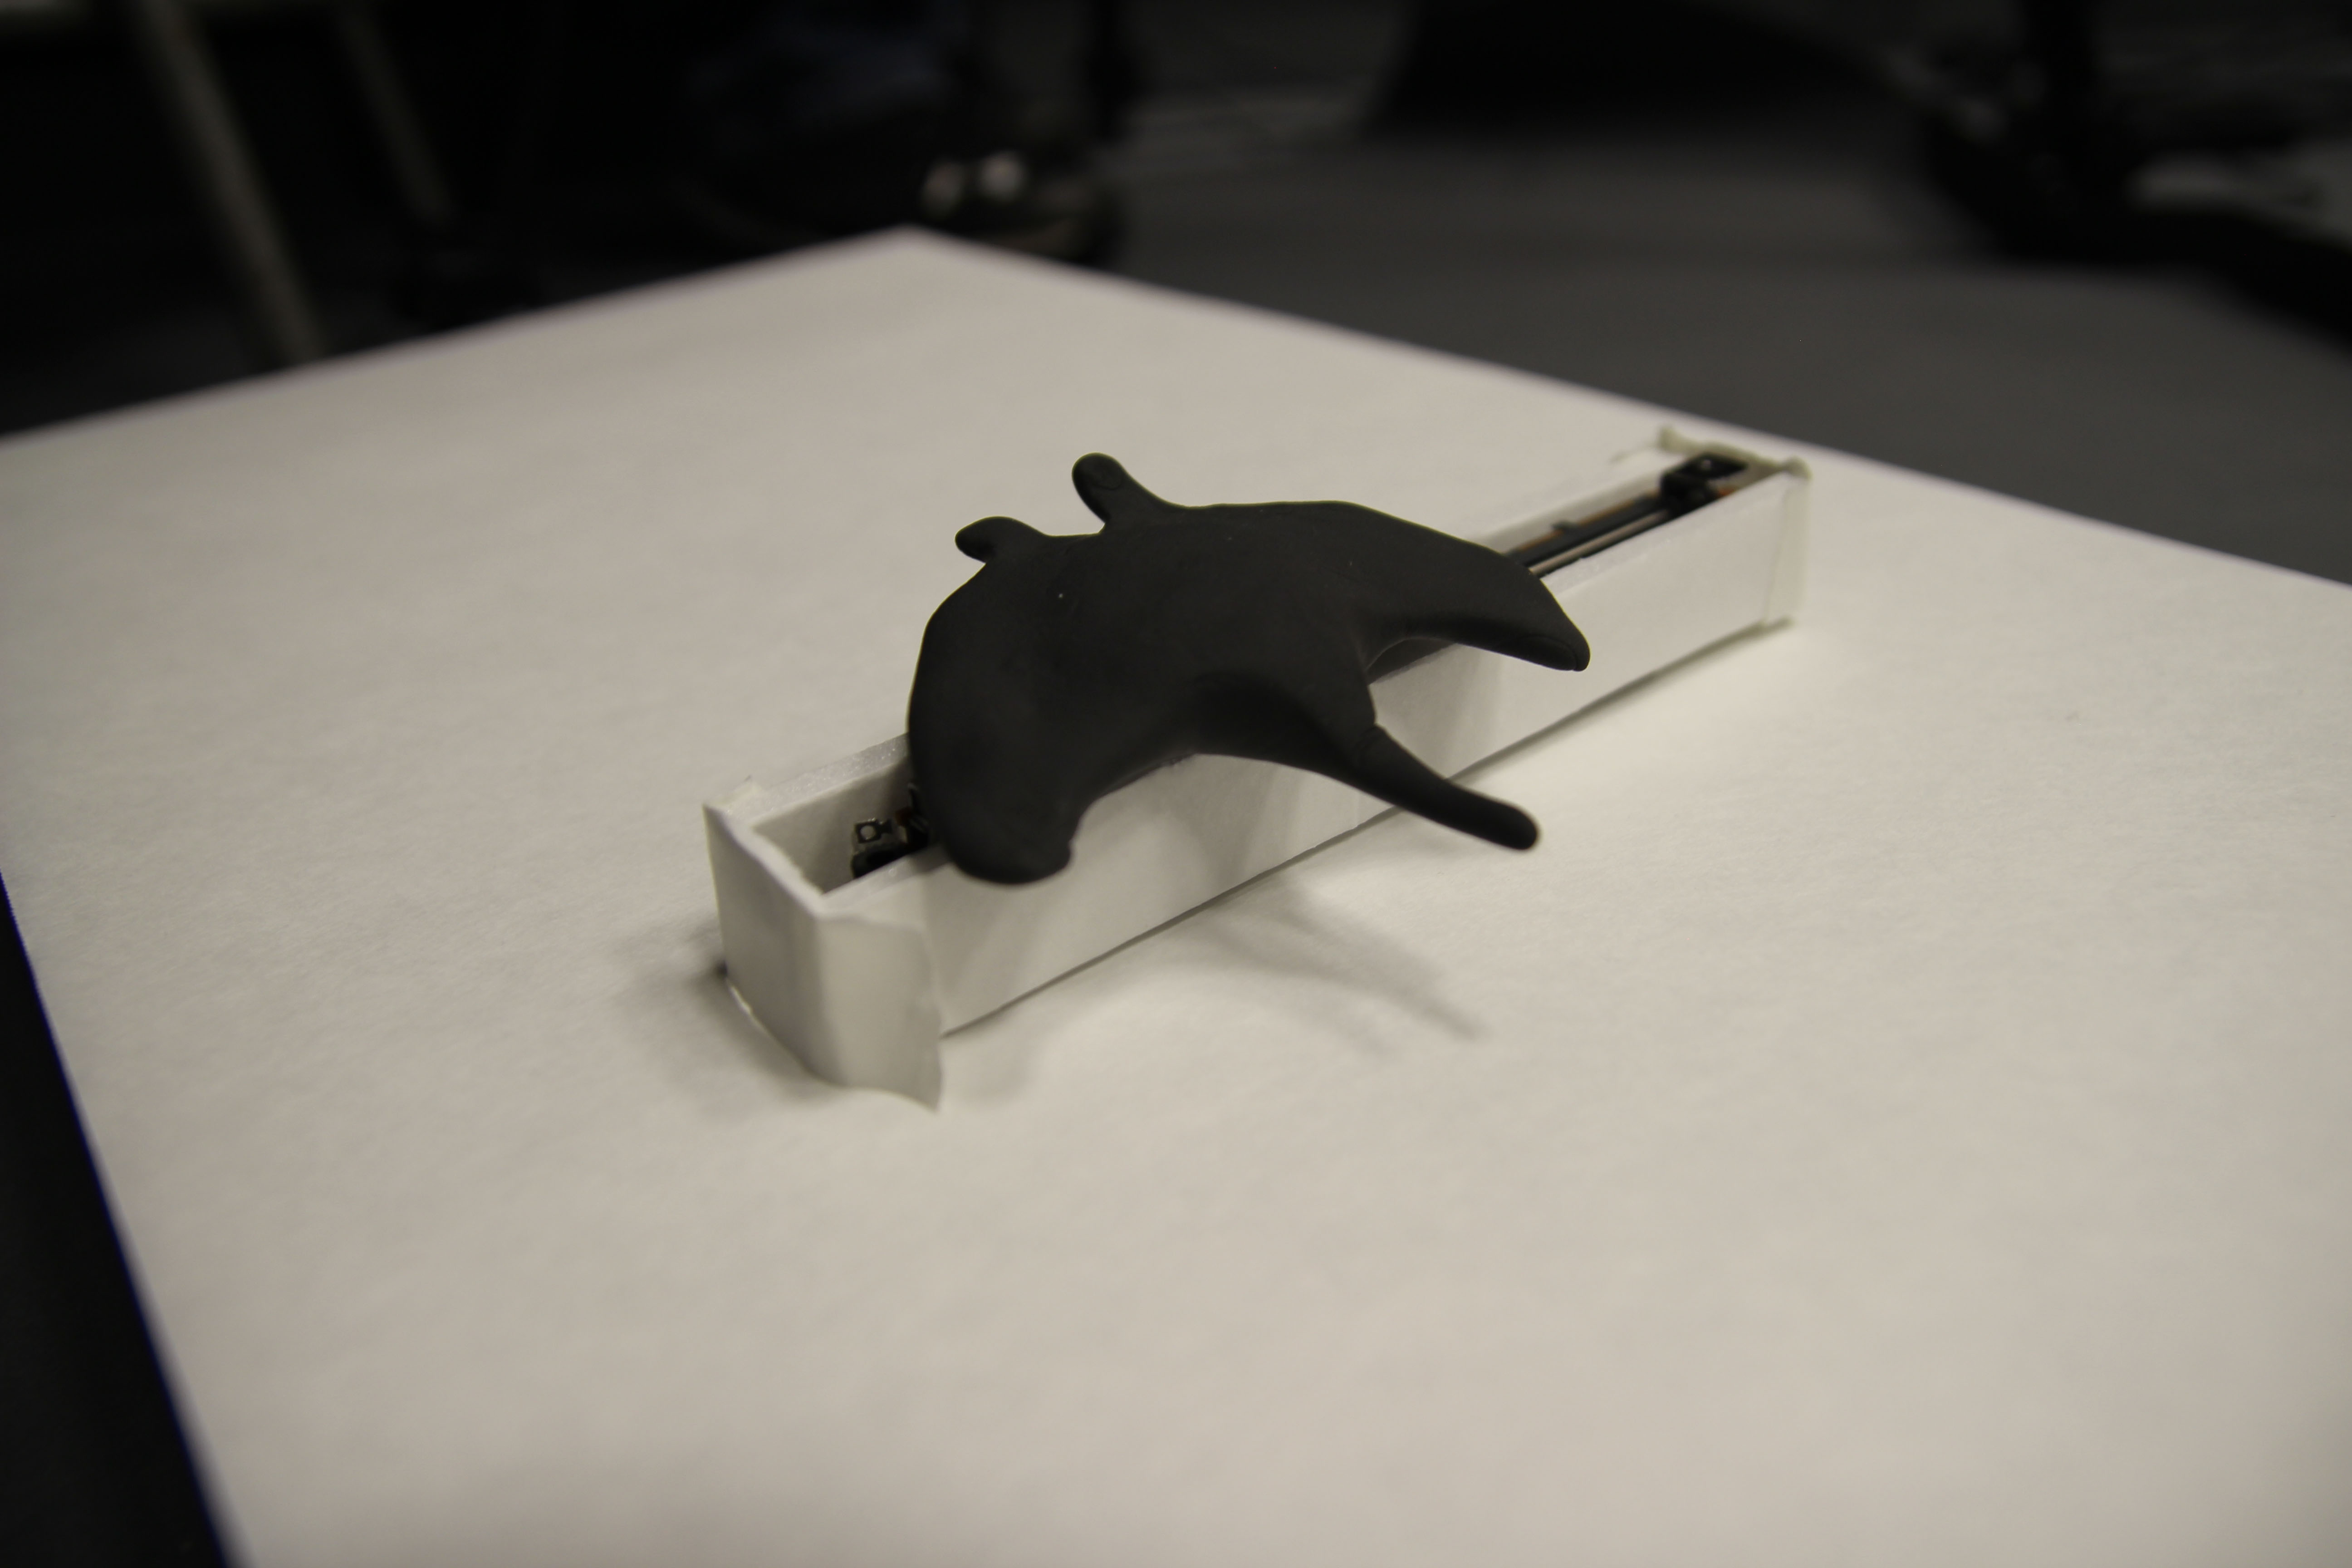
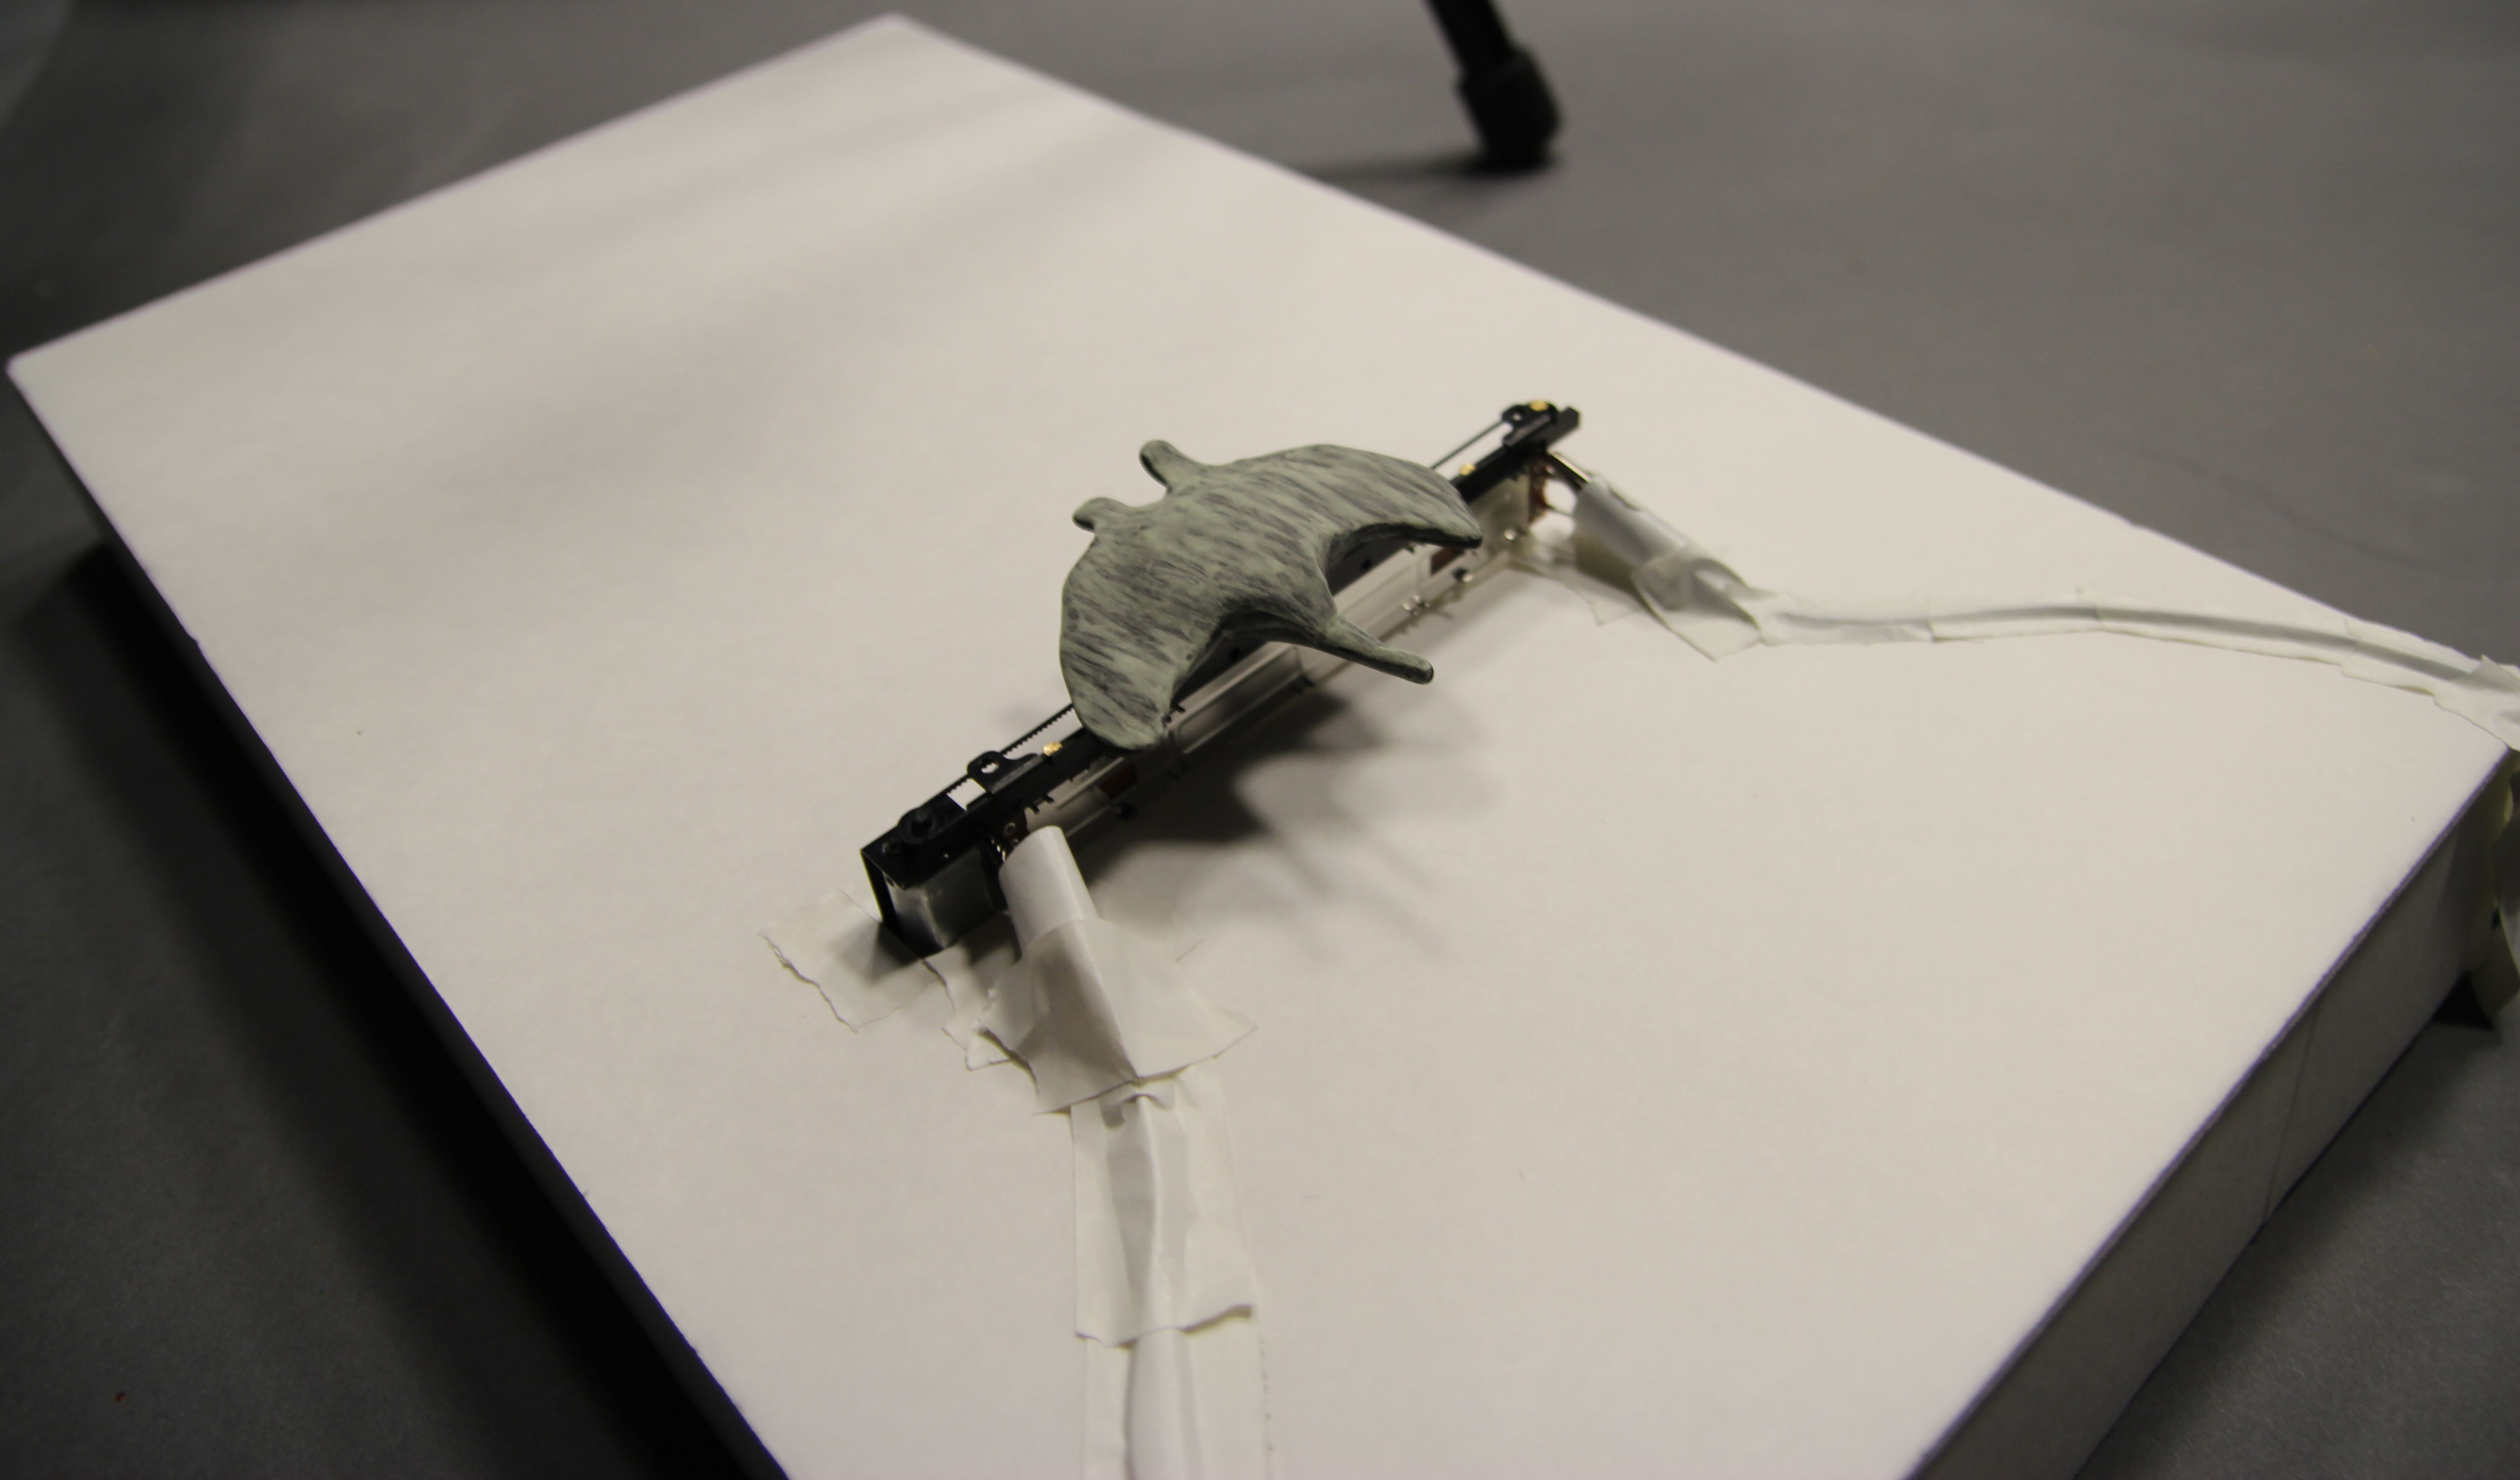
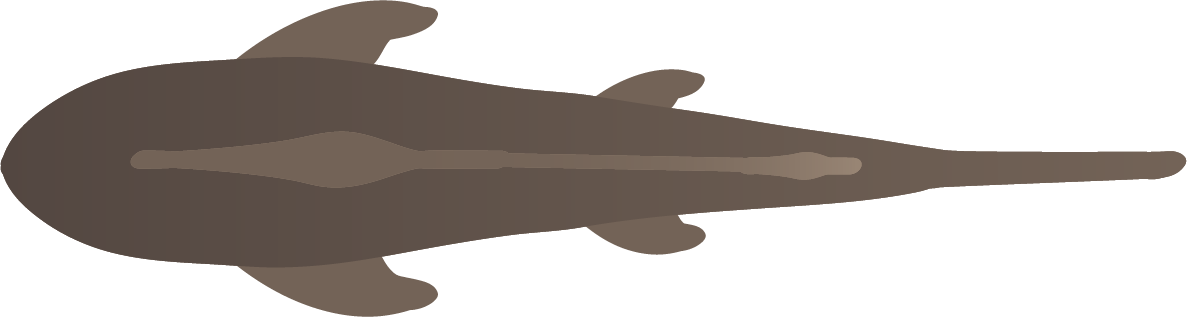
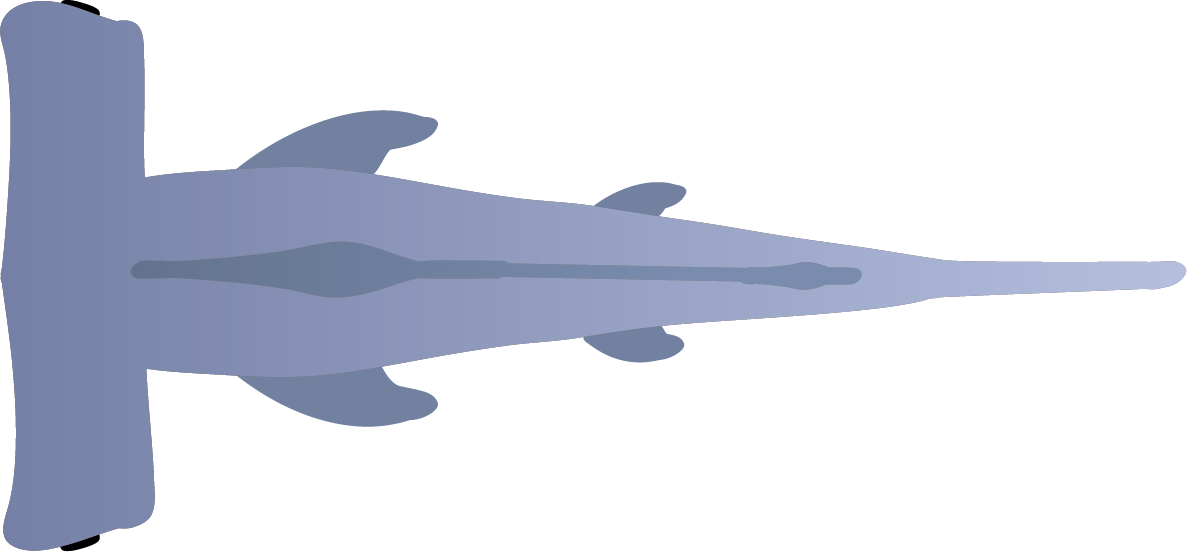
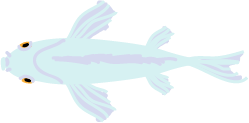
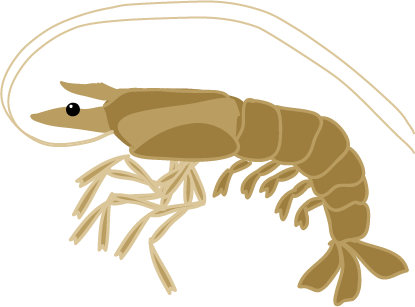
We used a combination of Arduino and a projected Processing sketch to make a seascape featuring a manta ray that moves on one axis. The manta ray is able to consume projected creatures by moving toward them, and avoid projected predators by moving away from them.
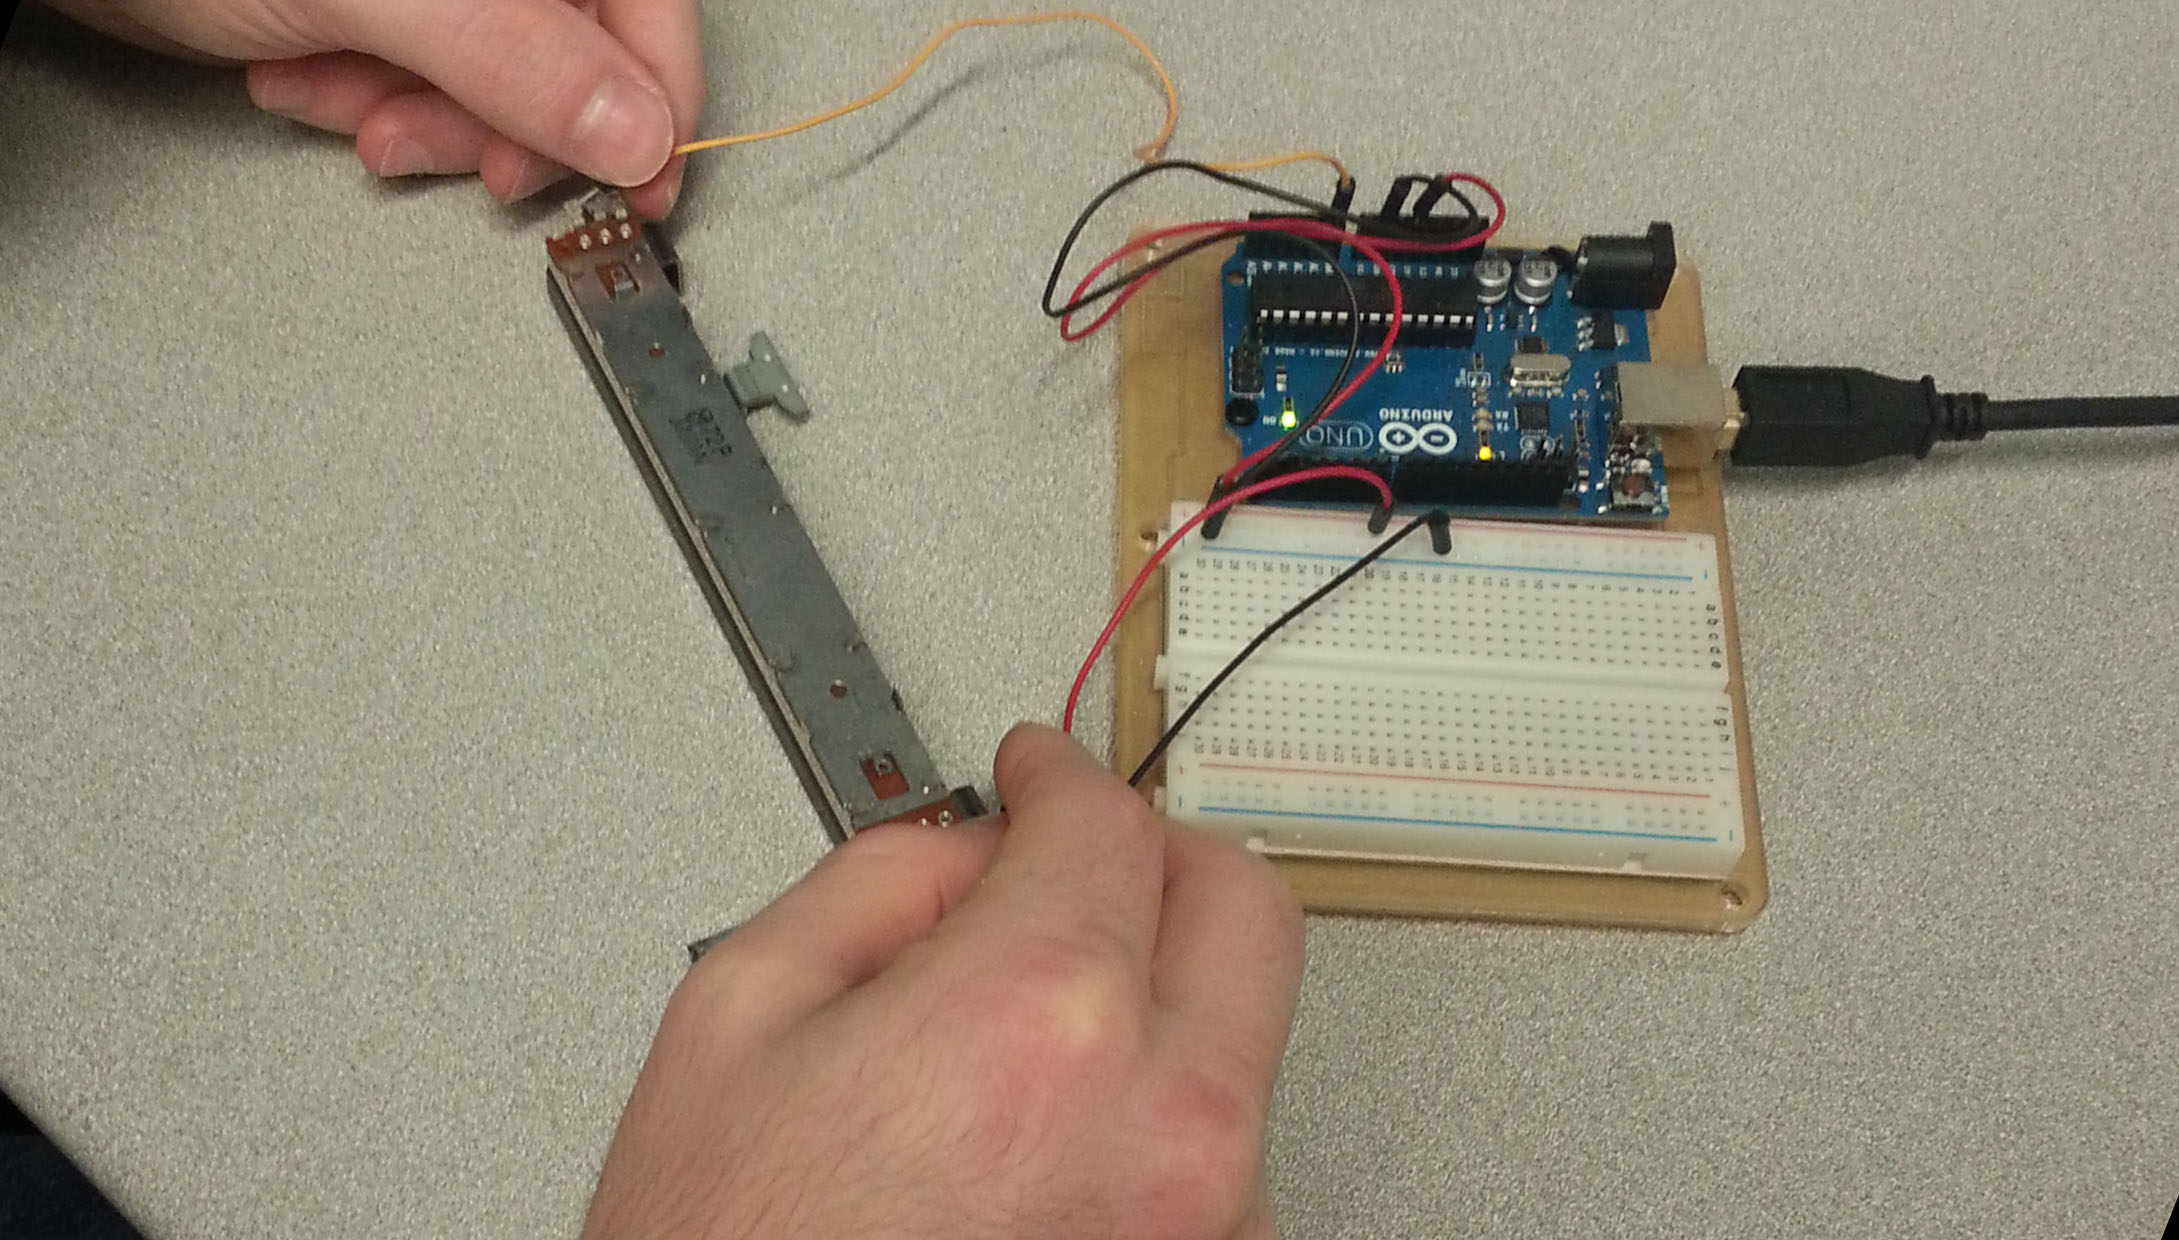
We were successfully able to create and control one-dimensional movement with our slider, in addition to sculpting a manta ray out of clay. We also created a platform out of foam-core board to serve as housing for our circuit and as our projection surface. We also gave our manta ray a sweet coat of glow-in-the-dark paint (although we later learned that the manta would not glow under projected light).We managed to create various assets to give the manta ray an interesting environment. (The hammerhead shark was removed from the final project, as Processing was having trouble rendering it correctly.)
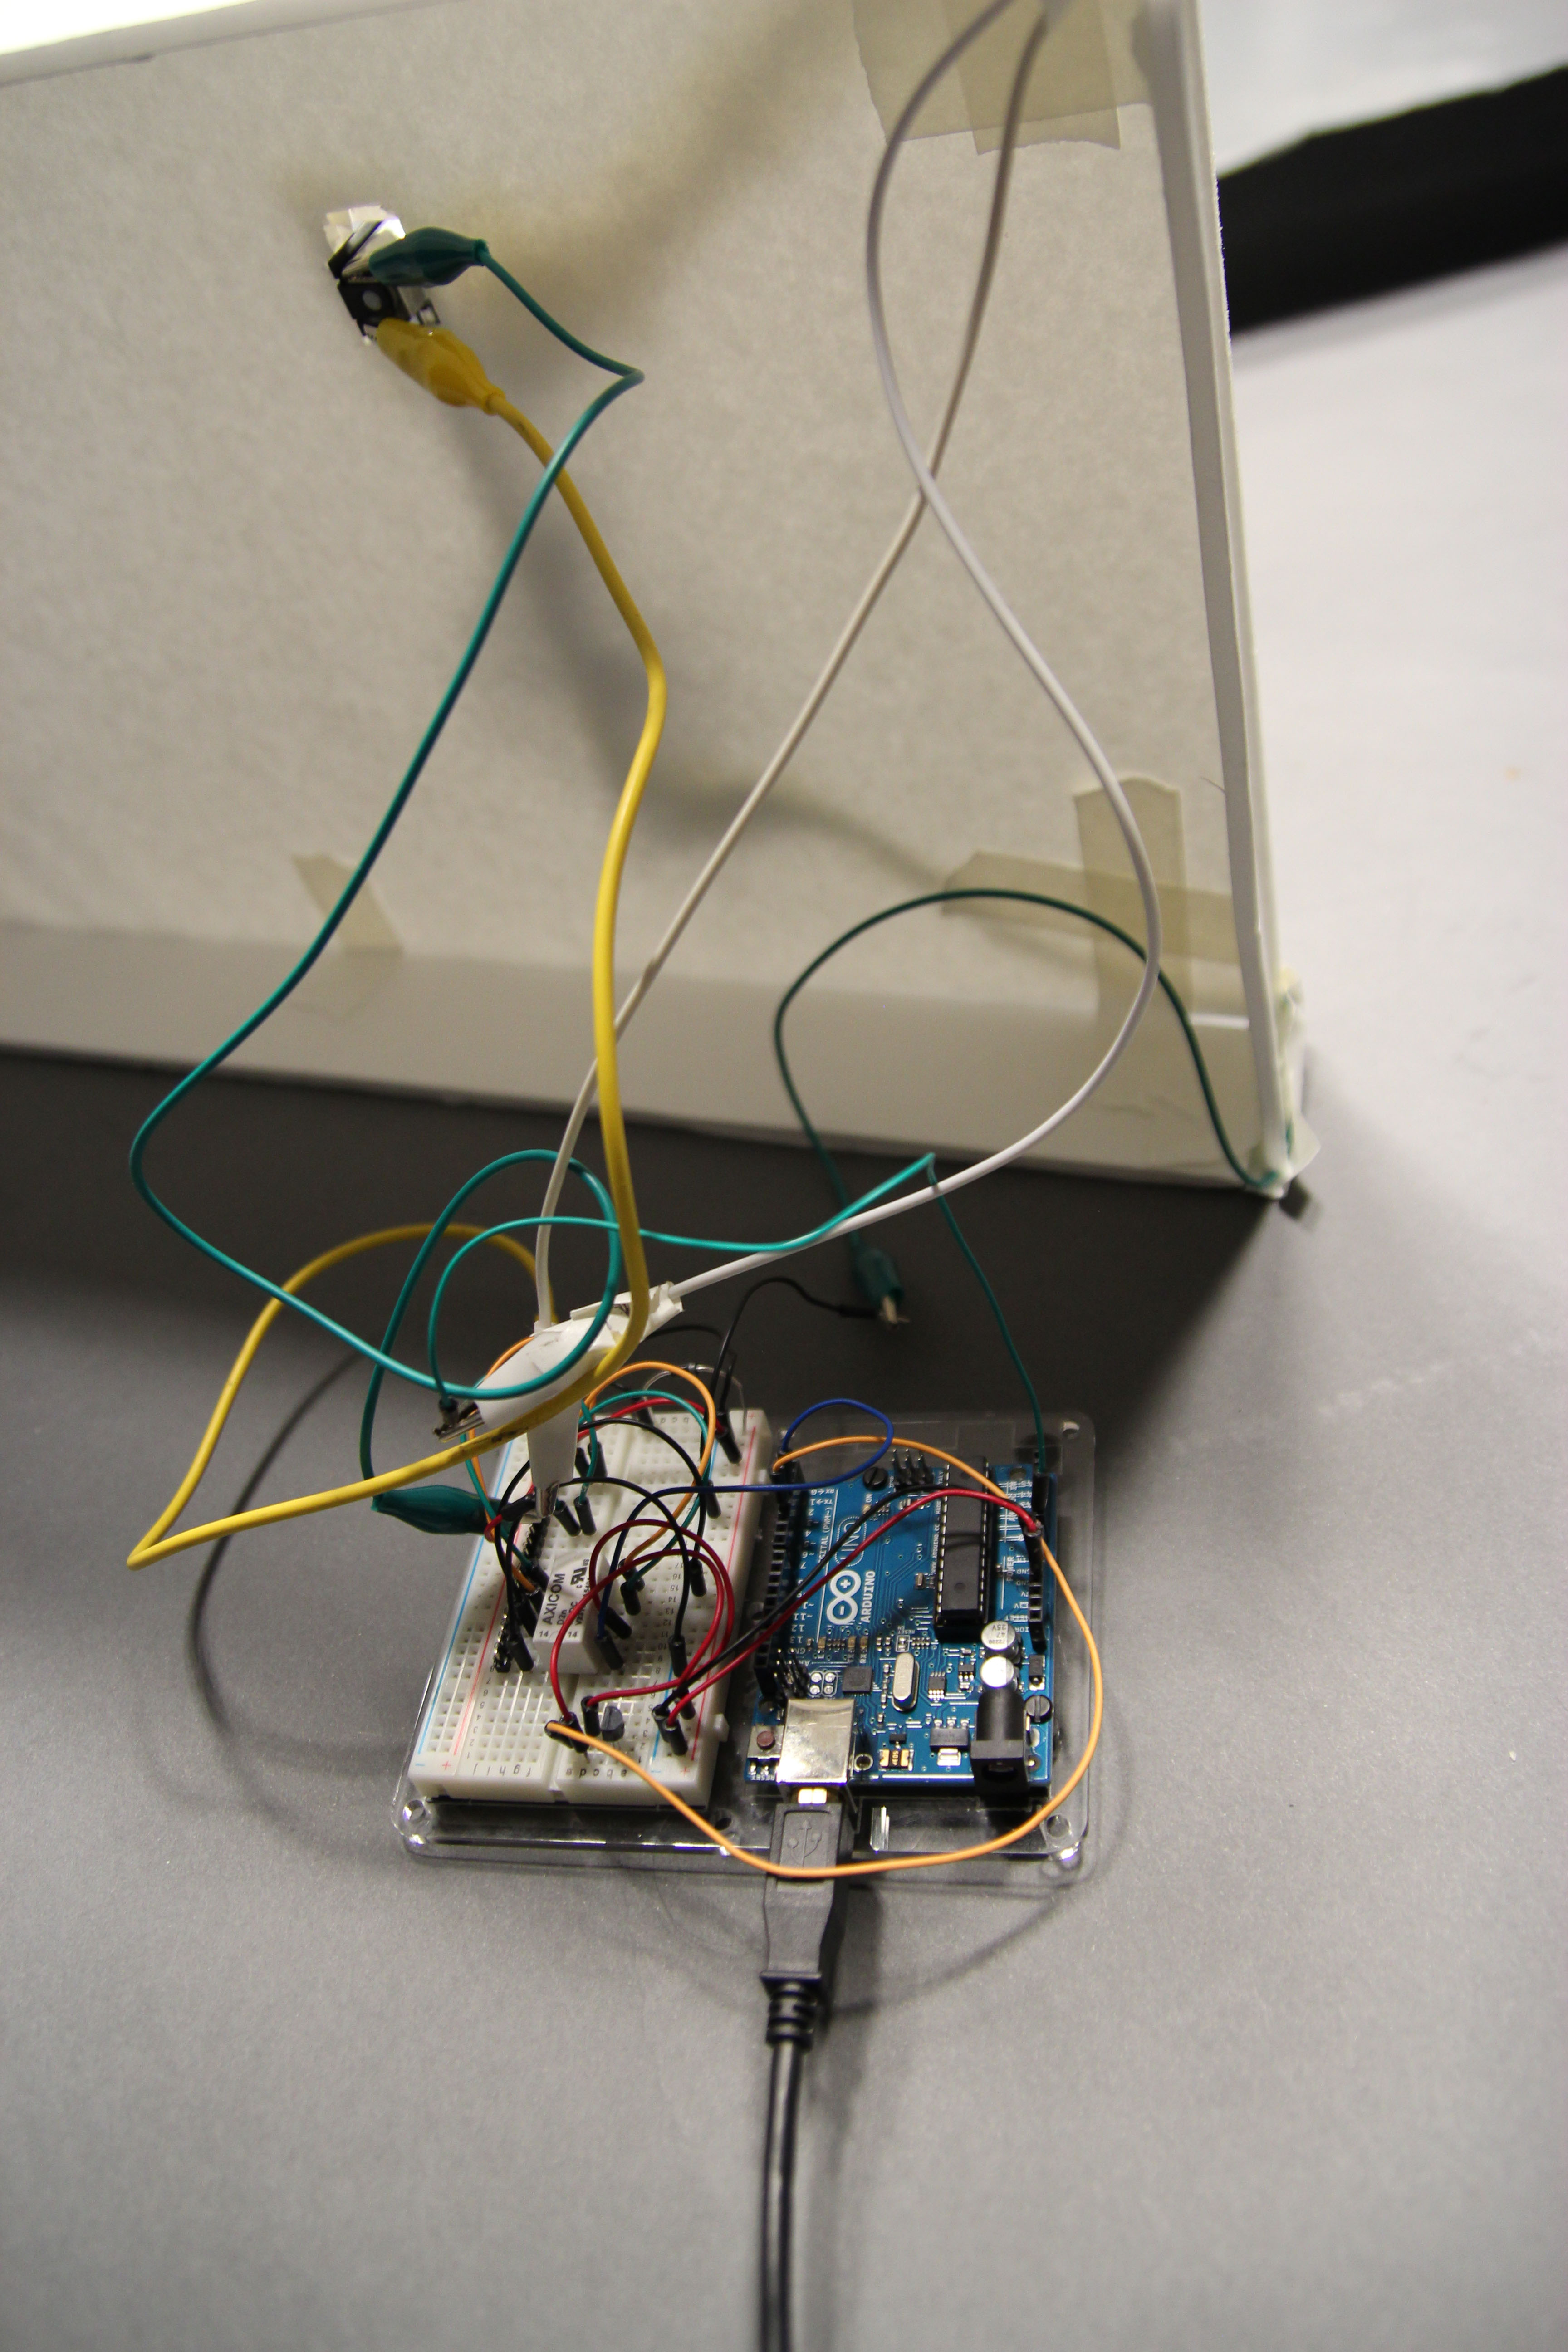
Unfortunately, due to the lack of documentation for our slider/potentiometer part, we managed to burn out our potentiometer. Because we weren’t able to computationally tell where the manta ray was due to the busted potentiometer, we had no way of detecting collisions, and could not implement behavior allowing the manta ray to move away from enemies (sharks) and towards food objects (everything that isn’t a shark).The good news is that we were eventually able to replace the part, allowing us to make the manta ray a true automaton: able to function without human interaction. Images, code, and video documentation have been updated accordingly.
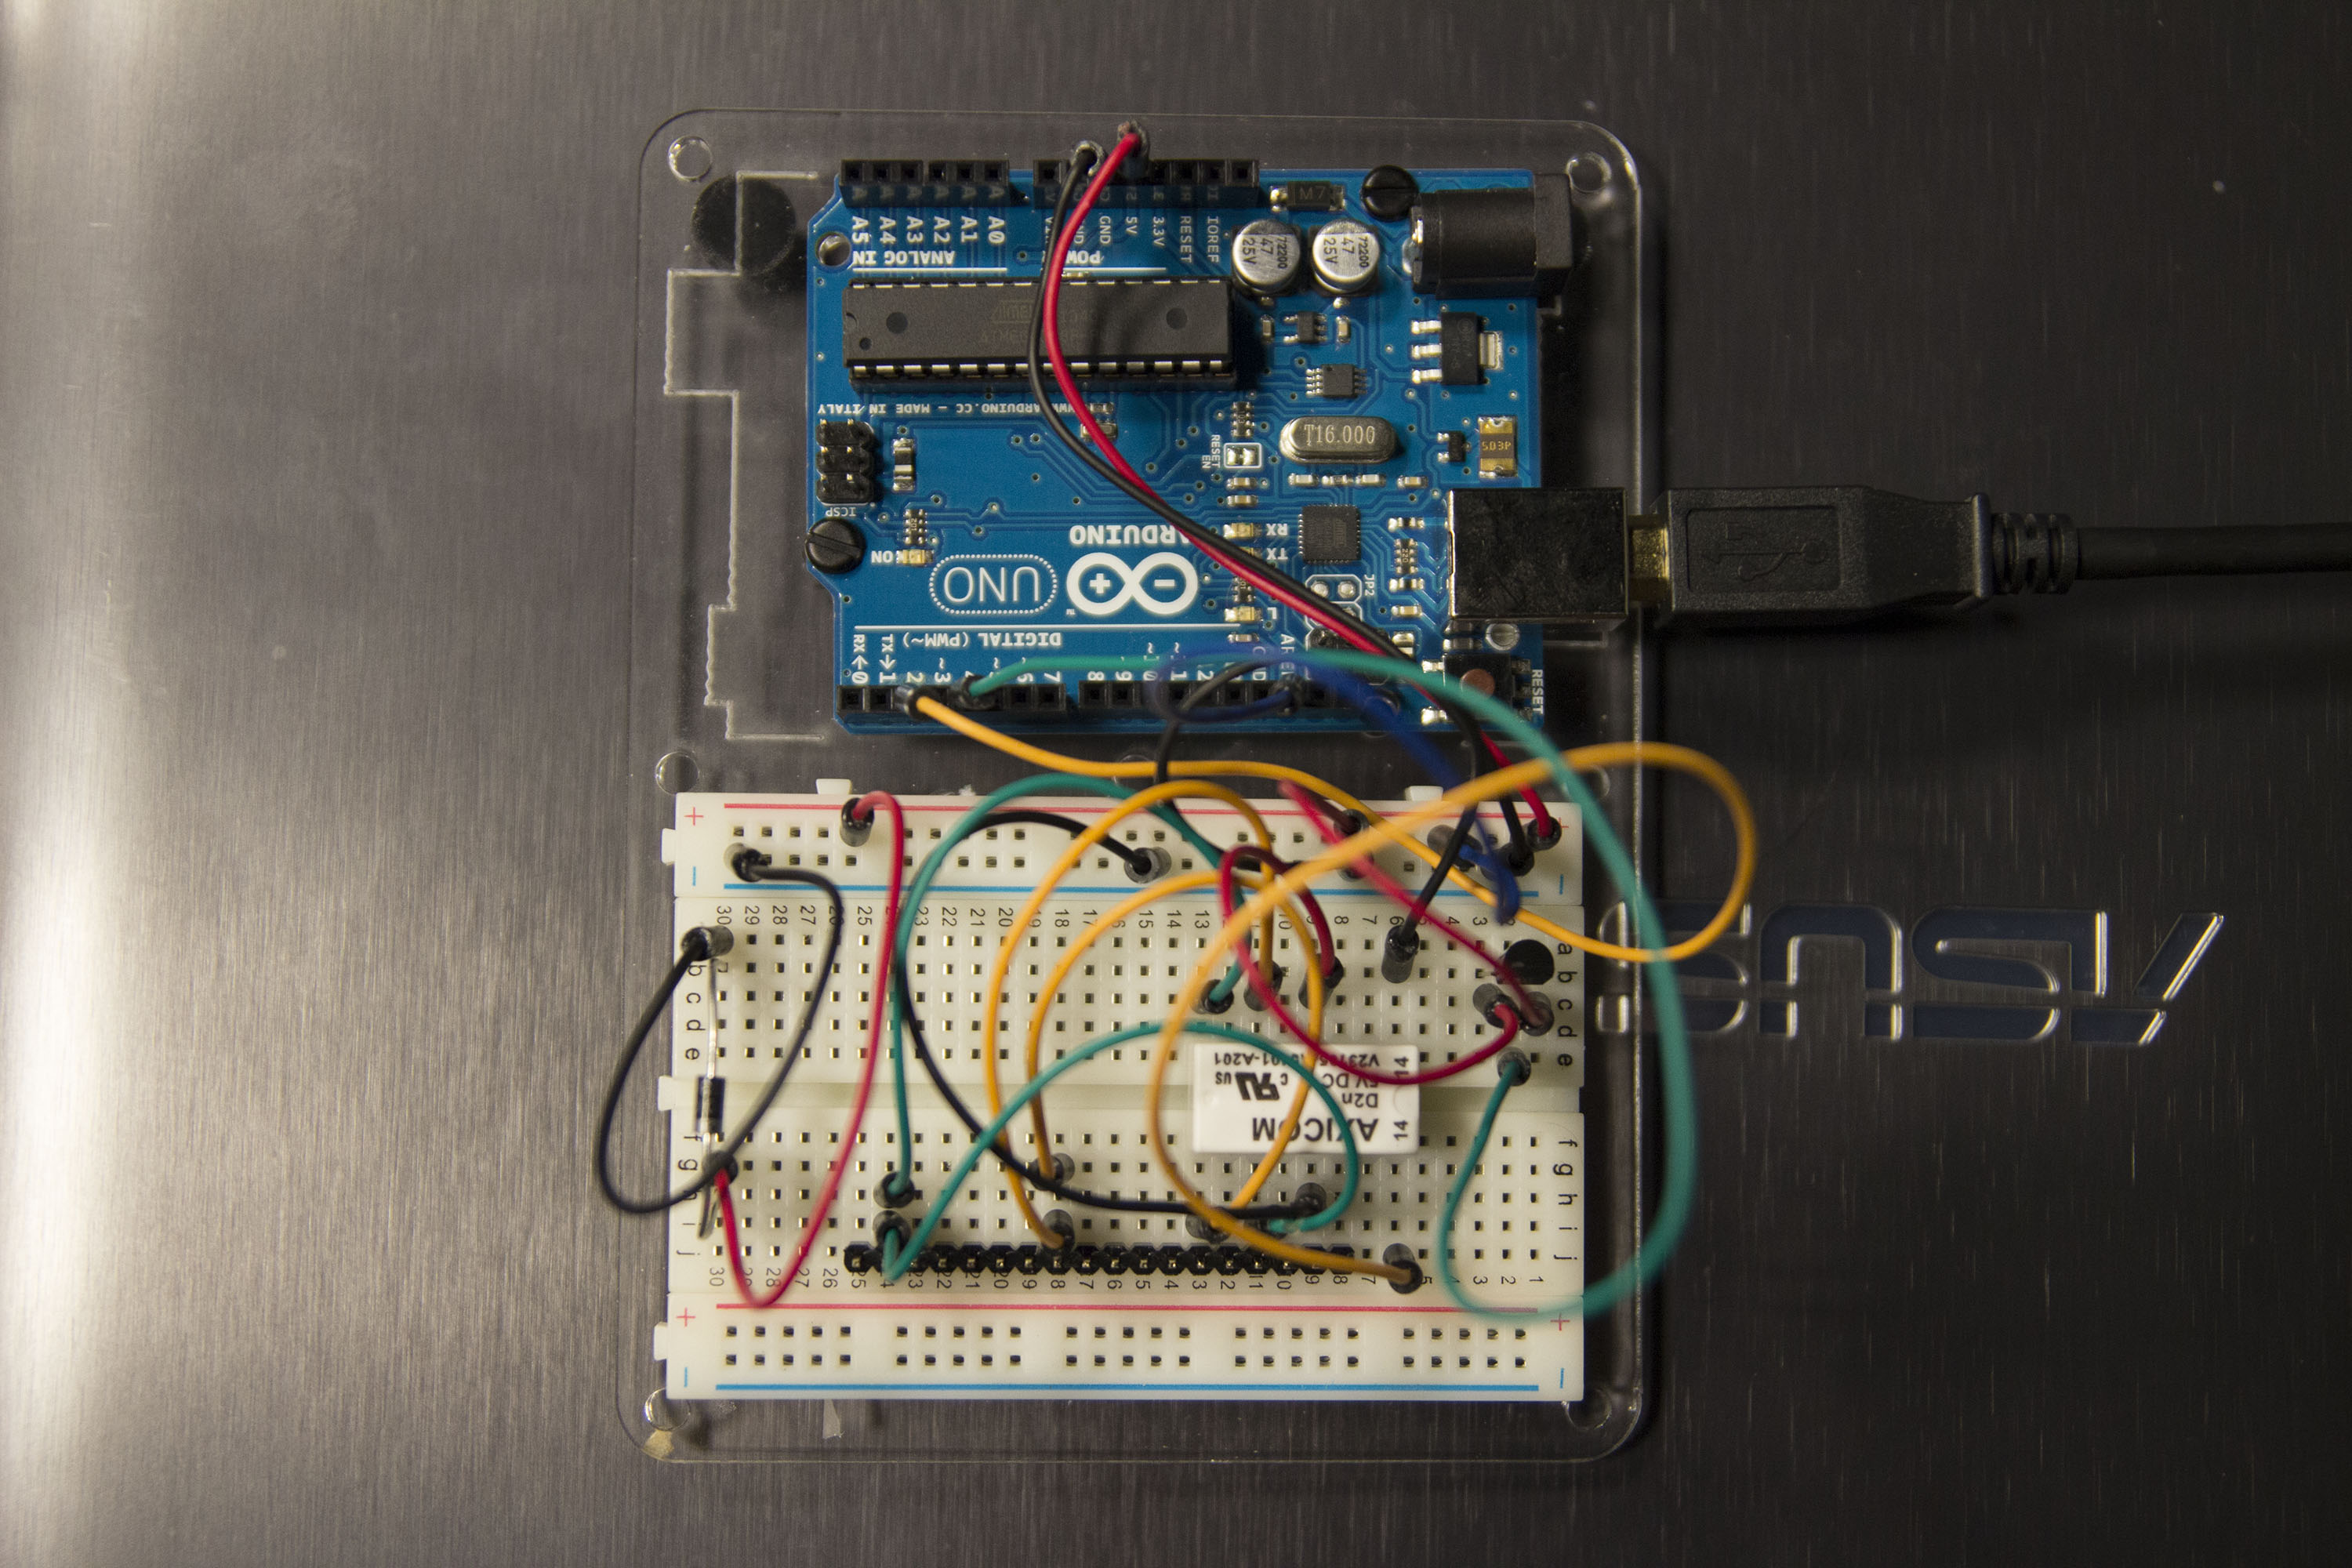
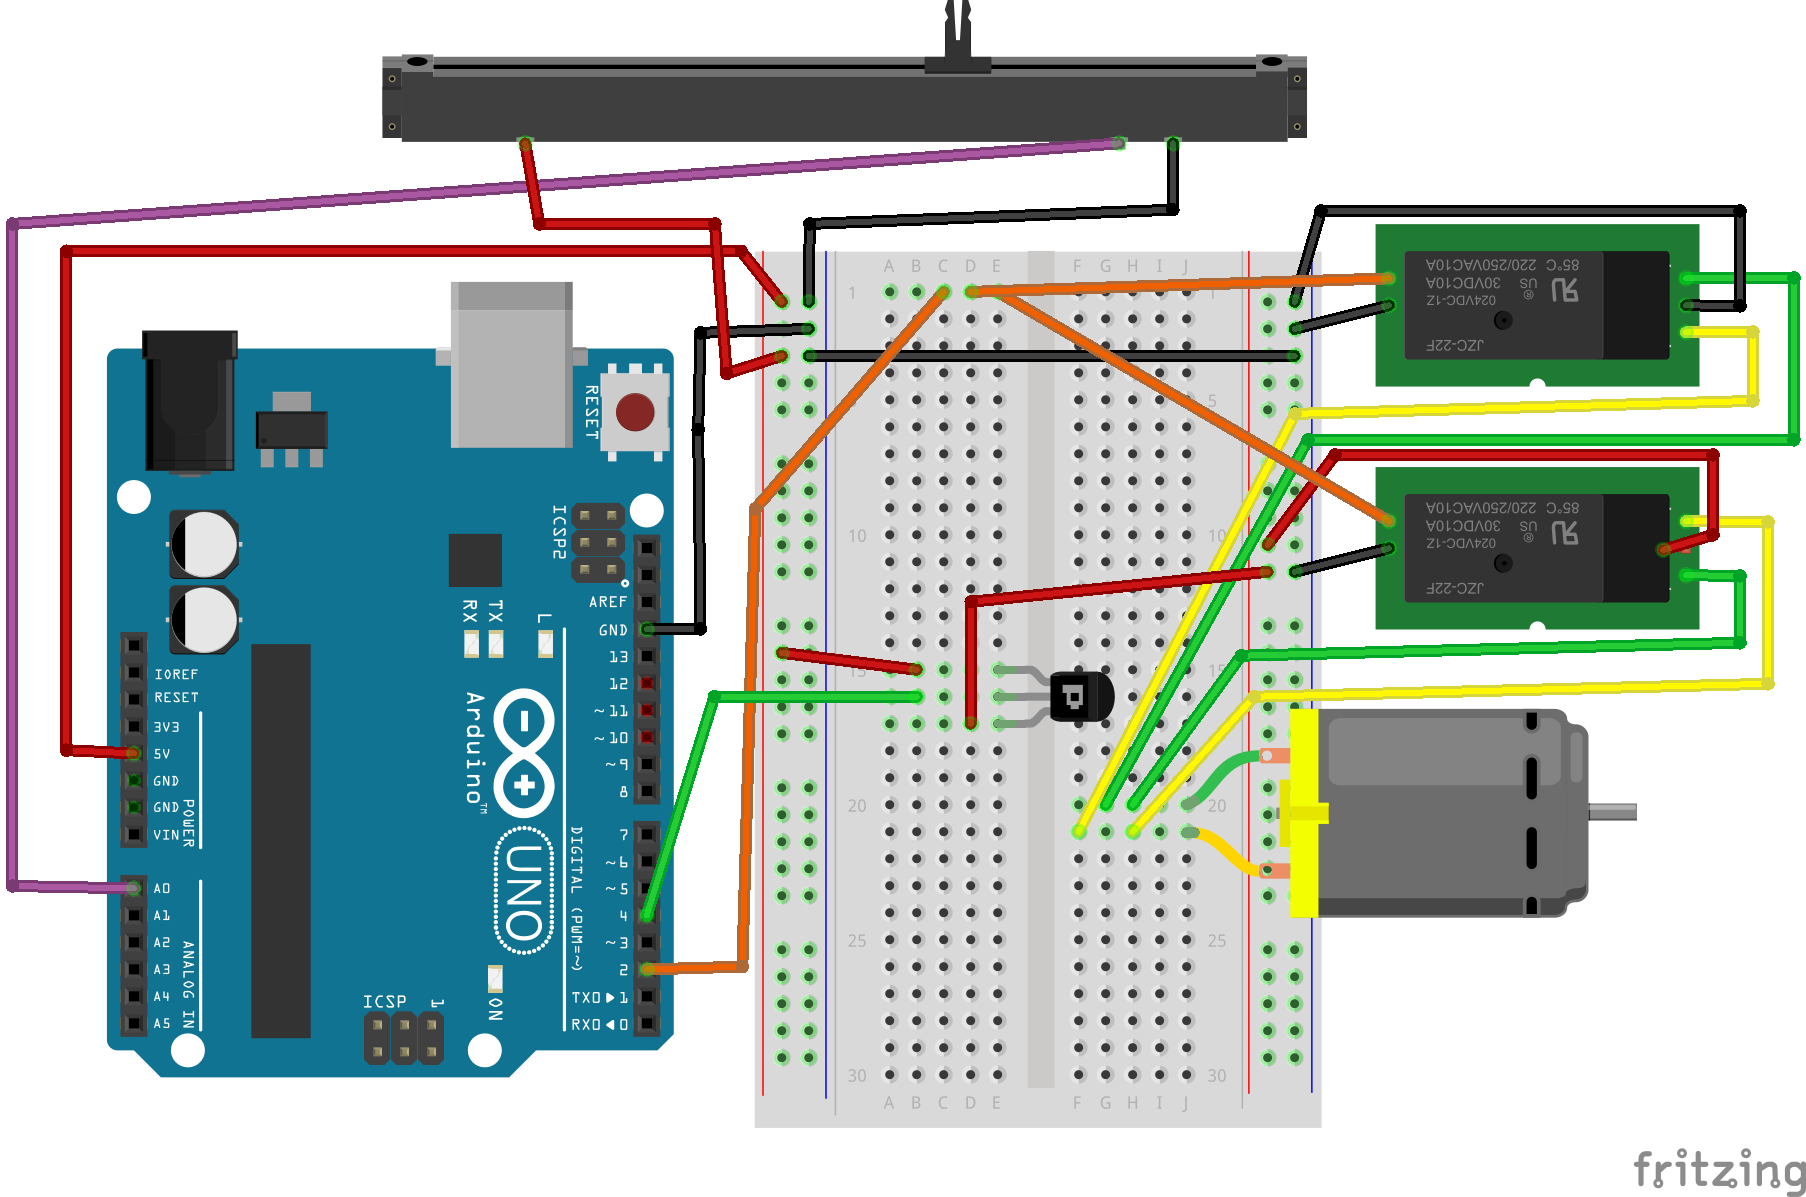
Here’s our circuit:
Here’s our Processing code:
//Miranda Jacoby and Matthew Kellogg
//EMS Interactivity Section A
//majacoby@andrew.cmu.edu, mkellogg@andrew.cmu.edu
//Copyright Miranda Jacoby and Matthew Kellogg 2014

//Matt and Miranda's MantaRay Project
import processing.serial.*;

static class Images {
  static PImage tigerShark;
  static PImage hammerHeadShark;
  static PImage shrimp;
  static PImage fish;
  static PImage plankton;
}

abstract class SeaThing {
  int x, y;
  int offX=0, offY=0;
  int l, r, w, h;
  float scale;
  PImage shape;

  void update() {
    x -= 7;
  }

  void draw() {
    pushMatrix();
    translate(x, y);
    scale(scale);
    translate(offX, offY);
    image(shape, 0, 0);
    popMatrix();
  }
};

class Shark extends SeaThing {
  Shark(int x, int y) {
    shape = Images.tigerShark;
    scale = 1.6;
    this.x = x;
    this.y = y;
    this.offX = -145;
    this.offY = -166;
  }
}

abstract class Edible extends SeaThing {
}

class Shrimp extends Edible {
  Shrimp(int x, int y) {
    shape = Images.shrimp;
    scale = 0.25;
    this.x = x;
    this.y = y;
    this.offX = -140;
    this.offY = -120;
  }
}

class Fish extends Edible {
  Fish(int x, int y) {
    shape = Images.fish;
    scale = 0.75;
    this.x = x;
    this.y = y;
    this.offX = -60;
    this.offY = -67;
  }
}

class Plankton extends Edible {
  Plankton(int x, int y) {
    shape = Images.plankton;
    scale = 0.15;
    this.x = x;
    this.y = y;
    this.offX = -230;
    this.offY = -230;
  }
}

class Manta {
  int x, y;
  SeaThing target;
  int value;
  Serial myPort;
  boolean bJustBuilt = false;
  int whichValueToAccum = 0;
  int nChars = 0;
  ArrayList serialChars;
  int RIGHT = 0;
  int LEFT = 1;
  int STOP = 2;
  int dir;
  int minY, maxY;

  Manta(MantaProcessing thiz, int x, int y) {
    this.x = x;
    this.y = y;
    minY = 220;
    maxY = 550;
    dir = STOP;
    if (Serial.list().length > 0) {
      String portName = Serial.list()[0];
      myPort = new Serial(thiz, portName, 9600);
    }
    serialChars = new ArrayList();
  }

  void draw() {
    //if (target!=null) {
    //ellipse(x, y, 100, 100);
    //}
  }

  void moveRight() {
    if (myPort!=null) {
      myPort.write("R\n");
    } else if (y-5>minY){
      y-=5;
    }
    dir = RIGHT;
  }

  void moveLeft() {
    if (myPort!=null) {
      myPort.write("L\n");
    } else if (y+5<maxY){
      y+=5;
    }
    dir = LEFT;
  }

  void moveStop() {
    if (myPort!=null) {
      myPort.write("S\n");
    } else {
      //nothing
    }
    dir = STOP;
  }

  void update() {
    readSerial();
    if (shark!=null && shark.x<x+600){ // run from shark
      if (shark.y<540) {         moveLeft();       } else {         moveRight();       }     }else if (target == null) {       for (SeaThing thing : things) {         if (thing.x > x + 50 && thing.x < x + 300 && thing.y > minY && thing.y  y+20) {
      moveLeft();
    } else if (target.y < y-20) {       moveRight();     } else {       moveStop();     }     if (y>maxY && dir==LEFT) {
      moveStop();
    } else if (y y-20 && thing.y < y+20 && thing.x > x-20 && thing.x <x+20) {         things.remove(i);         i--;       }     }          if (!things.contains(target)){       target = null;     }   }   void readSerial() {     if (myPort==null) return;     while (myPort.available () > 0) {
      char aChar = (char) myPort.read();

      // You'll need to add a block like one of these
      // if you want to add a 3rd sensor:
      if (aChar == 'A') {
        bJustBuilt = false;
        whichValueToAccum = 0;
      } else if (aChar == 'B') {
        bJustBuilt = false;
        whichValueToAccum = 1;
      } else if (((aChar == 13) || (aChar == 10)) && (!bJustBuilt)) {
        // If we just received a return or newline character, build the number:
        int accum = 0;
        int nChars = serialChars.size();
        for (int i=0; i < nChars; i++) {            int n = (nChars - i) - 1;            int aDigit = ((Character)(serialChars.get(i))).charValue();            accum += aDigit * (int)(pow(10, n));         }         // Set the global variable to the number we captured.         // You'll need to add another block like one of these          // if you want to add a 3rd sensor:         if (whichValueToAccum == 0) {           value = accum;         }         // Now clear the accumulator         serialChars.clear();         bJustBuilt = true;       } else if ((aChar >= 48) && (aChar <= 57)) {
        // If the char is between '0' and '9', save it.
        char aDigit = (char)(aChar - '0');
        serialChars.add(aDigit);
      }
    }
    y = (int)(((maxY-minY)*((1023-value)/1023.0))+minY);
  }
}

ArrayList things = new ArrayList();

PImage sharkImage;
PImage causticsImage;

Manta manta;
Shark shark;
PGraphics causticsGraphics;

void buildCausticsGraphics() {
  PGraphics g = causticsGraphics;
  g.beginDraw();
  g.blendMode(ADD);
  g.tint(100, 100, 255, 100);
  g.image(causticsImage, 0, 0);
  g.endDraw();
  g.loadPixels();
  for (int y=0; y<g.height; y++) {
    for (int x=0; x<g.width; x++) {
      color c = g.pixels[x+y*g.width];
      c = color(red(c), green(c), blue(c), blue(c));
      g.pixels[x+y*g.width] = c;
    }
  }
}

void setup() {
  causticsImage = loadImage("caustics.png");
  causticsGraphics = createGraphics(causticsImage.width, causticsImage.height);
  buildCausticsGraphics();
  size(1920, 1080);
  frameRate(60);
  Images.tigerShark = loadImage("tigershark.png");
  Images.hammerHeadShark = loadImage("hammerheadshark.png");
  Images.shrimp = loadImage("shrimp.png");
  Images.fish = loadImage("fish.png");
  Images.plankton = loadImage("plankton.png");
  shark = new Shark(200, 200);
  things.add(shark);
  manta = new Manta(this, width/4, height/2);
}

void draw() {
  if ((frameCount % 20)==0) {
    float r = random(0, 80);
    if (r<2) {
      if (shark==null) {
        shark = new Shark(width*2, 200);
        things.add(shark);
      }
    } else if (r<4) {
      if (shark==null) {
        shark = new Shark(width*2, height - 200);
        things.add(shark);
      }
    } else if (r<24) {
      things.add(new Fish(width*2, (int)random(250, height-250)));
    } else if (r<44) {
      things.add(new Plankton(width*2, (int)random(250, height-250)));
    } else if (r<64) {
      things.add(new Shrimp(width*2, (int)random(250, height-250)));
    }
  }

  for (SeaThing thing : things) {
    thing.update();
  }

  //remove things that are far off screen
  for (int i = 0; i < things.size (); i++) {
    if (things.get(i).x<-width) {
      if (things.get(i) instanceof Shark){
        shark = null;
      }
      things.remove(i);
      i--;
    }
  }

  manta.update();

  background(10, 30, 75);
  image(causticsGraphics, -(frameCount%causticsGraphics.width), 0);
  image(causticsGraphics, -(frameCount%causticsGraphics.width)+causticsGraphics.width, 0);
  image(causticsGraphics, -(frameCount%causticsGraphics.width)+2*causticsGraphics.width, 0);
  for (SeaThing thing : things) {
    thing.draw();
  }

  manta.draw();
  image(causticsGraphics, -((frameCount*2)%causticsGraphics.width), -causticsGraphics.height/2);
  image(causticsGraphics, -((frameCount*2)%causticsGraphics.width)+causticsGraphics.width, -causticsGraphics.height/2);
  image(causticsGraphics, -((frameCount*2)%causticsGraphics.width)+2*causticsGraphics.width, -causticsGraphics.height/2);
  image(causticsGraphics, -((frameCount*2)%causticsGraphics.width), causticsGraphics.height/2);
  image(causticsGraphics, -((frameCount*2)%causticsGraphics.width)+causticsGraphics.width, causticsGraphics.height/2);
  image(causticsGraphics, -((frameCount*2)%causticsGraphics.width)+2*causticsGraphics.width, causticsGraphics.height/2);
}
Here’s our Arduino code:
// Arduino control for the Manta Ray
// Author: Matthew Kellogg
// Copyright 2014 Matthew Kellogg

static const int dirPin = 2;
static const int goPin = 4;

boolean go = false;
boolean dir = false;

void setup(){
  pinMode(dirPin,OUTPUT);
  pinMode(goPin,OUTPUT);
  Serial.begin(9600);
}

void loop(){
  //Print the value from the potentiometer
  // to serial
  Serial.println("A"+(String)(analogRead(0)));

  //Process available controls
  while (Serial.available()){
    char a = Serial.read();
    switch (a){
    case 'L':
      dir = false;
      go = true;
      break;
    case 'R':
      dir = true;
      go = true;
      break;
    case 'S':
      go = false;
      break;
    default:
      break;
    };
  }
  // Set digital outputs based on controls
  digitalWrite(goPin,go);
  digitalWrite(dirPin,dir);
  // Delay to allow some control to control to happen
  delay(50);
}
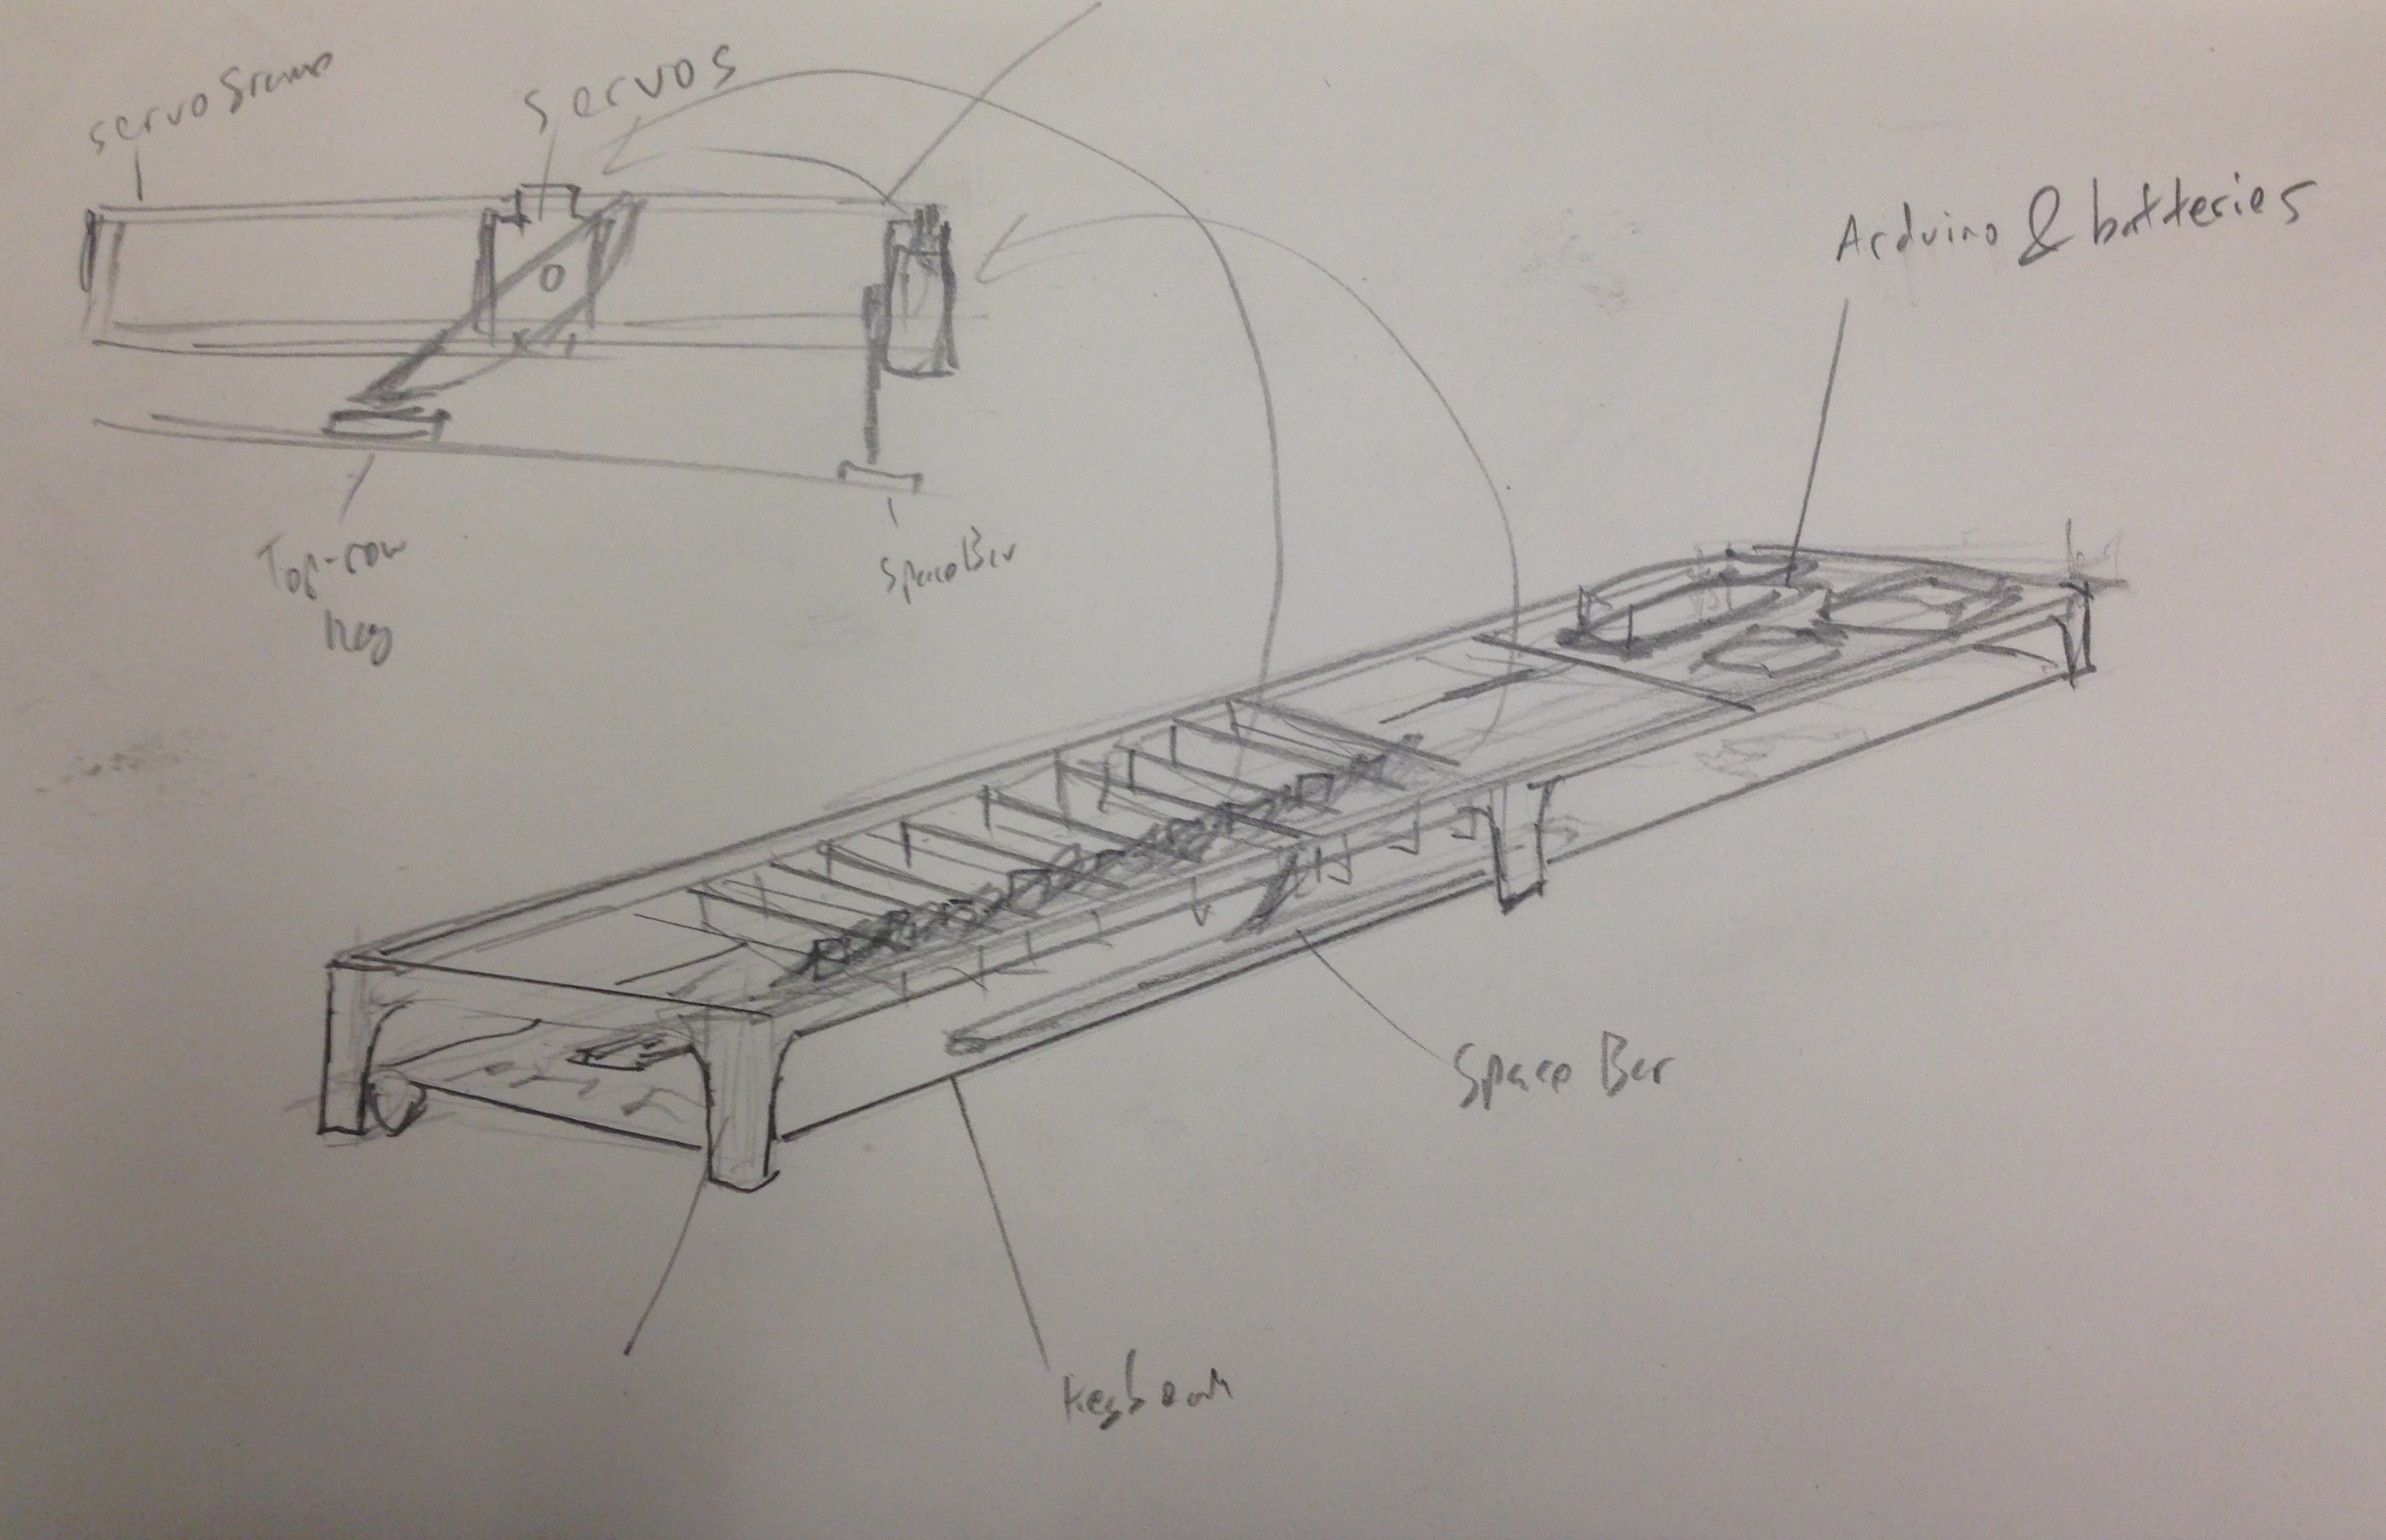
For my automaton I want to make a machine that types. I was originally intending to make a machine that could type a specific message, but Golan challenged me to make it so that the machine could type any words made with the tow row of a qwerty keyboard.
This automaton would be designed to fit over any full Apple keyboard, letting it interface with all of the computers in our clusters, as well as giving it some application to the wider world. I am as of yet uncertain what I exactly want it to type, although I am considering randomly generating phrases and selecting ones I like to use later. My instinct towards the generative that may not be suited to the piece, however.
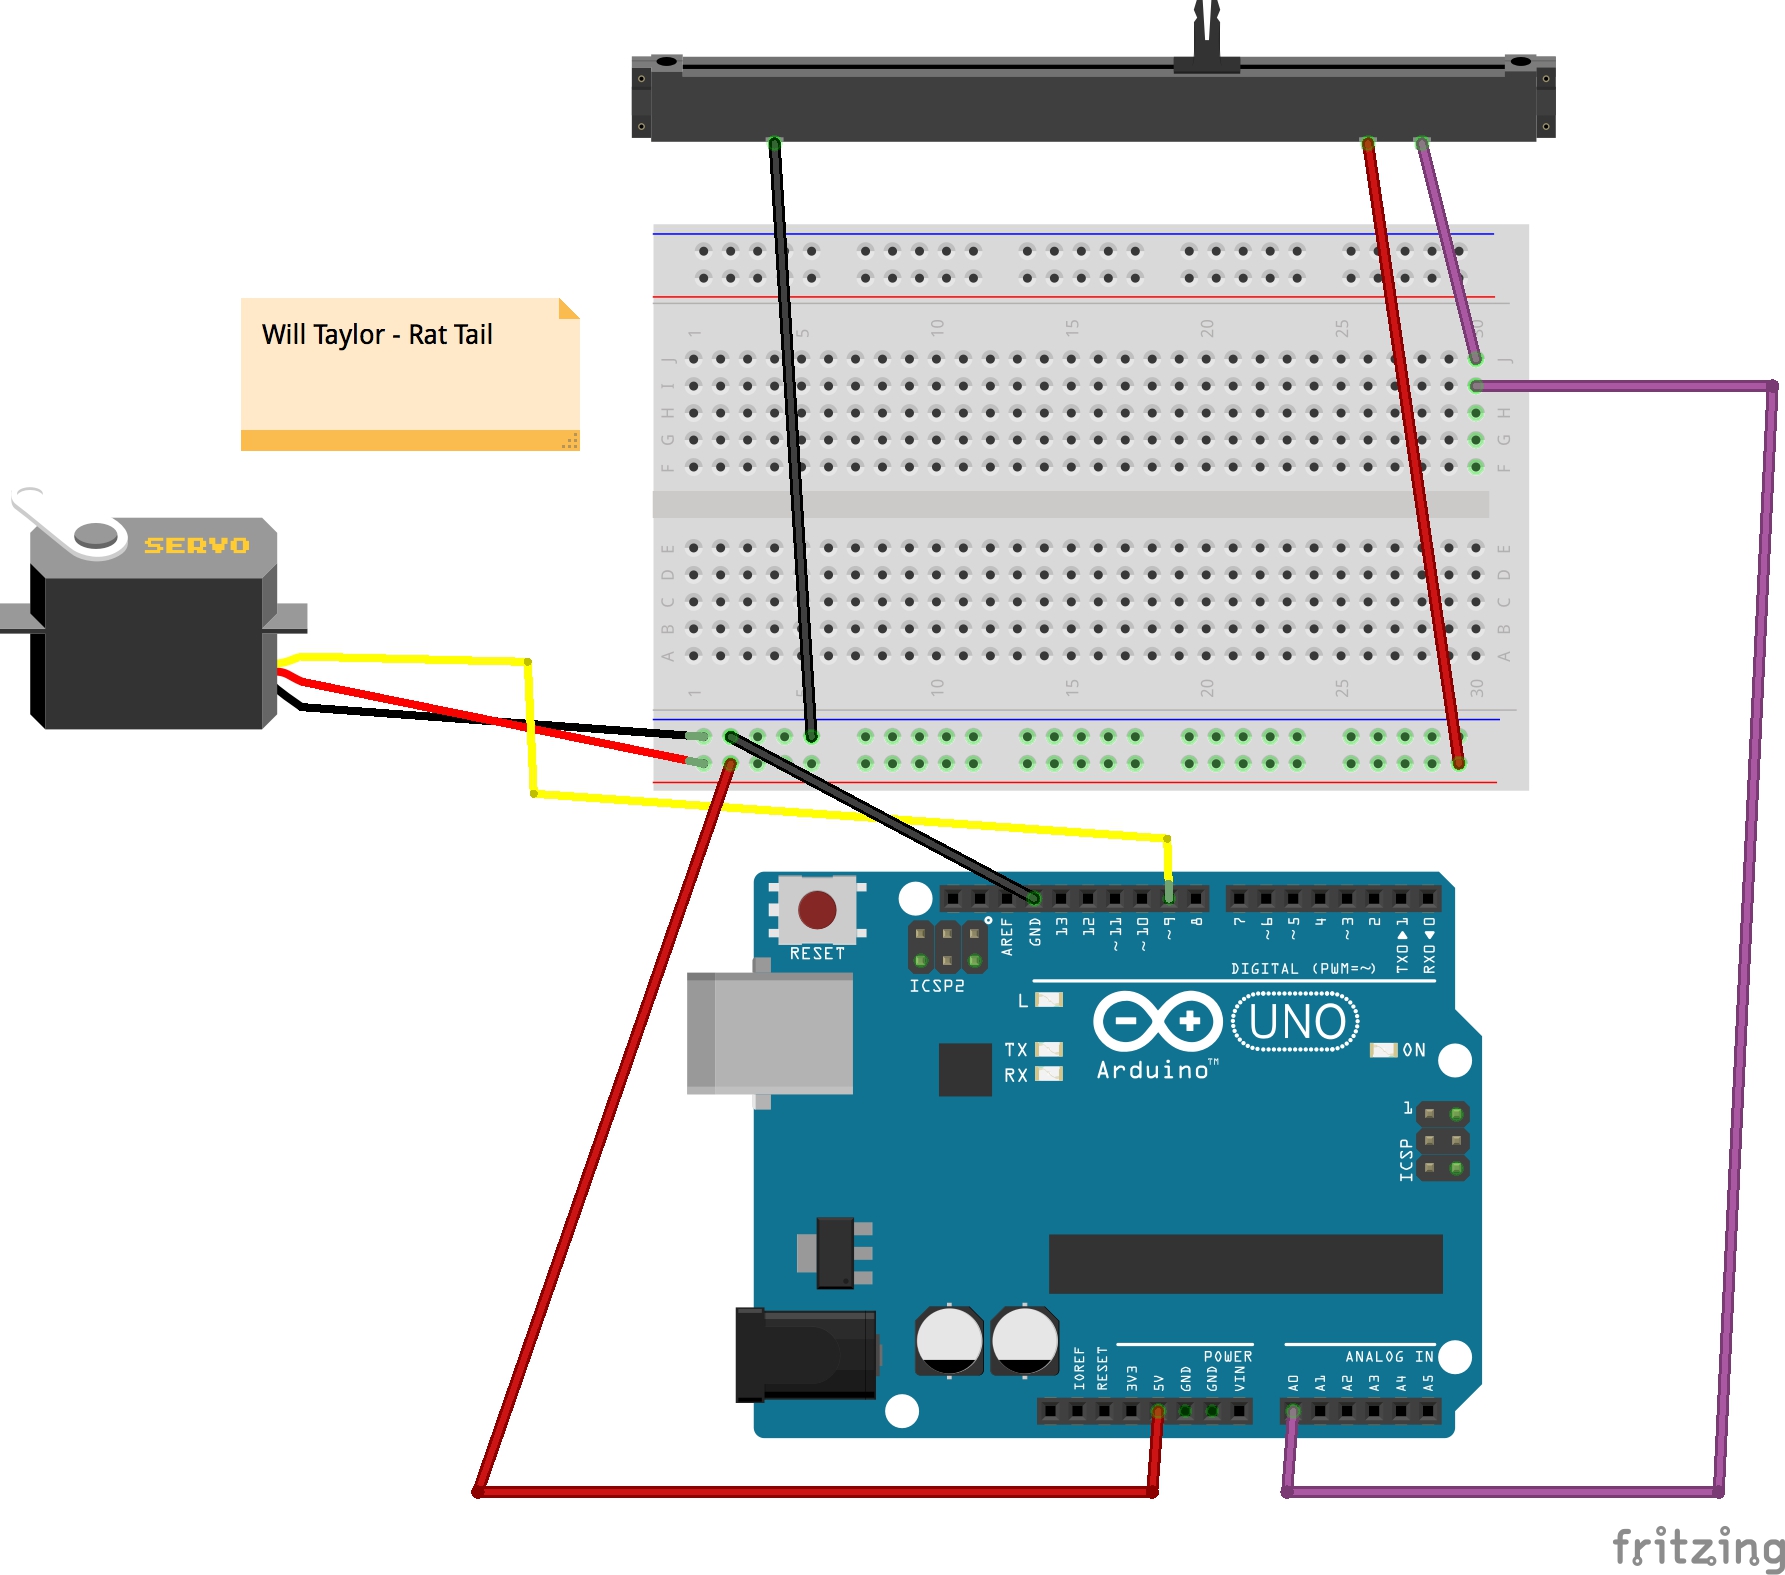
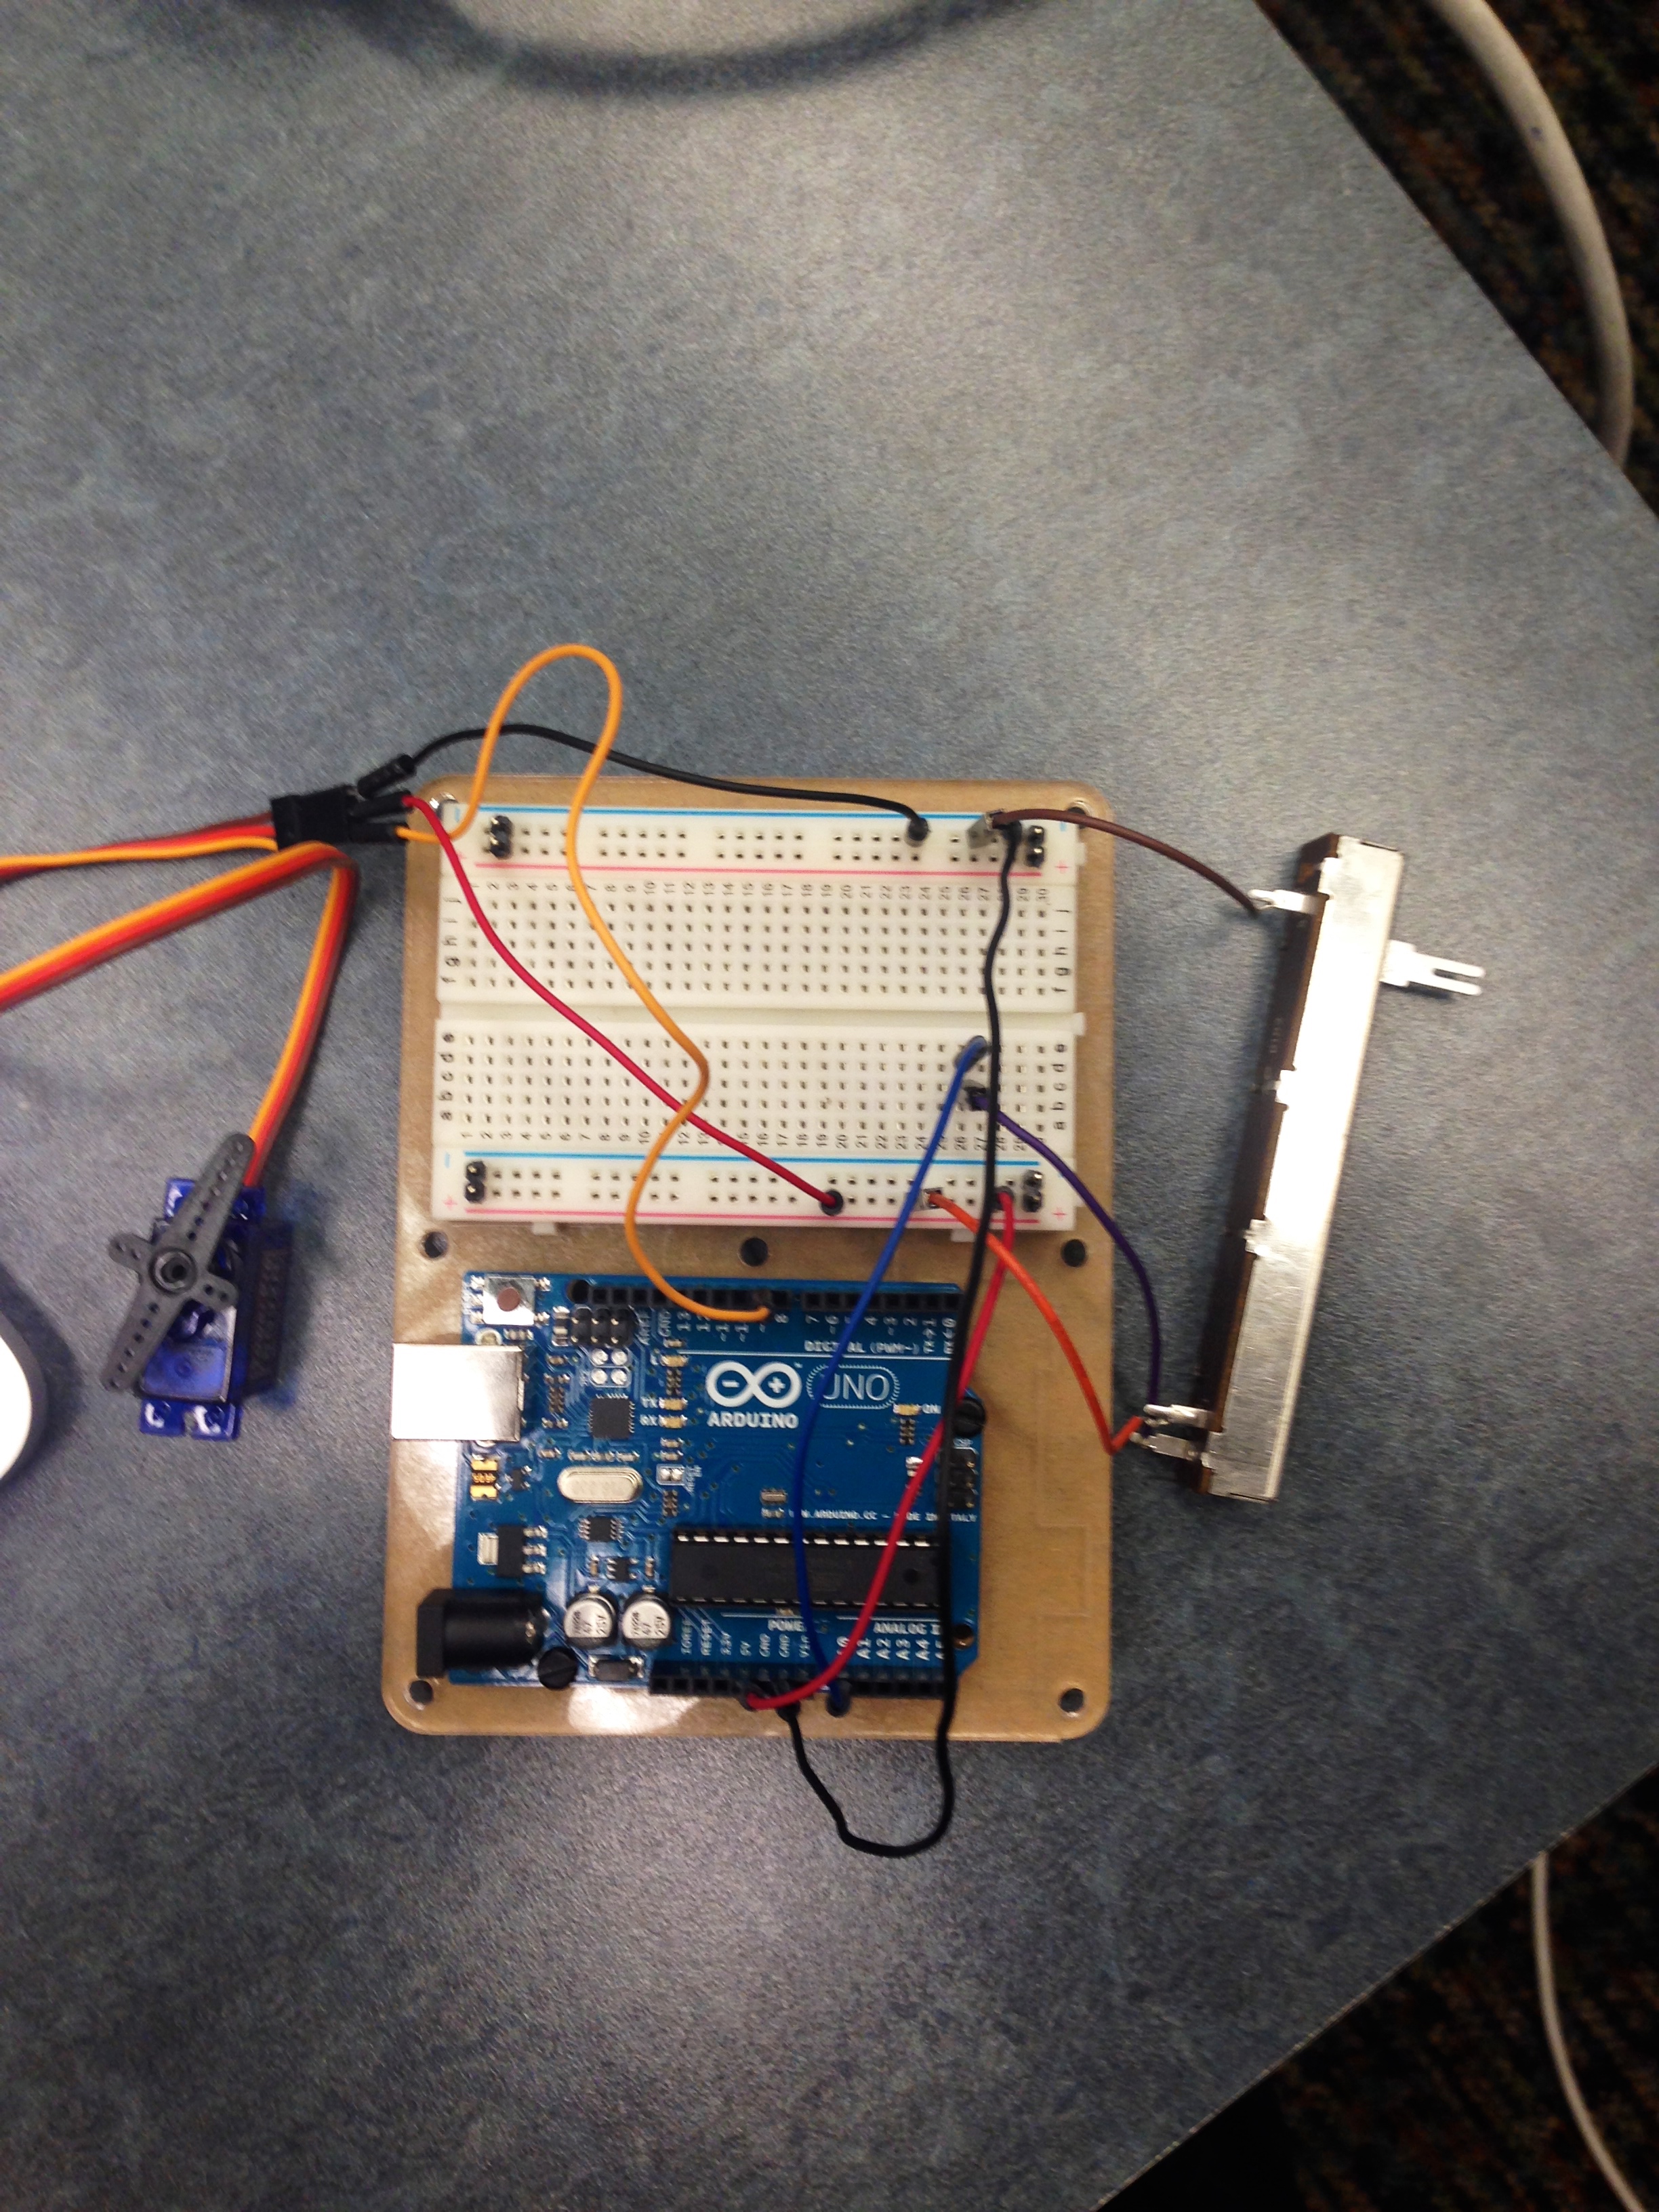
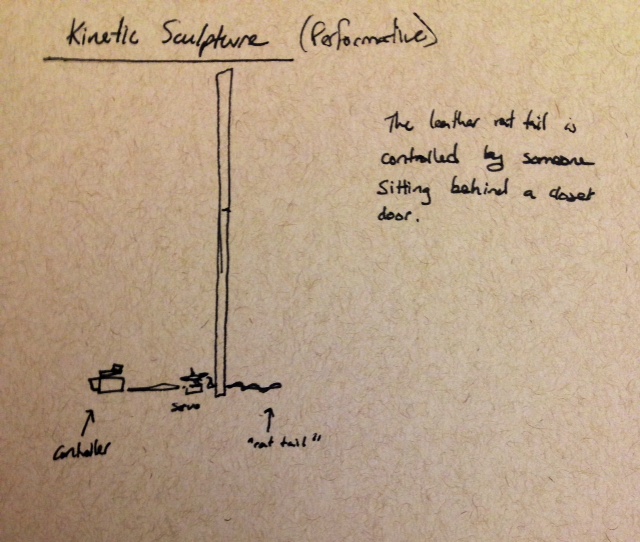
“Rat Tales” is a performative installation I created using an Arduino, slider potentiometer, servo, black bandana, and leather. This work is created in response to some encumbering experiences I had this summer as I began exploring different ‘scenes’ embedded in North Texas gay culture. This performance is specifically centered around my experiences at a leather bar; the subject of the photographs displayed in the video.
For the duration of the performance, I am blindfolded with a black bandana and sit in a dark, cramped closet. I use the slider potentiometer to control the leather rat-tail that emerges from the dark crack under the door. Significance can be found within the combination of the material, shape, and motion of the rat-tail.
/*
Will Taylor
Rat tail thats position is controlled by the slider sensor
*/

#include <Servo.h>

Servo ratTail; // servo to control the rat tail

int sliderPin = 0; // slider connected to A0
int val; // variable to read the value from the analog pin

void setup()
{
ratTail.attach(9); // attaches servo to pin9
}

void loop()
{
val = analogRead(sliderPin); // reads slider value
val = map(val, 0, 1023, 0, 180); // maps slider value to servo position between 0 and 180 degrees
ratTail.write(val); // sets the servo position according to the scaled value
delay(15); // waits for the servo to get there
}
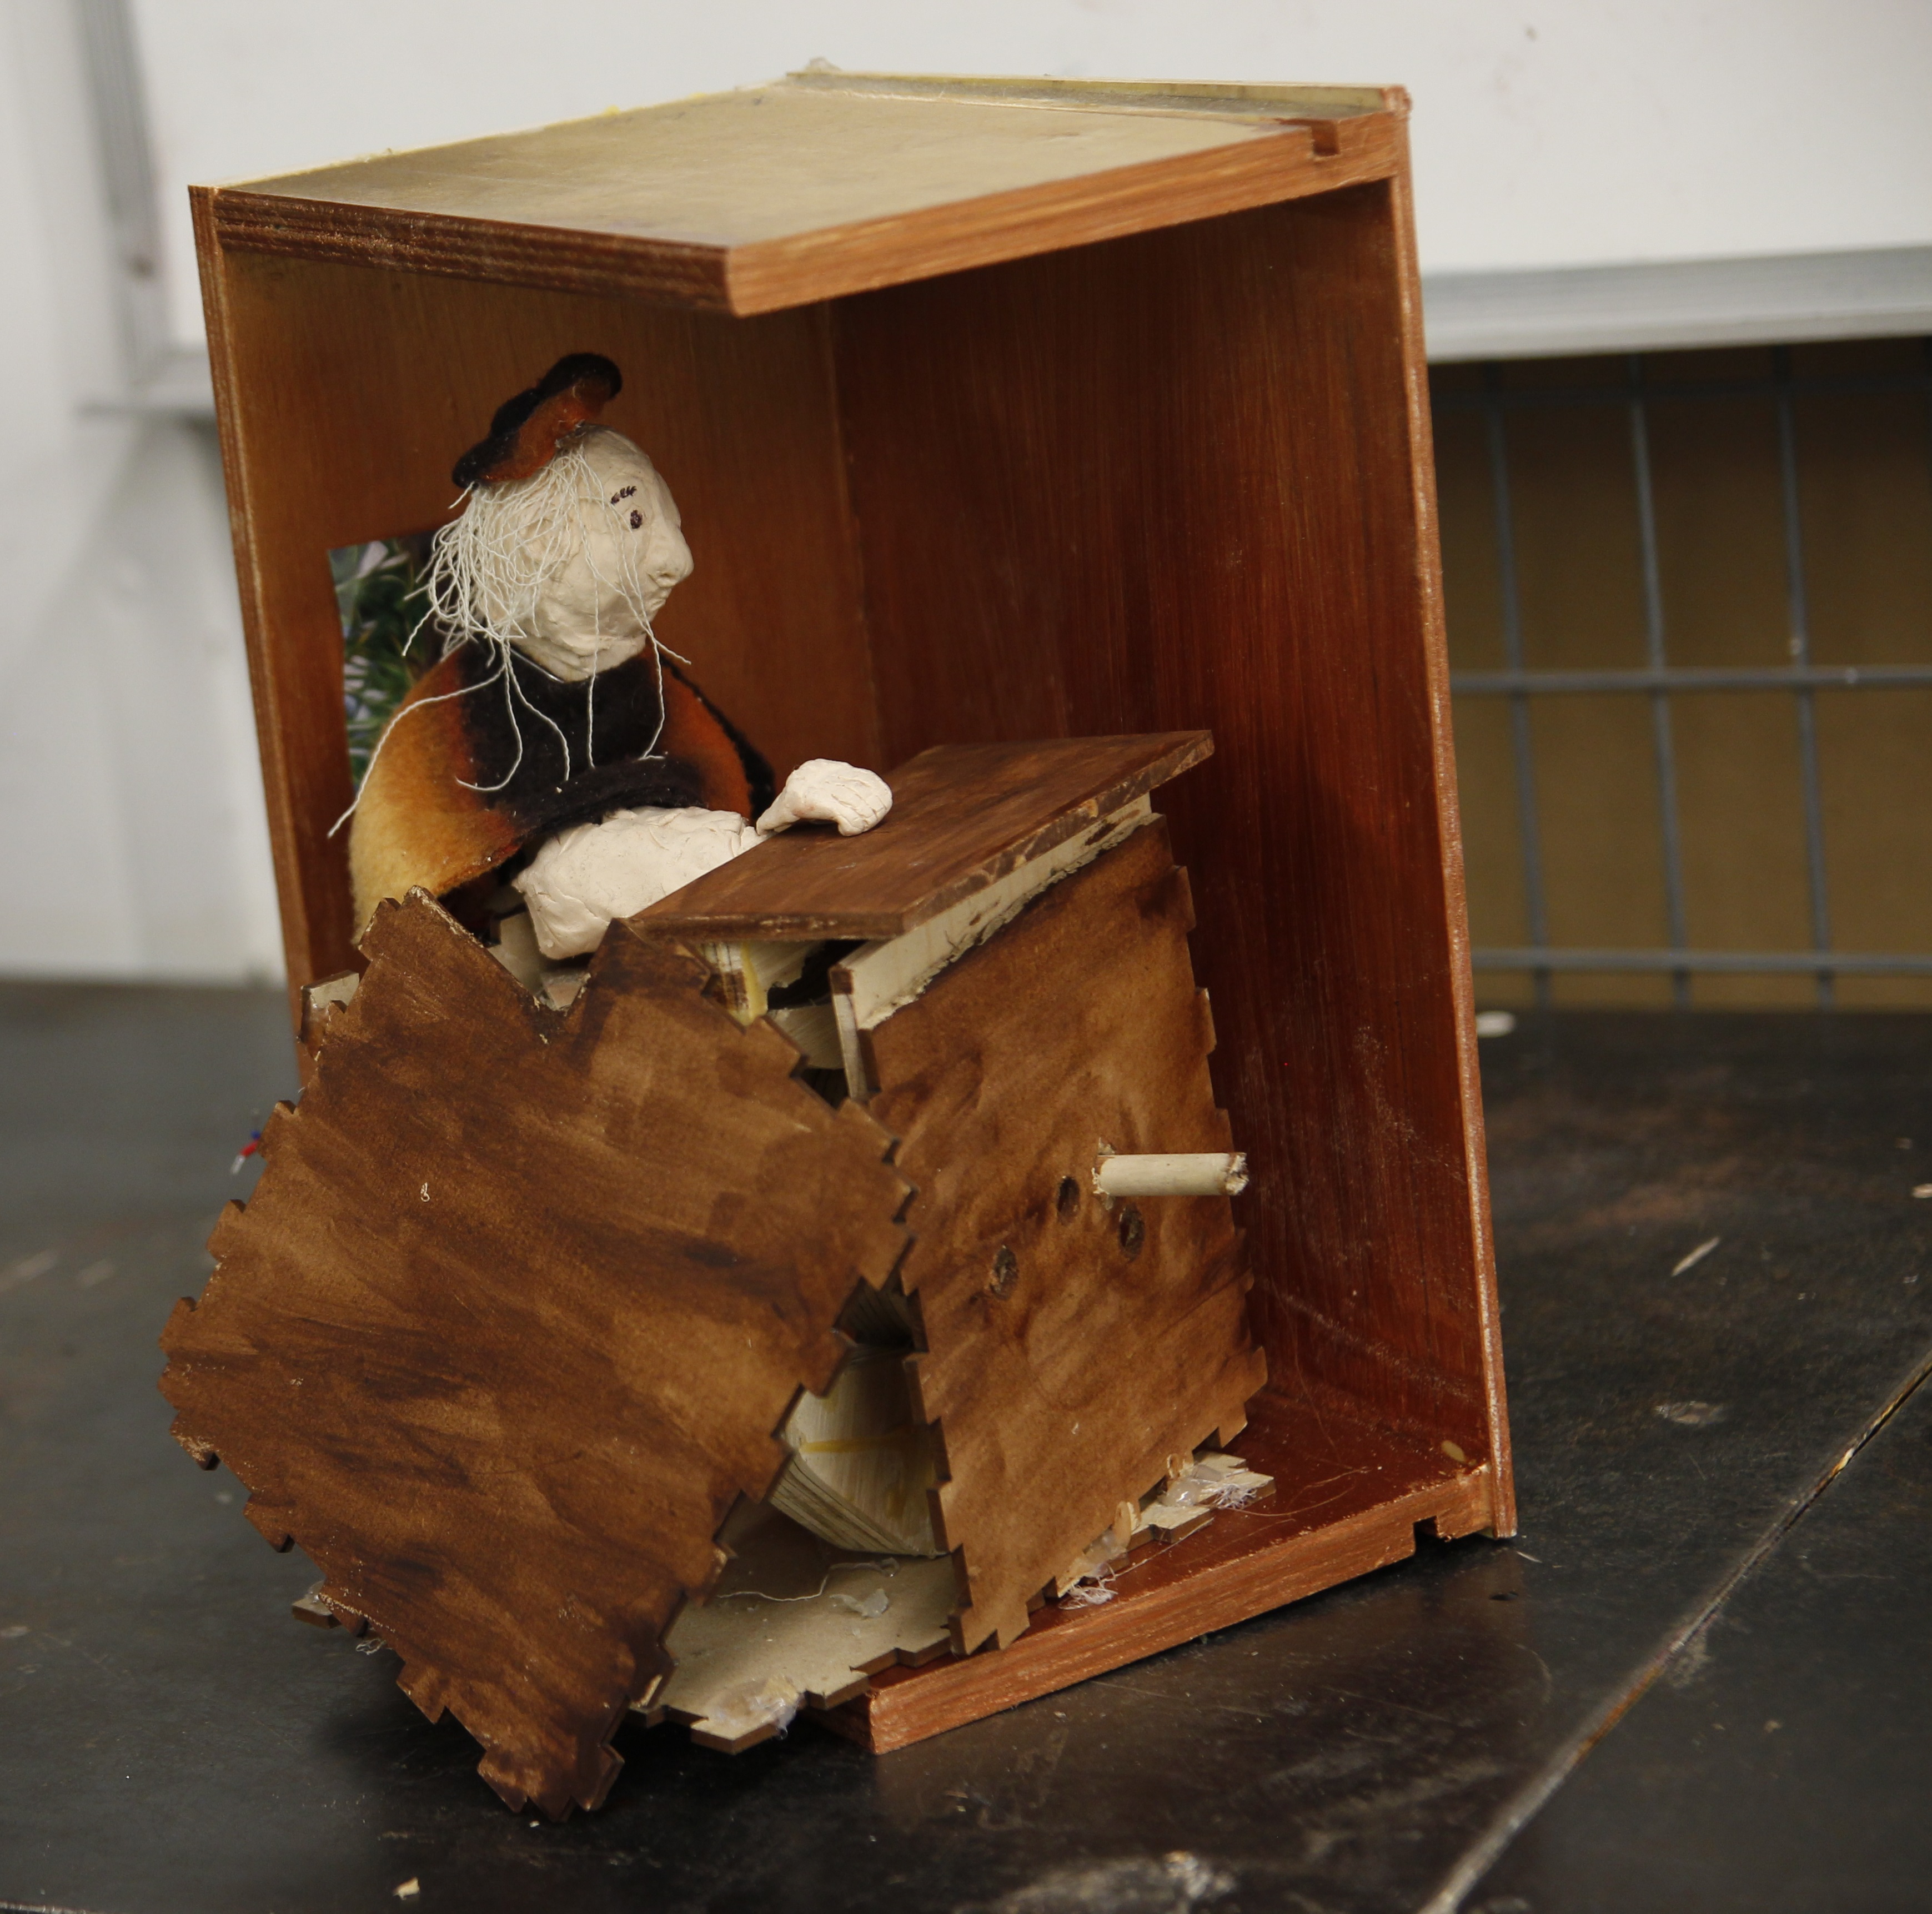
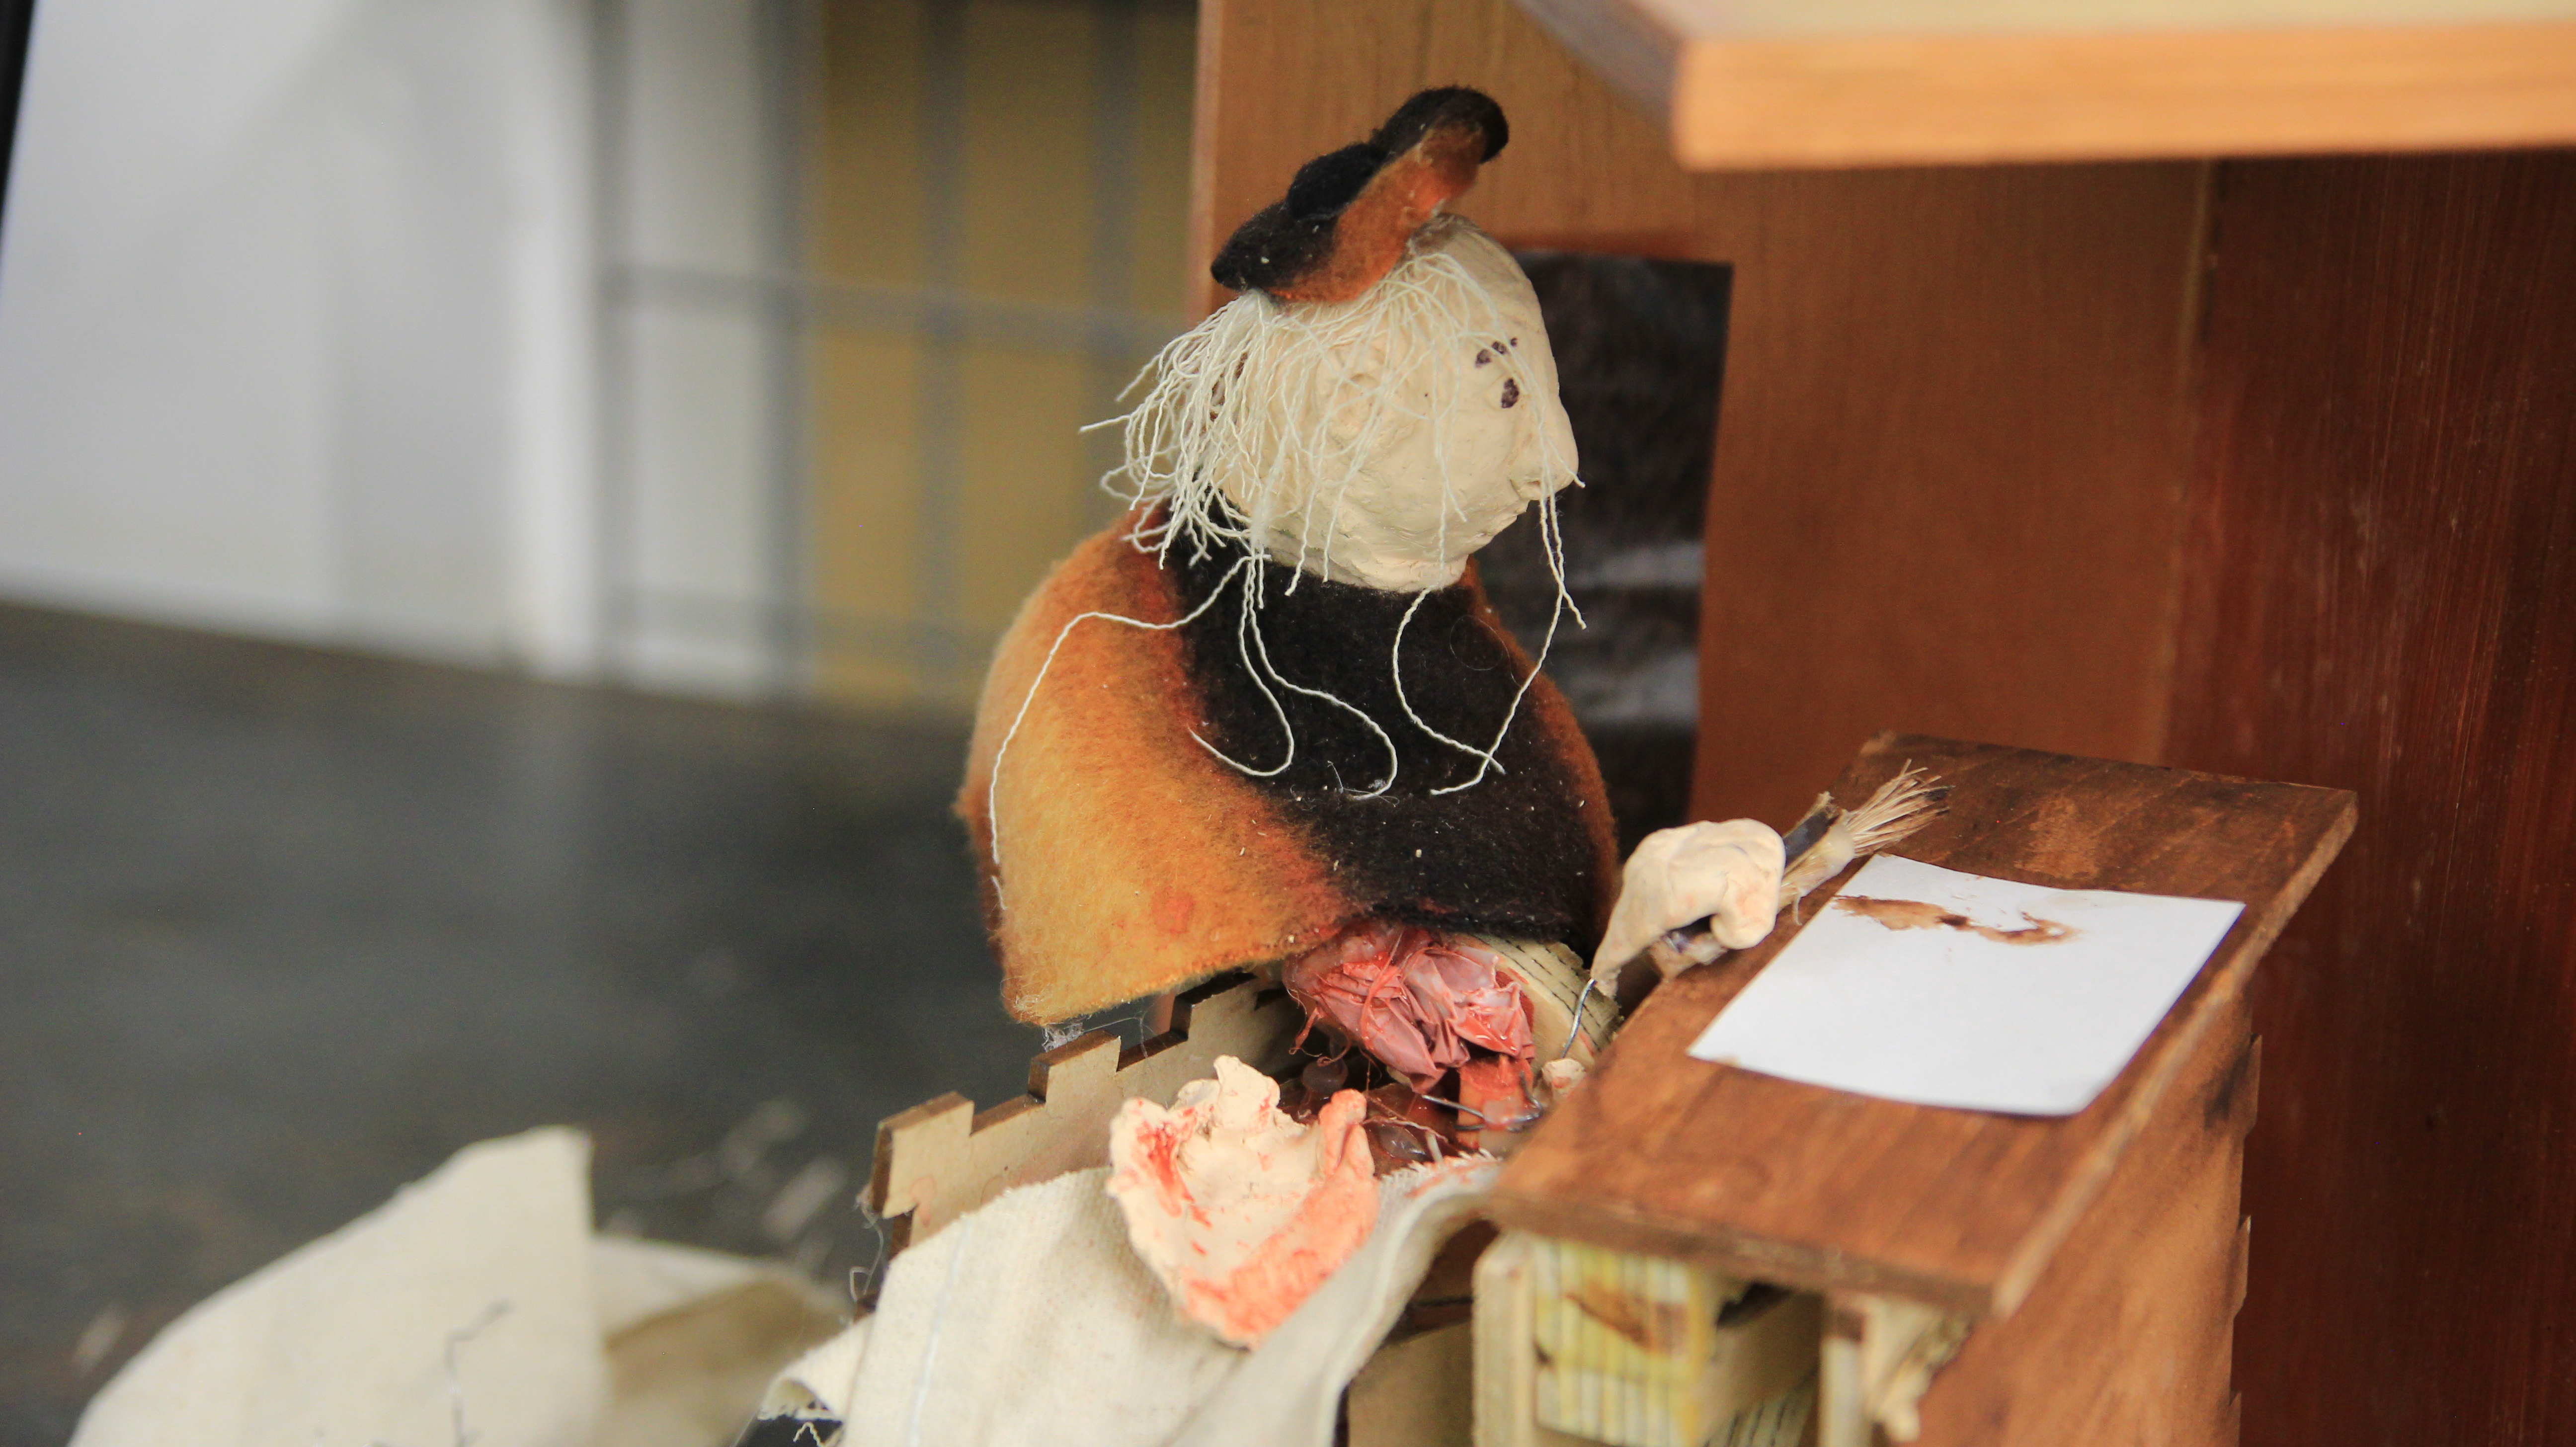
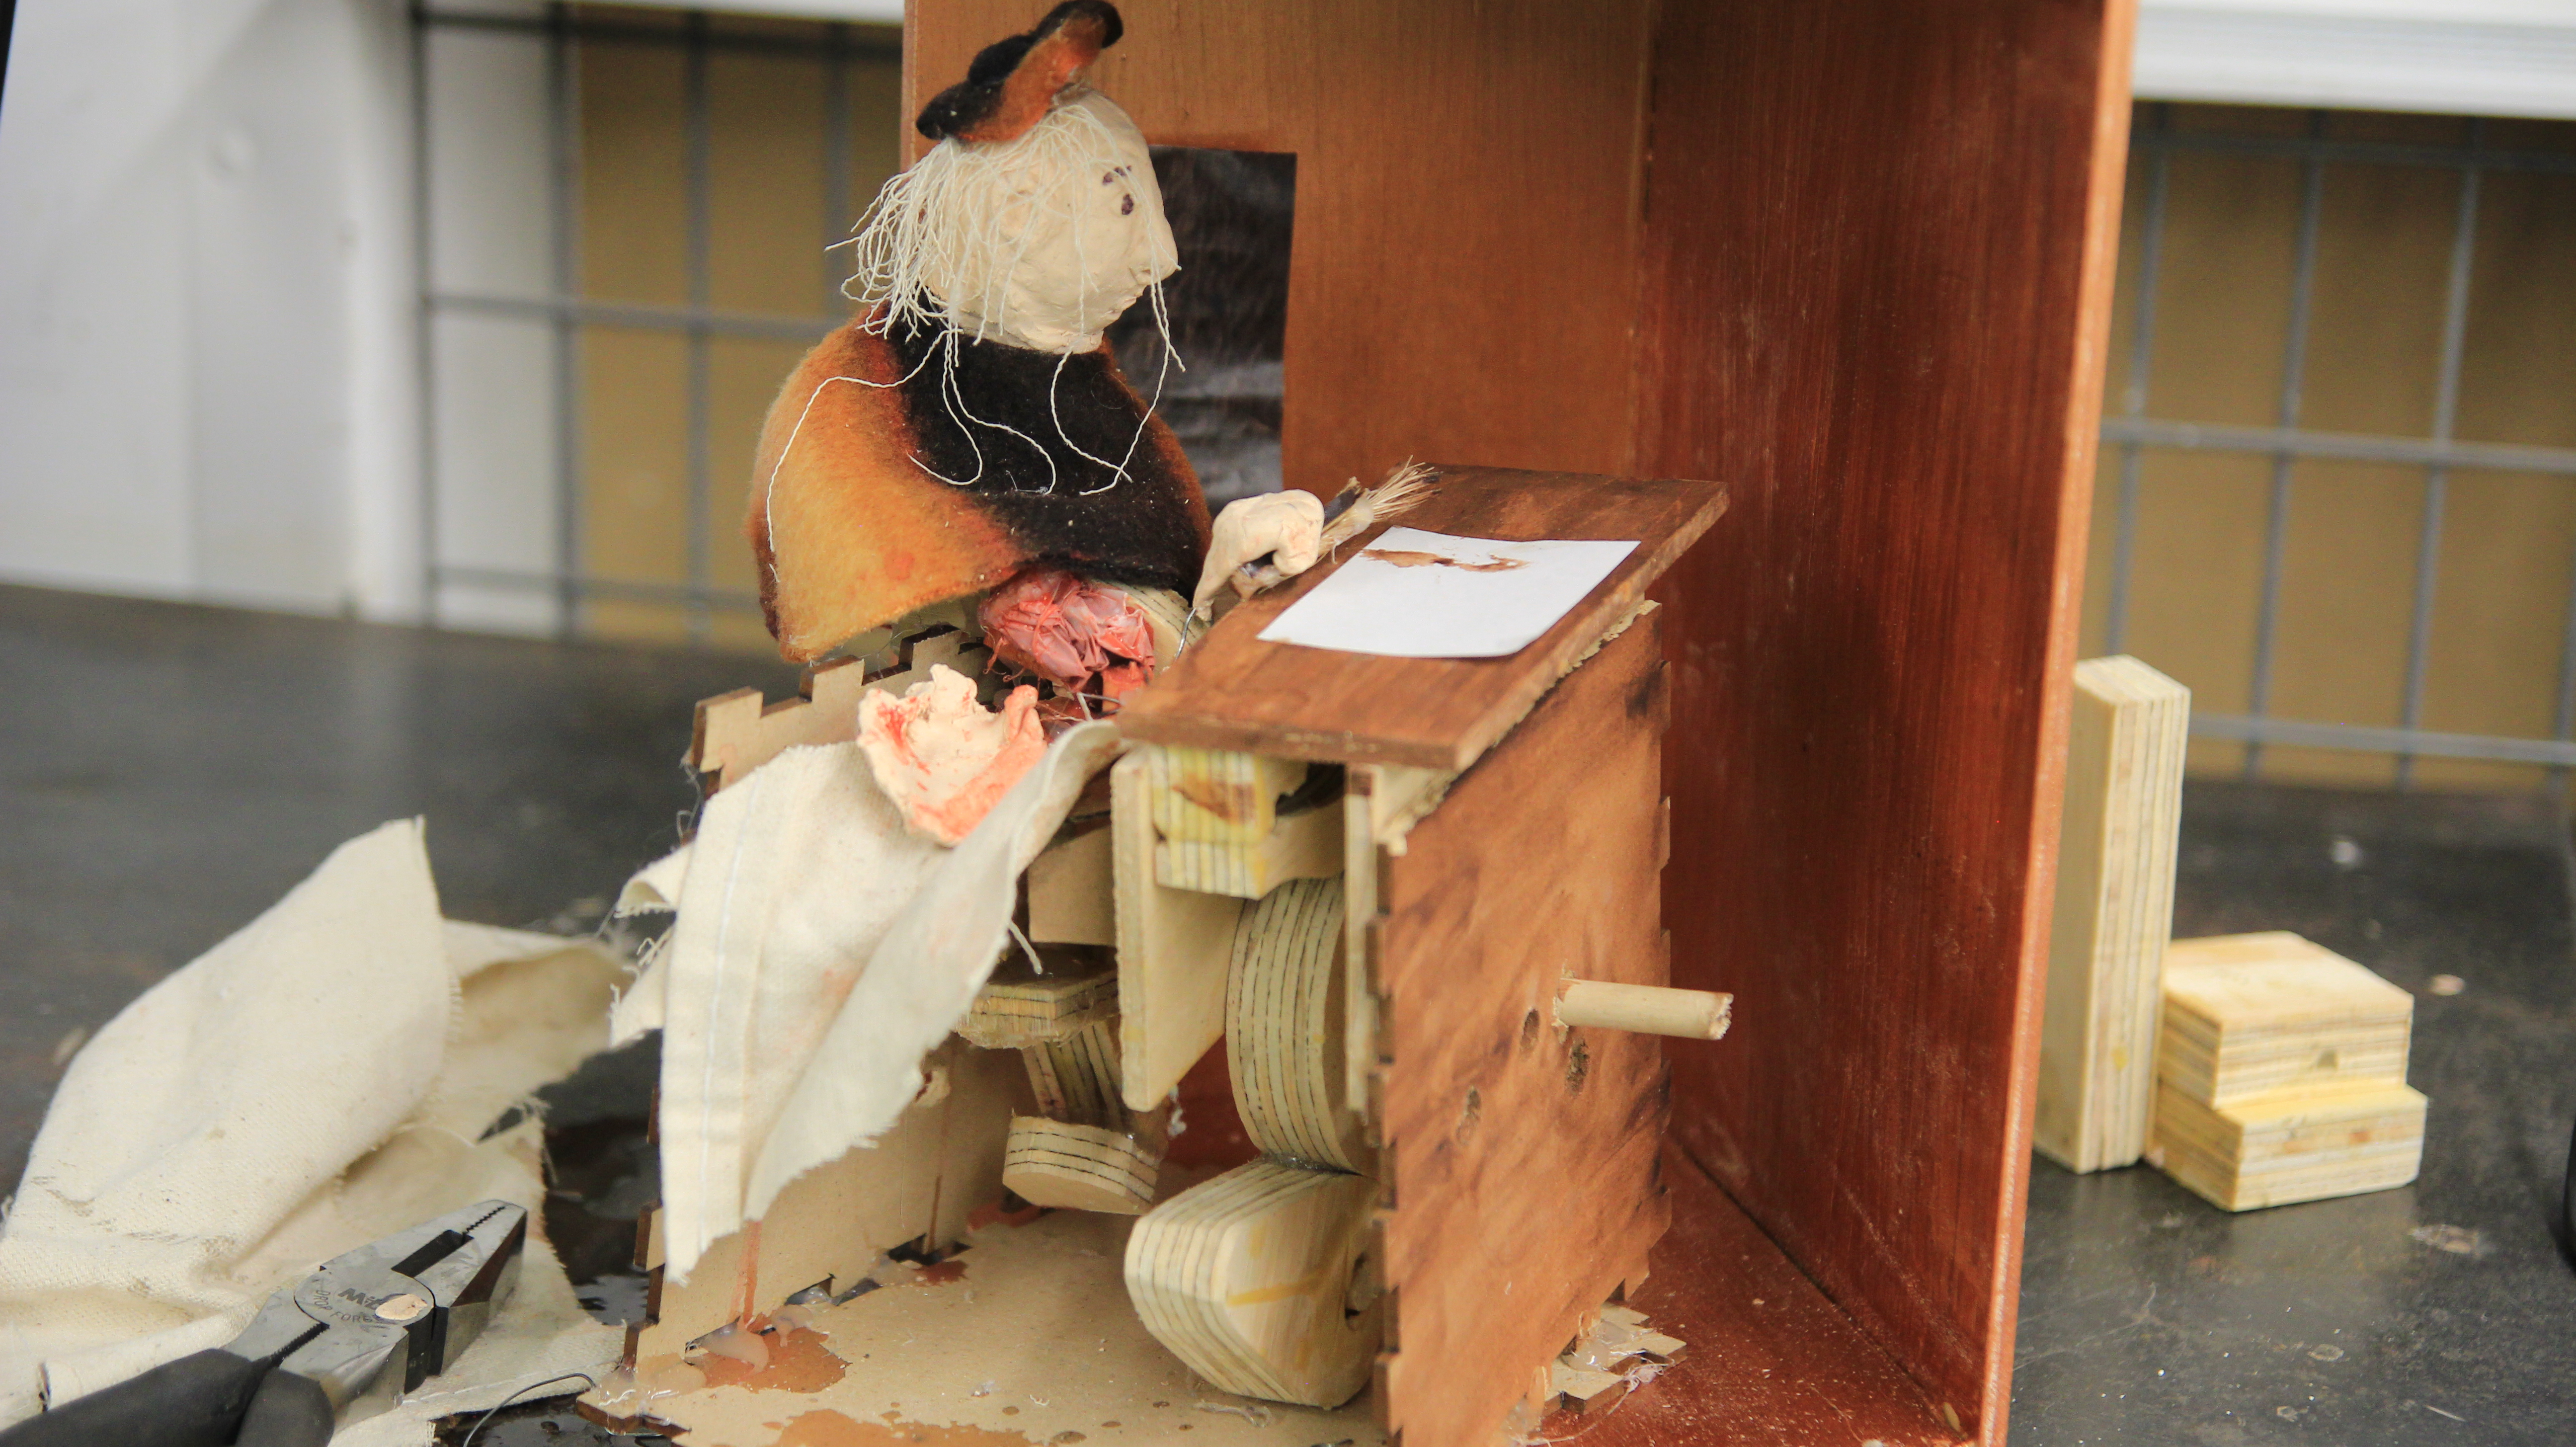
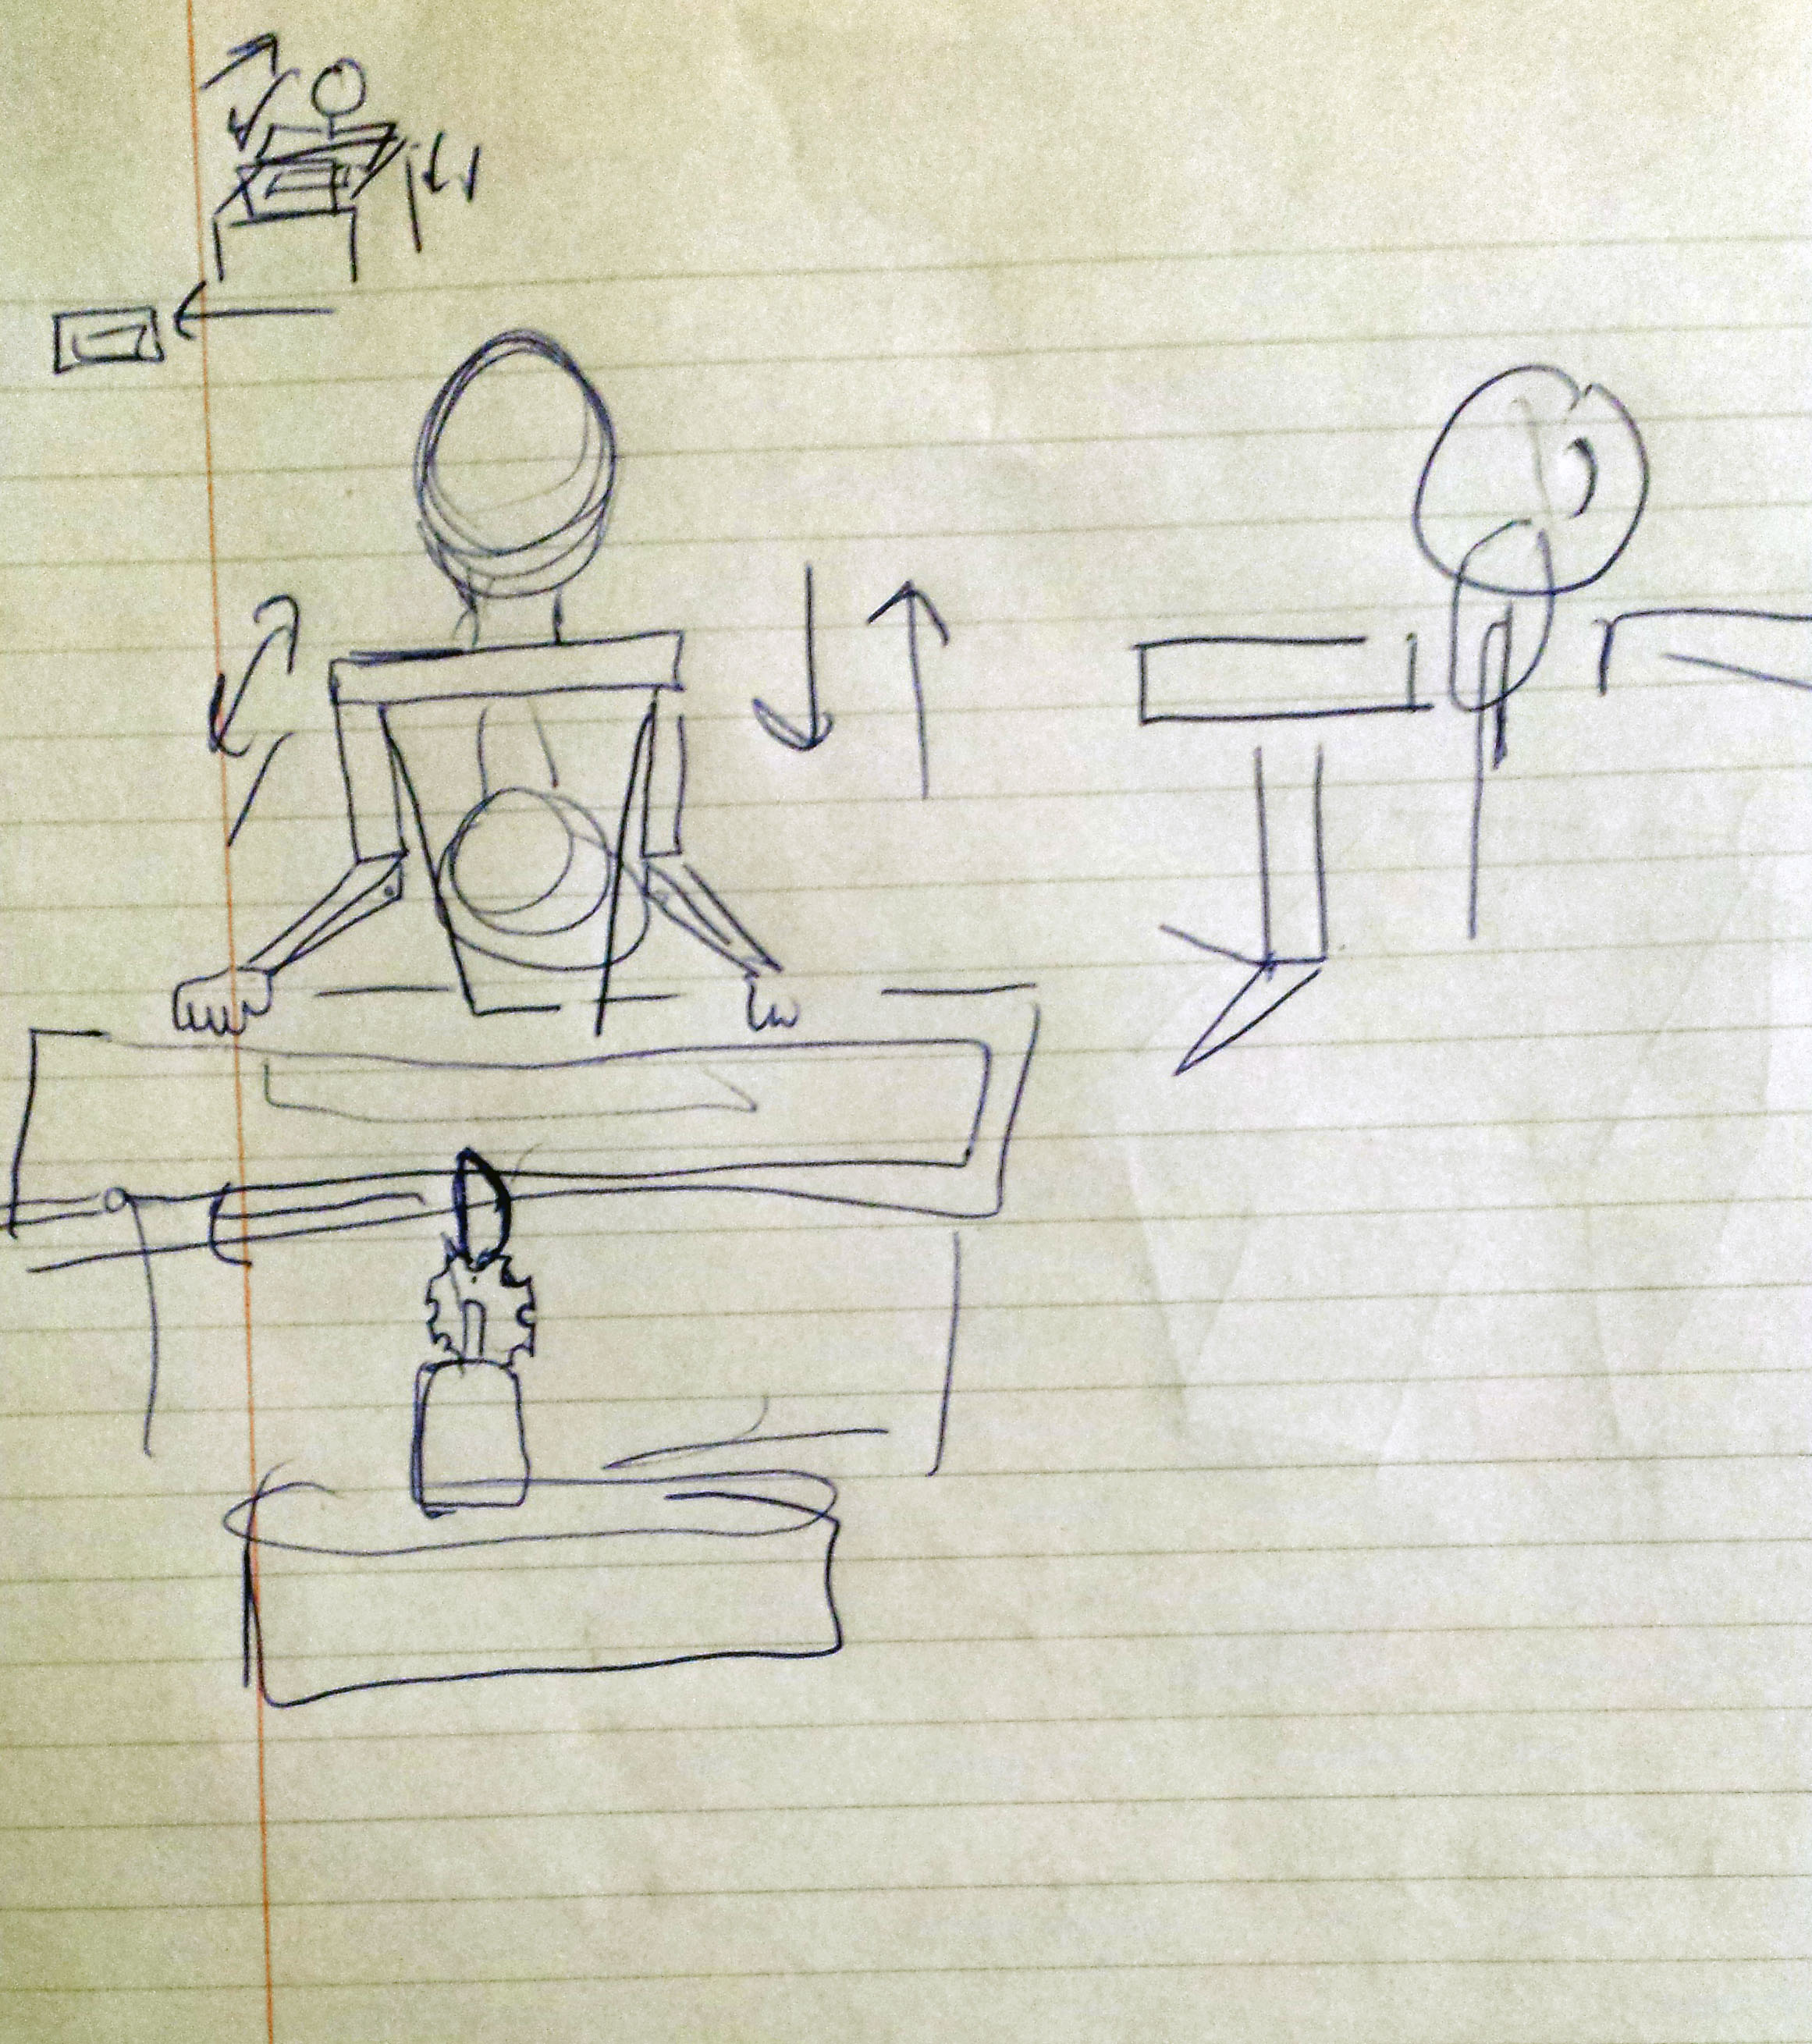
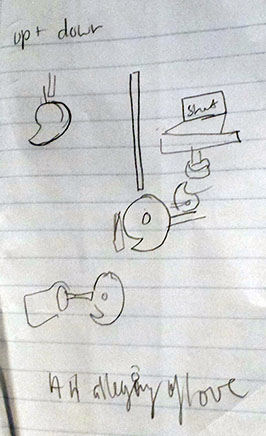
Make art, make art, an artist should make art. It’s a command, it’s an instinct, an impulse. My piece “The Art Is” looks at the almost mechanical nature in which art is created. As the servo spins, it moves the wires attached to it and, as result, also spins the handle back and forth. This prompts foot like gears that kick the posts connected to the desk and the arm of the automaton and move it up and down. The automaton is forced to make art until it bleeds.
The Artist
Final Product
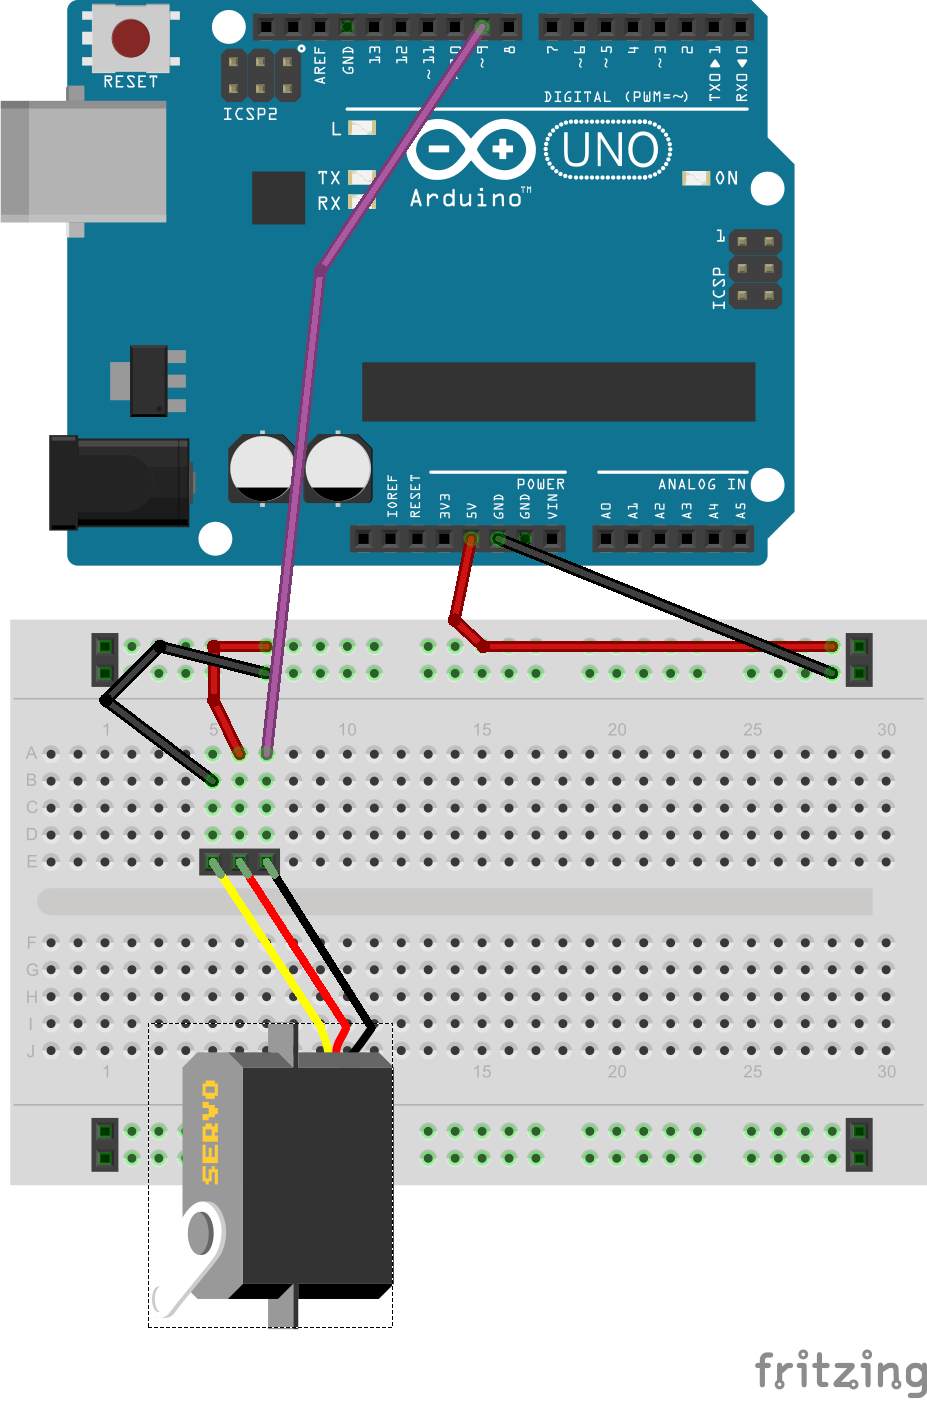
Circuit
Servo diagram
Aurdino code:
// Sweep
// by BARRAGAN

#include <Servo.h>

Servo myservo; // create servo object to control a servo
// a maximum of eight servo objects can be created

int pos = 0; // variable to store the servo position

void setup()
{
myservo.attach(9); // attaches the servo on pin 9 to the servo object
}

void loop()
{
for(pos = 0; pos < 270; pos += 1) // increased the distance the servo spins to 270
myservo.write(pos); // tell servo to go to position in variable 'pos'
delay(5); // decreased the delay to 5 seconds
}
for(pos = 270; pos>=1; pos-=1) // increased the distance in which the servo spins to 270
{
myservo.write(pos); // tell servo to go to position in variable 'pos'
delay(5); // decreased the delay to 5 second
}
}
10/5/2014
diagram
For my automaton I aim to create a human like structure made out of sculpey clay, wood and wire that moves both it’s head and hands in response to the motor. Below are a few sketches I made for the automaton and the specific gears and parts that might be required for it.
This assignment — an AUTOMATON — is due Monday, November 10th.
(It is the second-to-last assignment; after this, your final project will be due.)
You may work in pairs, and are encouraged to do so.
This is a very good time to learn how to use the laser cutter.
Assignment: Make an automaton or other kinetic artwork. It should have an expressive behavior (or behaviors). Optionally, you may use one passive sensor (such as a photocell) to allow it to respond to the viewer’s proximity.
As previously detailed, your project should have the usual:
A blog post, properly categorized;
A video demonstrating your project working, uploaded to YouTube, embedded in the blog post.
Furthermore, for projects requiring creative design (e.g. not just executing a tutorial), please also include in your blog post:
A written narrative of 150-200 words, describing and evaluating your goals, process and results. Include a discussion of the roles you each assumed, if you worked with a partner.
A scan of your hand-drawn sketches
A photograph of your finished project
A Fritzing diagram of your circuit
Your source code, embedded using the WP-Syntax WordPress plugin (for proper syntax-colored formatting)
Consider:
Try to imagine making a sculpture, in which the interesting thing is how it moves (or behaves), and not necessarily how it looks.
Does your project go through a specific sequence of motions on a schedule? Or is it interactive, thus responding in a contingent way to variable conditions? (Both are fine).
Is your project’s movement organic? Is there a way to control its movement, through code, to make it moreso?
What is the concept behind your work: Is it figurative? Abstract?
Do you achieve apparent complexity with simple means? (I.e., can you use just a small number of motors to control a deceptively interesting system)?